Once you've created your connection and received your notification email address, you can configure your Contact Form 7 form to forward submissions to Dash Dolphin.
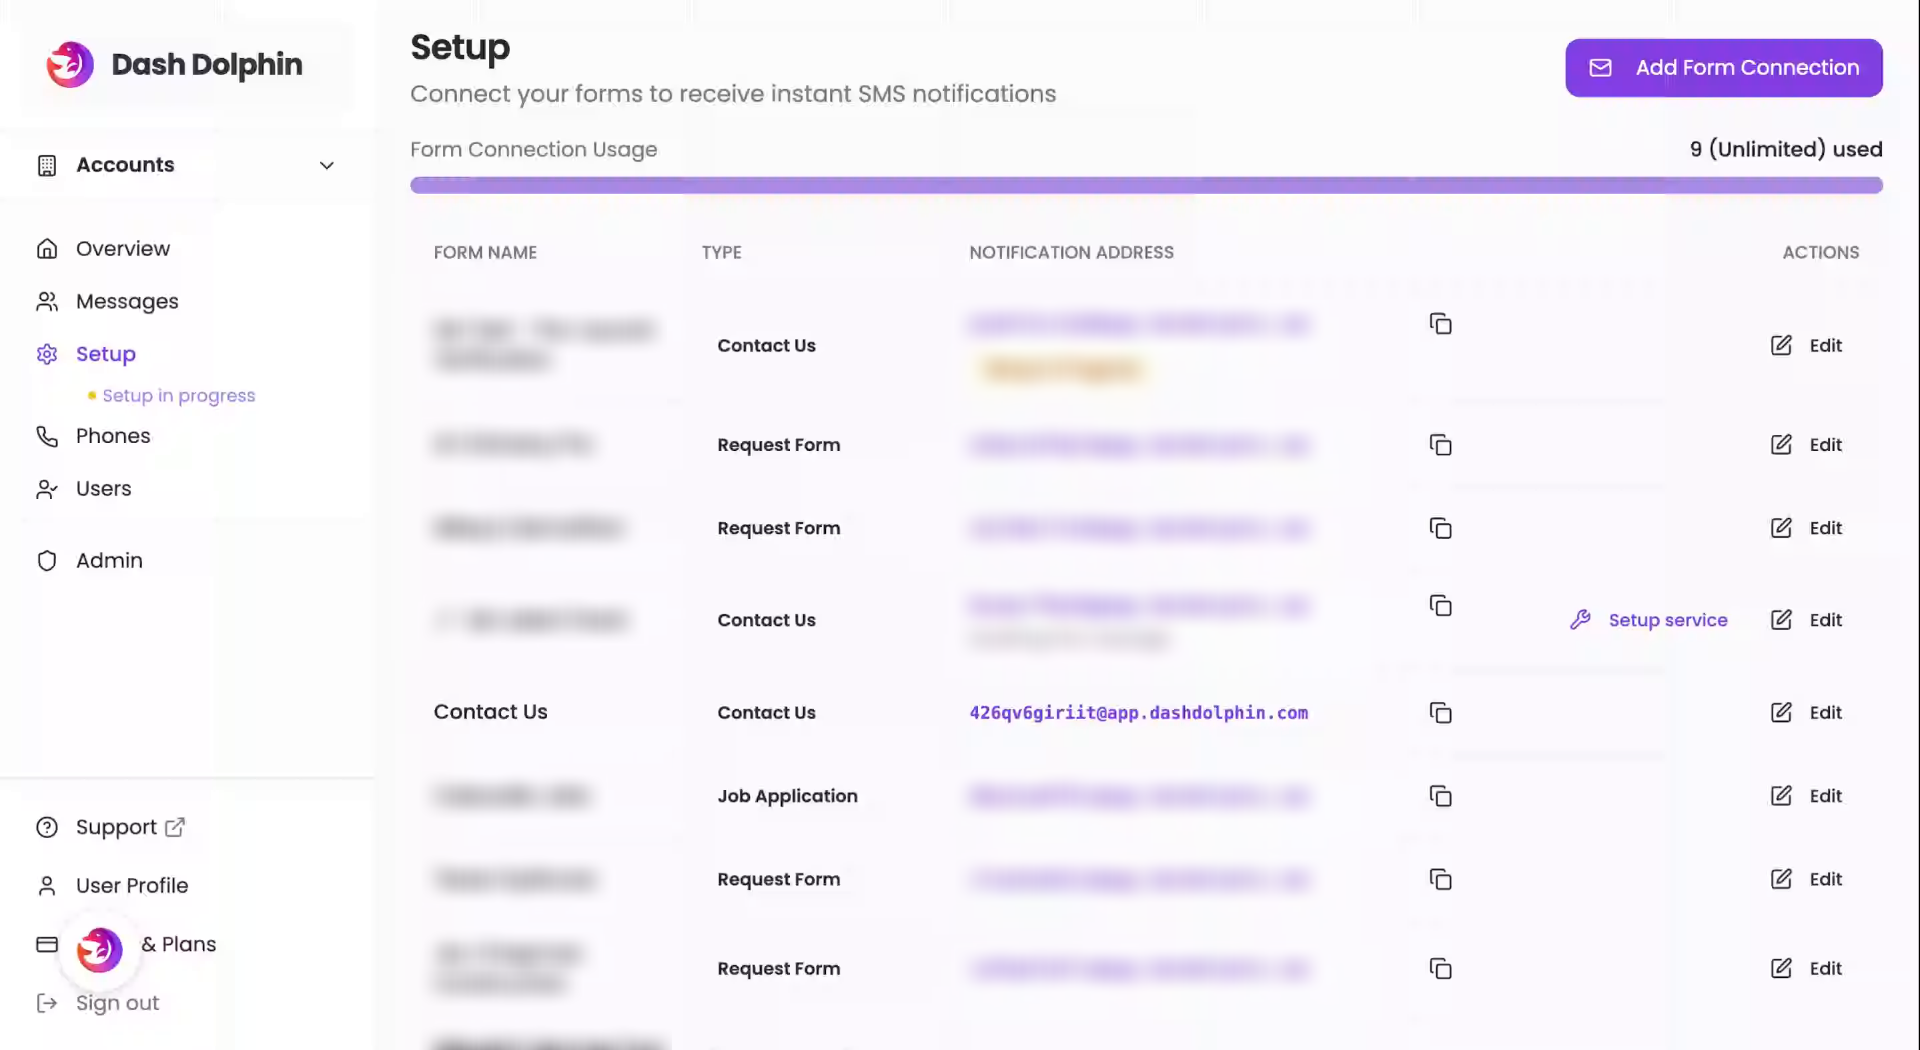
1. Open Setup Page
Open your Dash Dolphin Setup page where each form connection has a unique notification email.
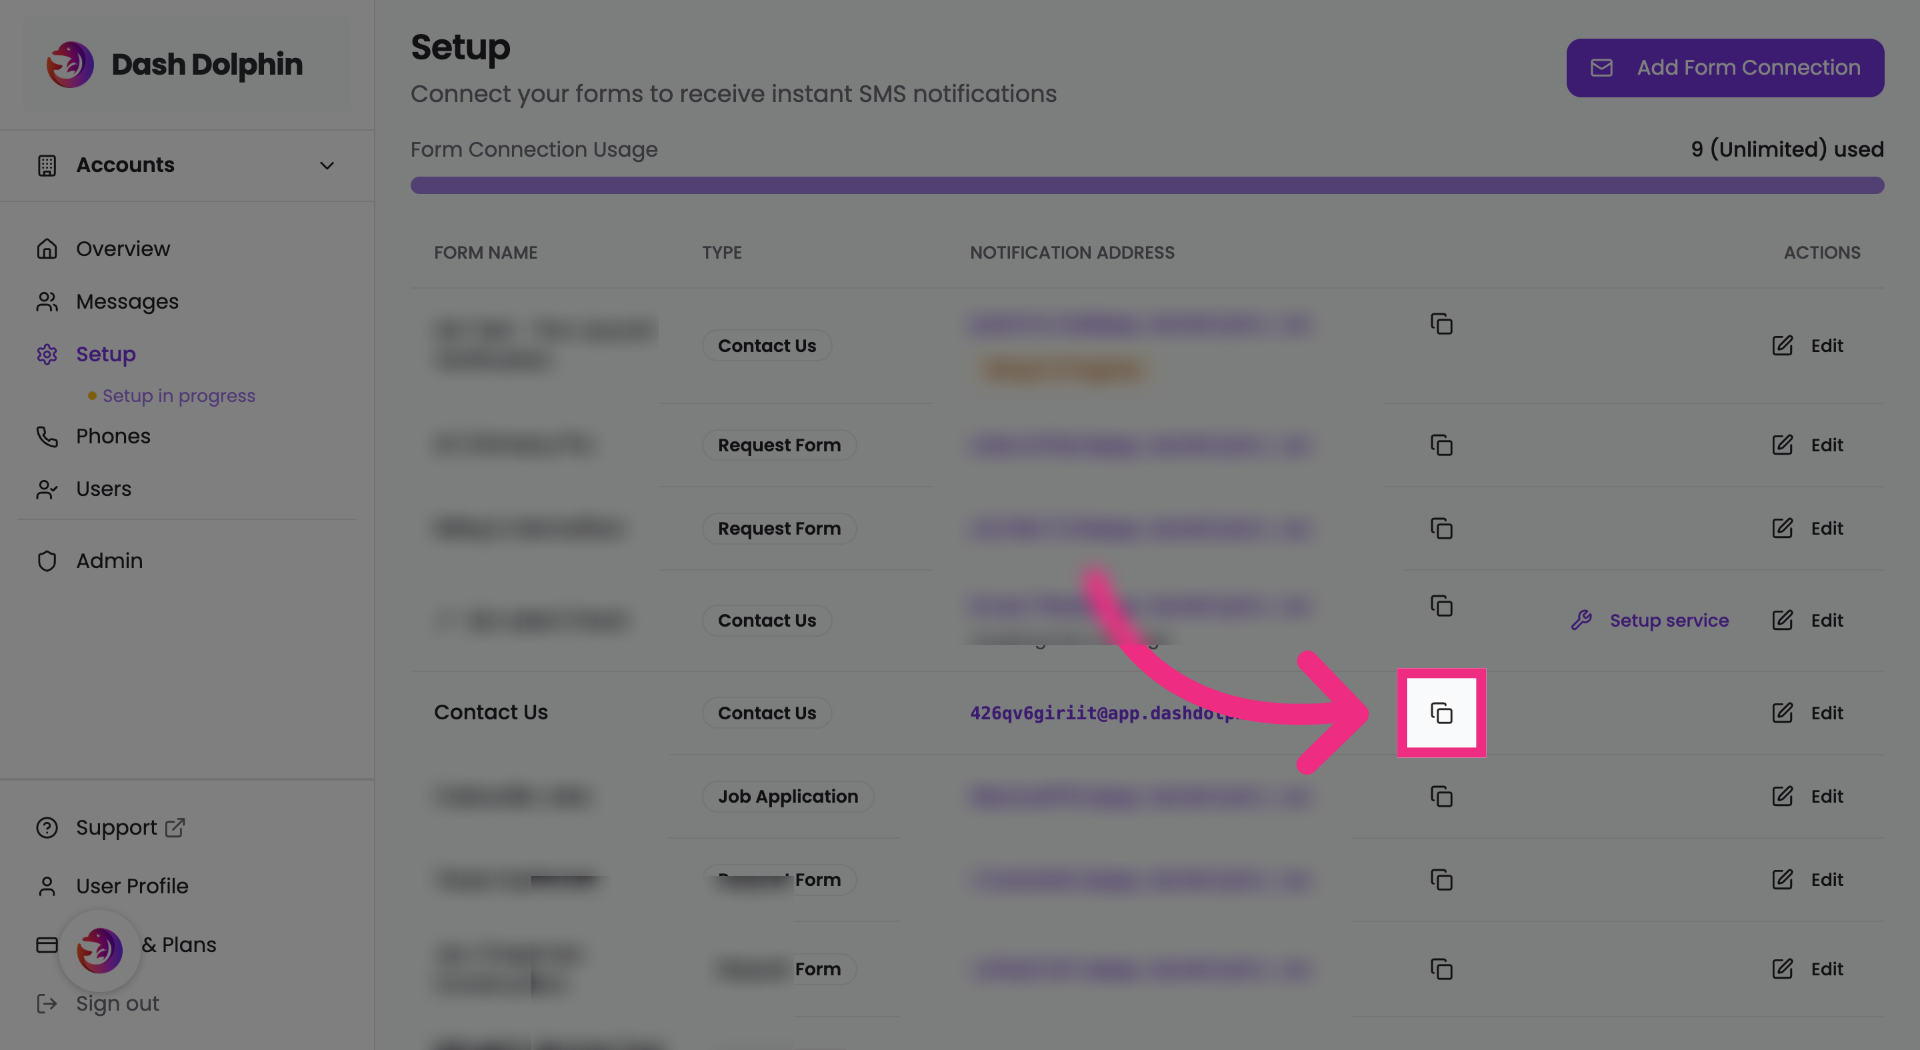
2. Copy Notification Email Address
Copy the notification email address for the form connection you're configuring.
3. Open WordPress Admin
Switch to your WordPress admin tab.
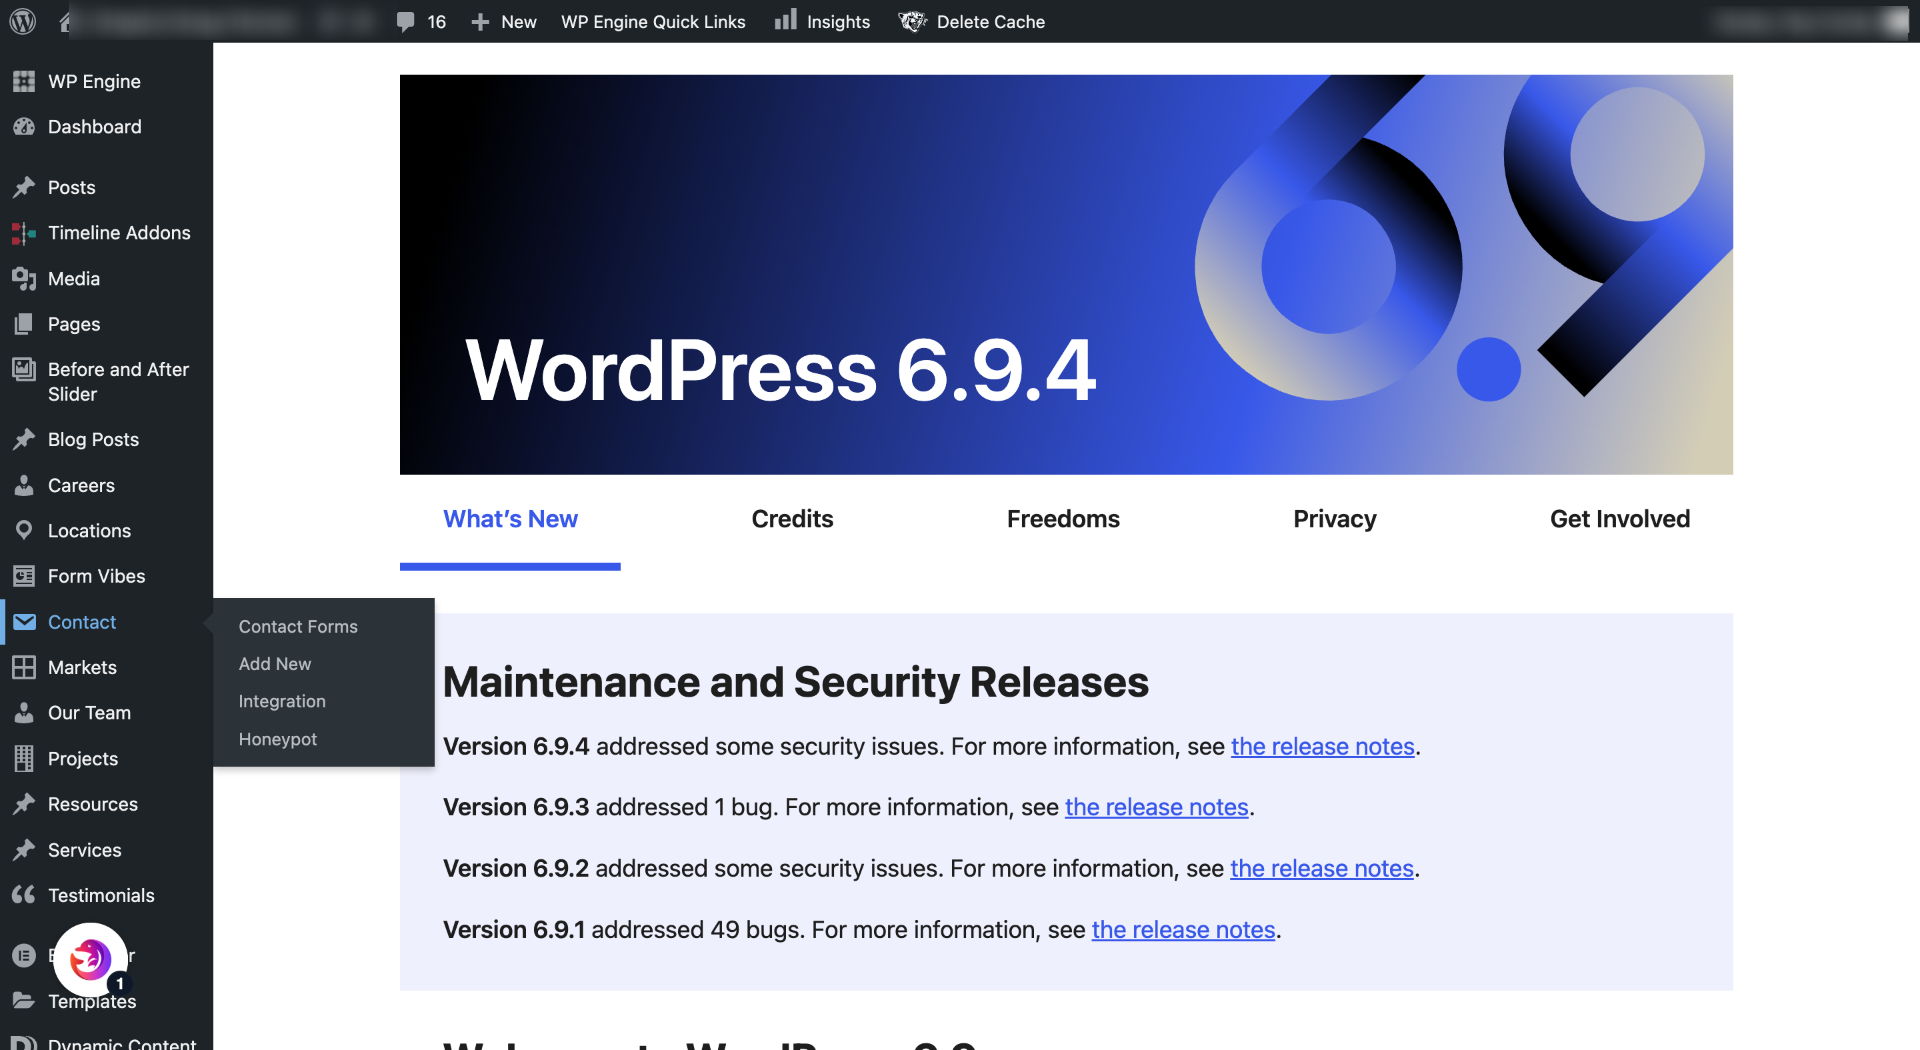
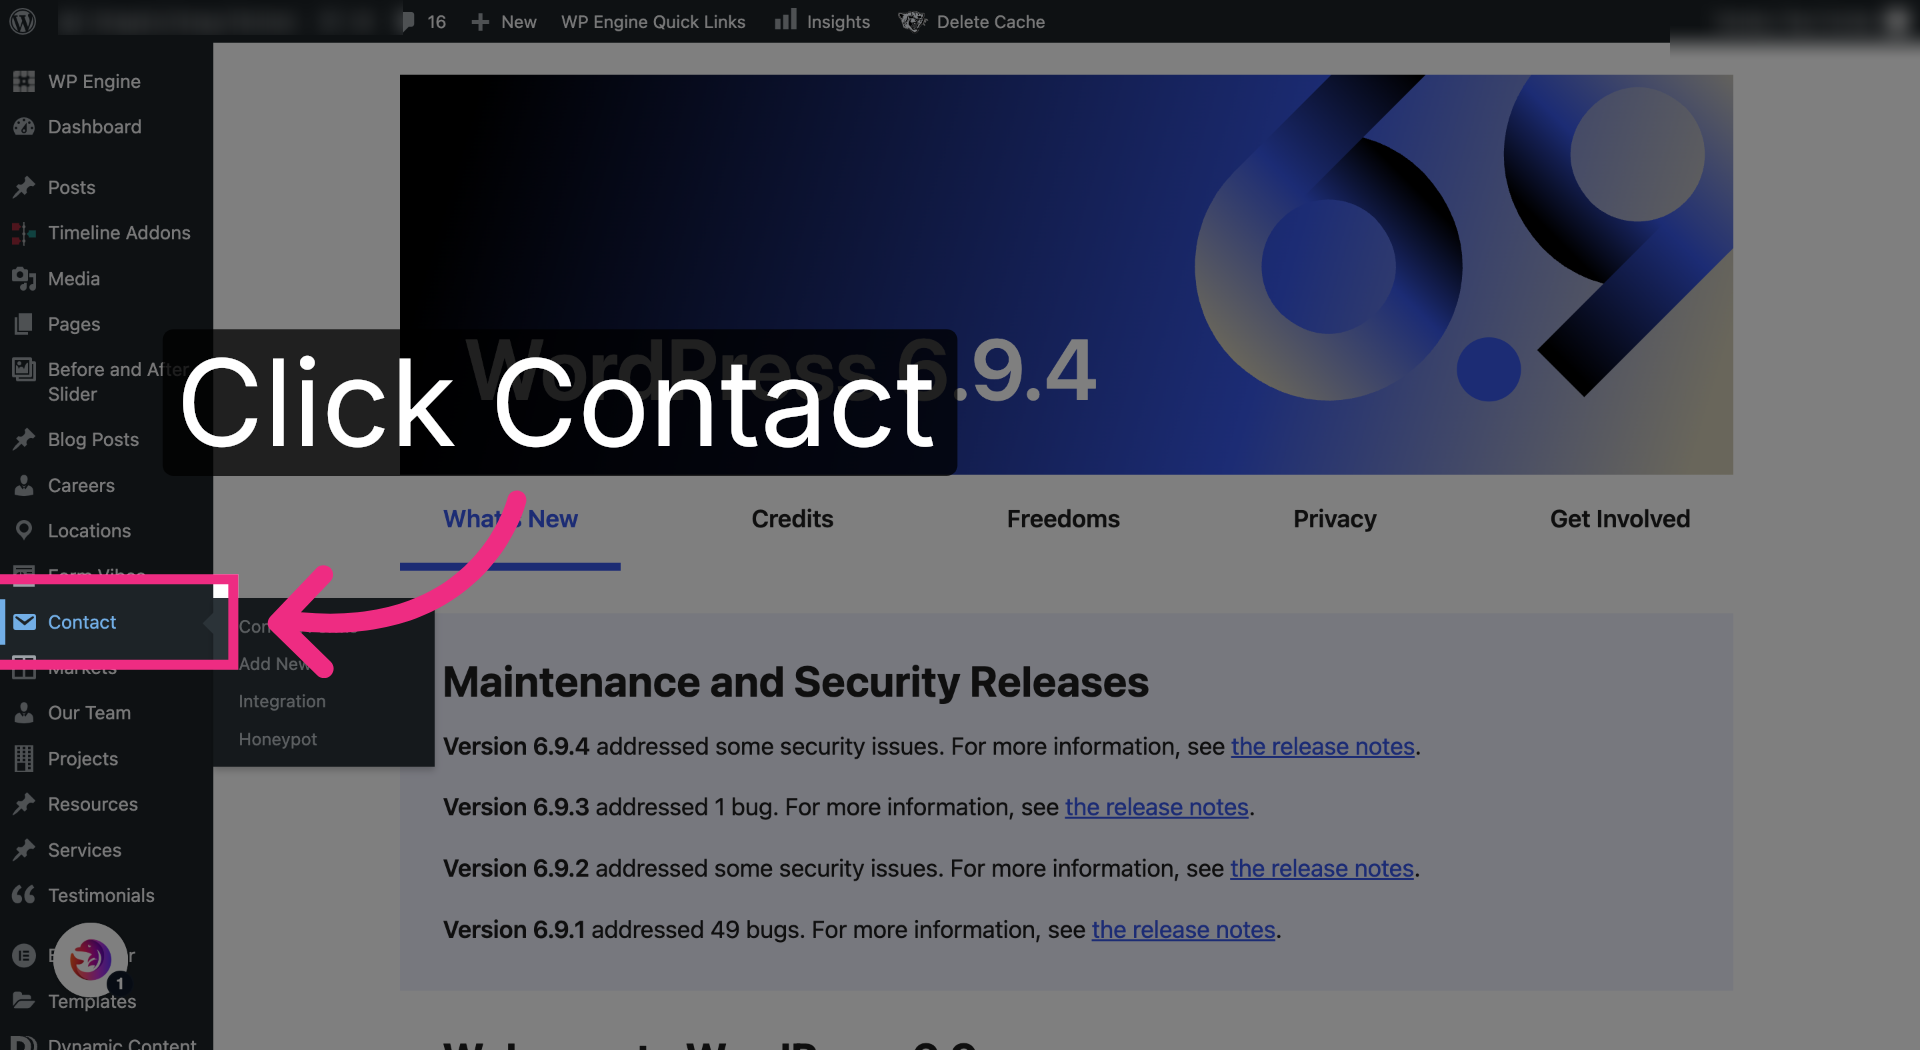
4. Open Contact Menu
Click Contact in the WordPress sidebar.
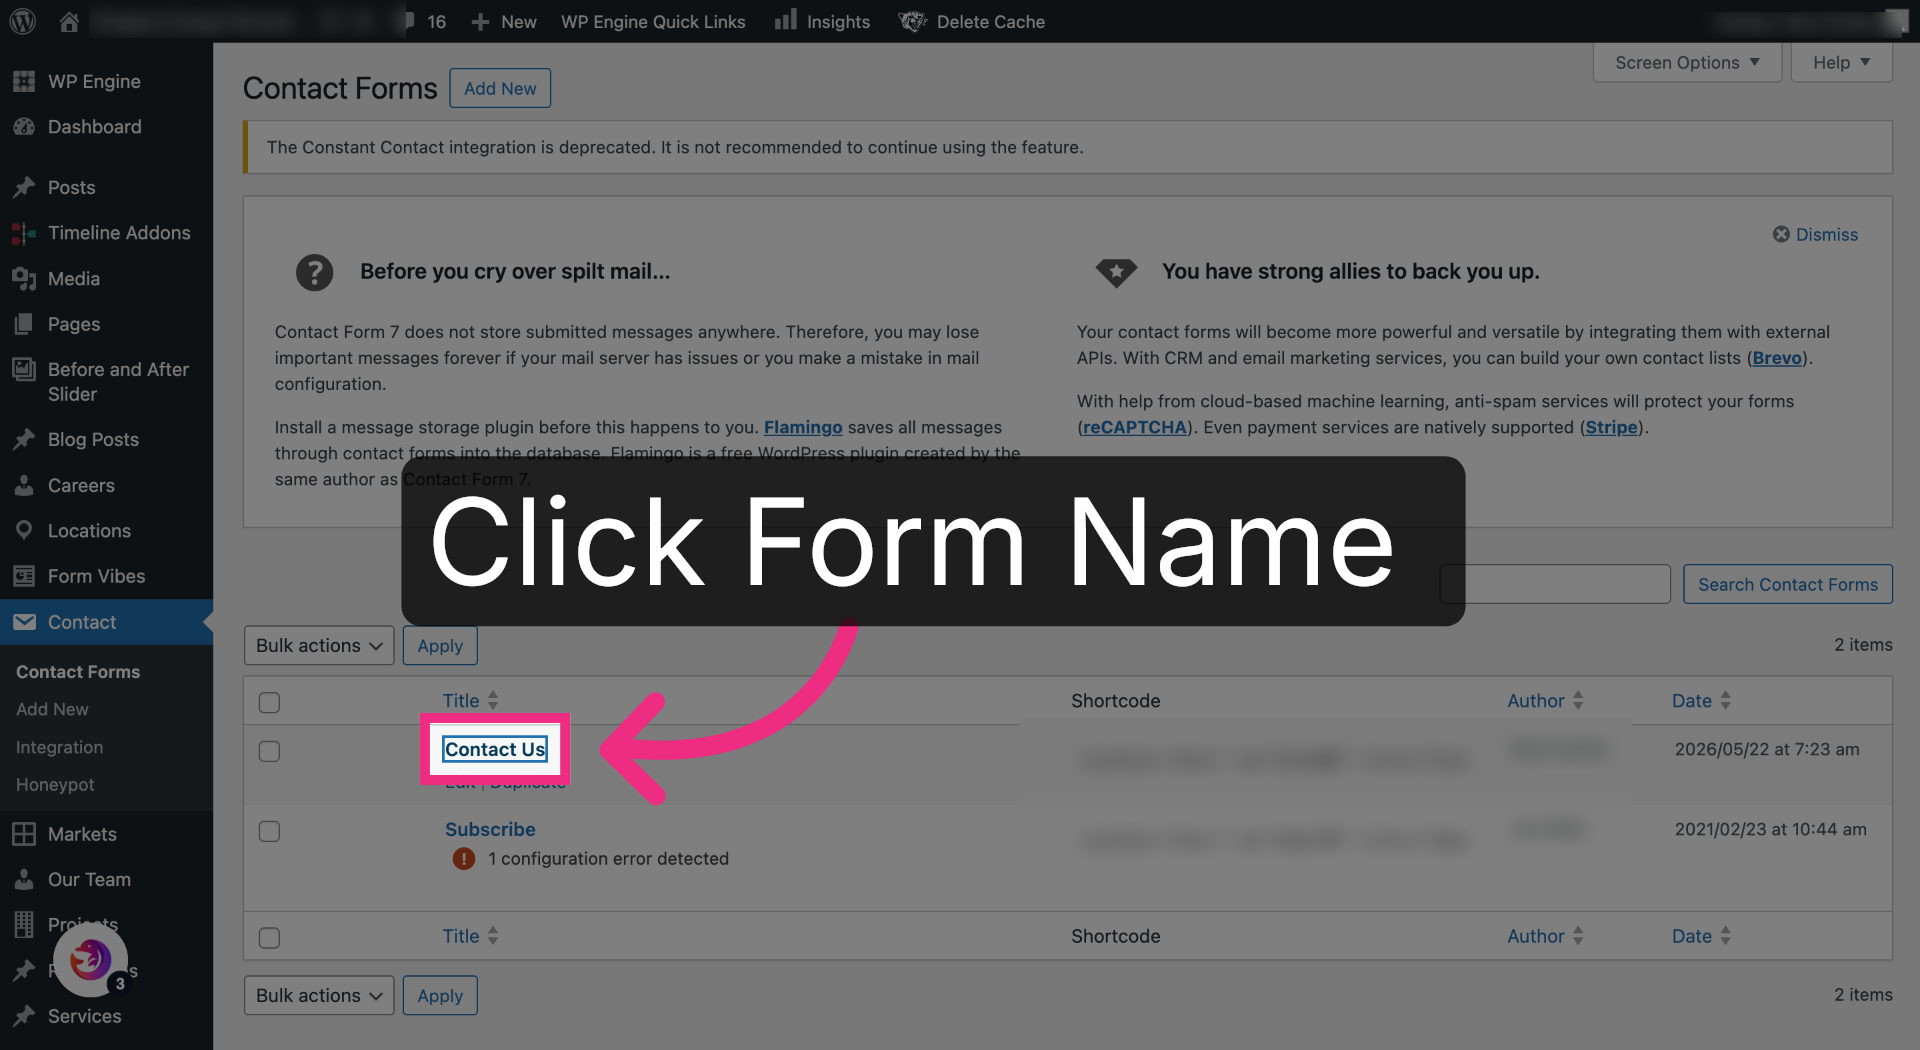
5. Open Contact Form
Open the contact form you want to connect to Dash Dolphin.
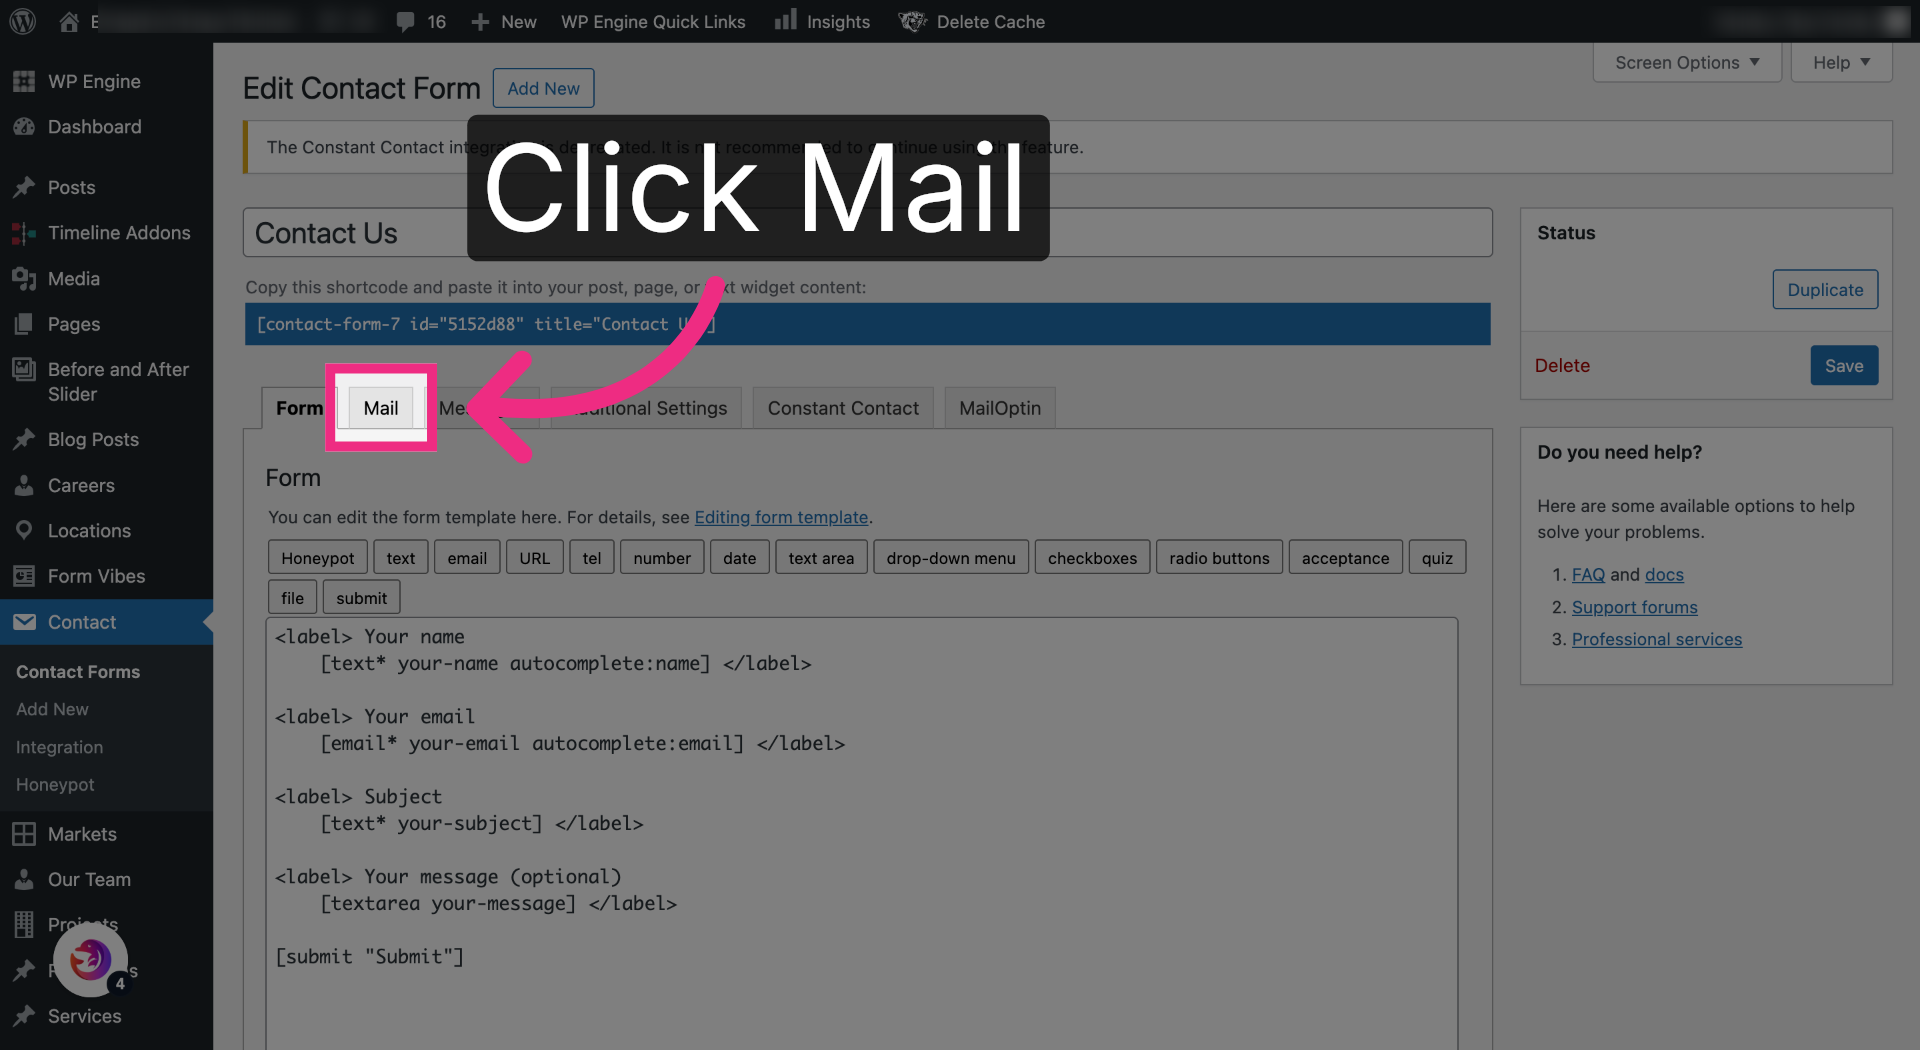
6. Open Mail Tab
Open the Mail tab where notification settings live.
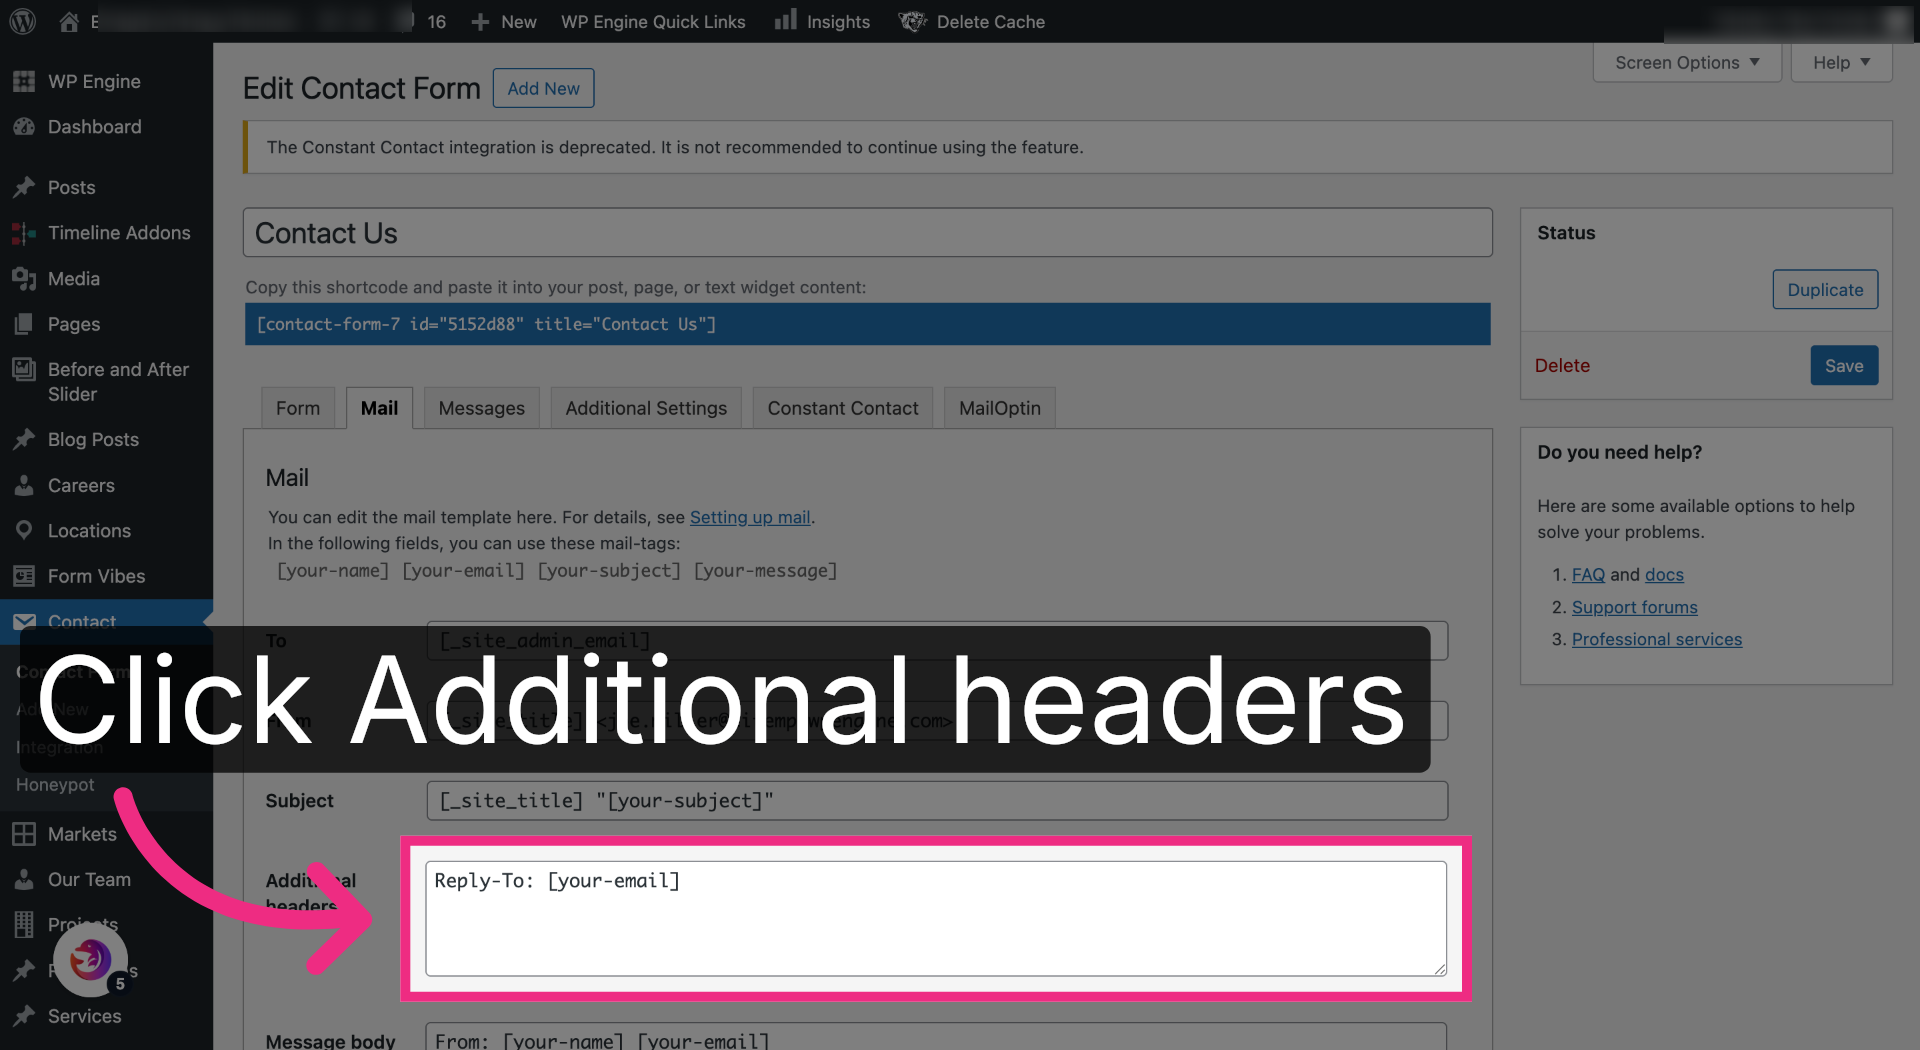
7. Edit Additional Headers
Click into the Additional headers field.
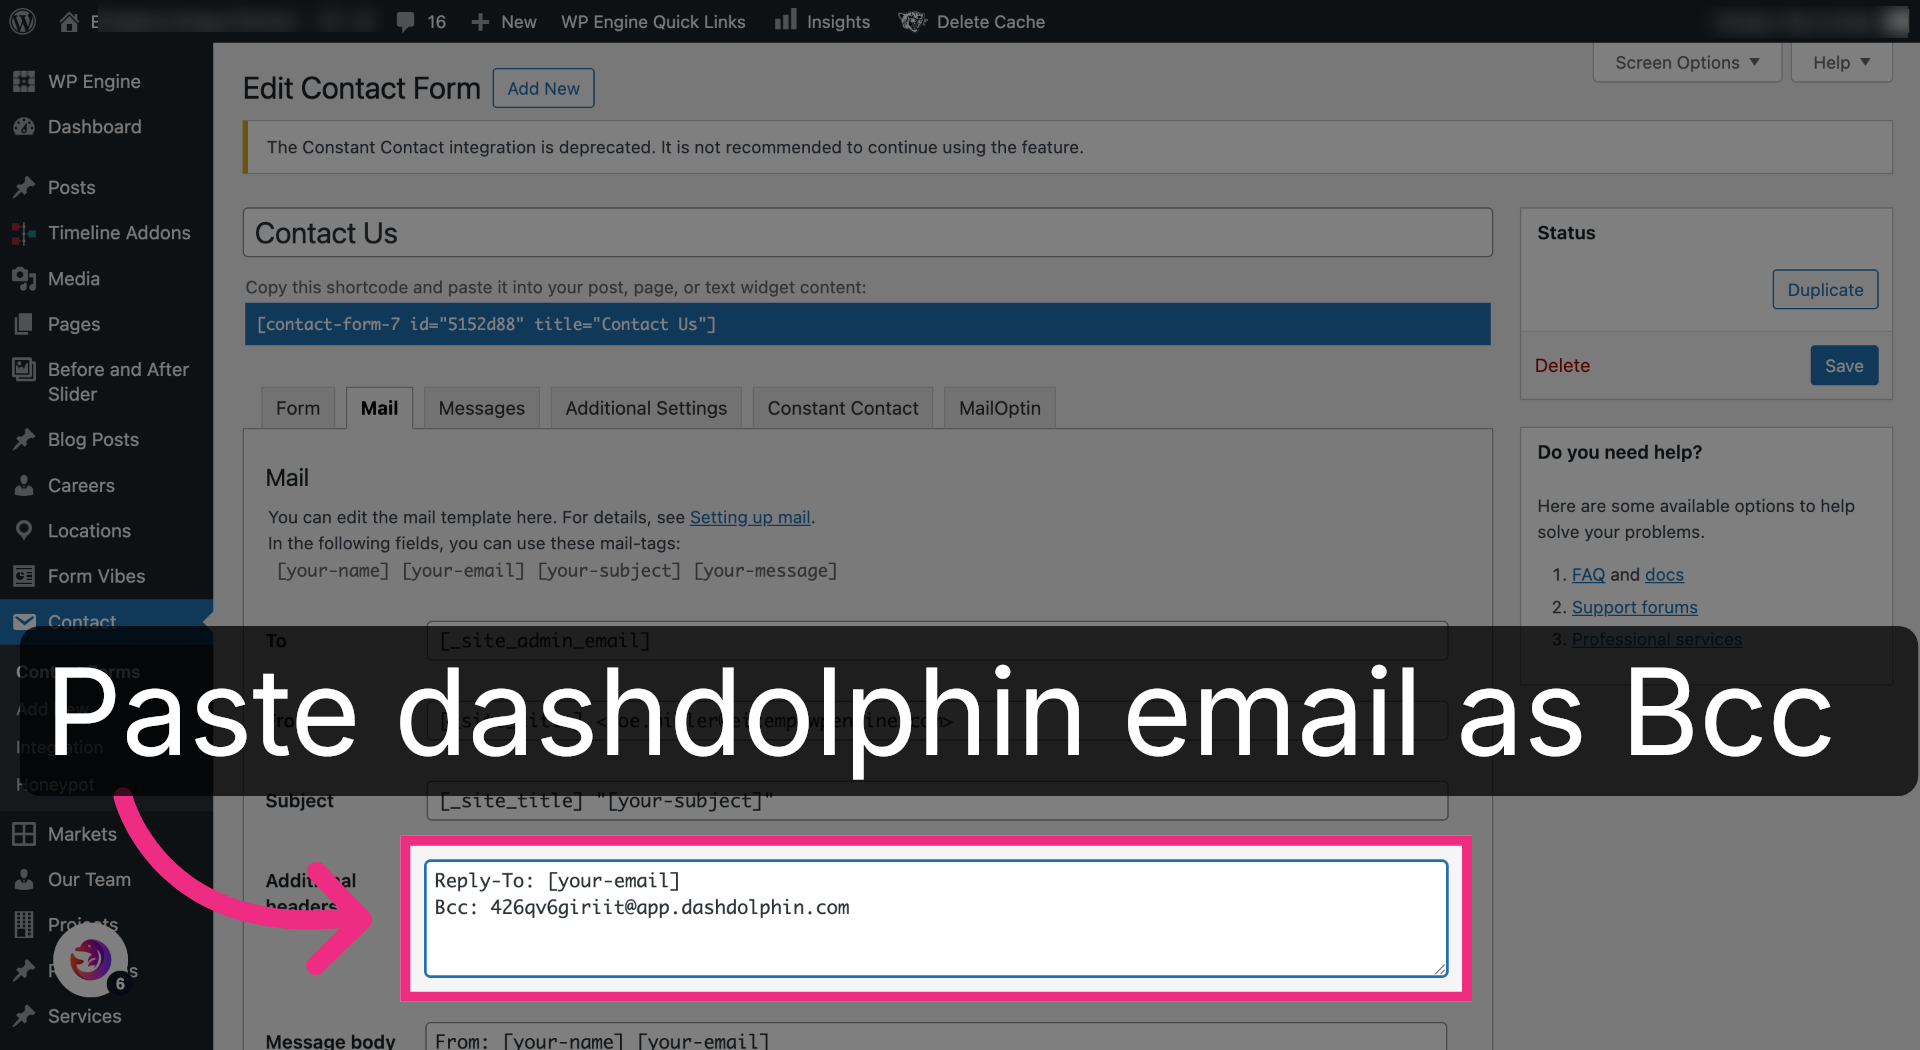
8. Add Bcc Notification Email
Add a Bcc line and paste your Dash Dolphin notification email address.
9. Save Form Changes
Click Save to apply the changes.

You have successfully configured your Contact Form 7 form to send notification emails to Dash Dolphin, enabling instant SMS alerts. Test the setup by submitting a form and verifying the SMS notification delivery.