Once you've created your connection and received your notification email address, you can configure your ActiveCampaign form to forward submissions to Dash Dolphin.
1. Open Dash Dolphin Setup
Open your Dash Dolphin Setup page where your form connections live.
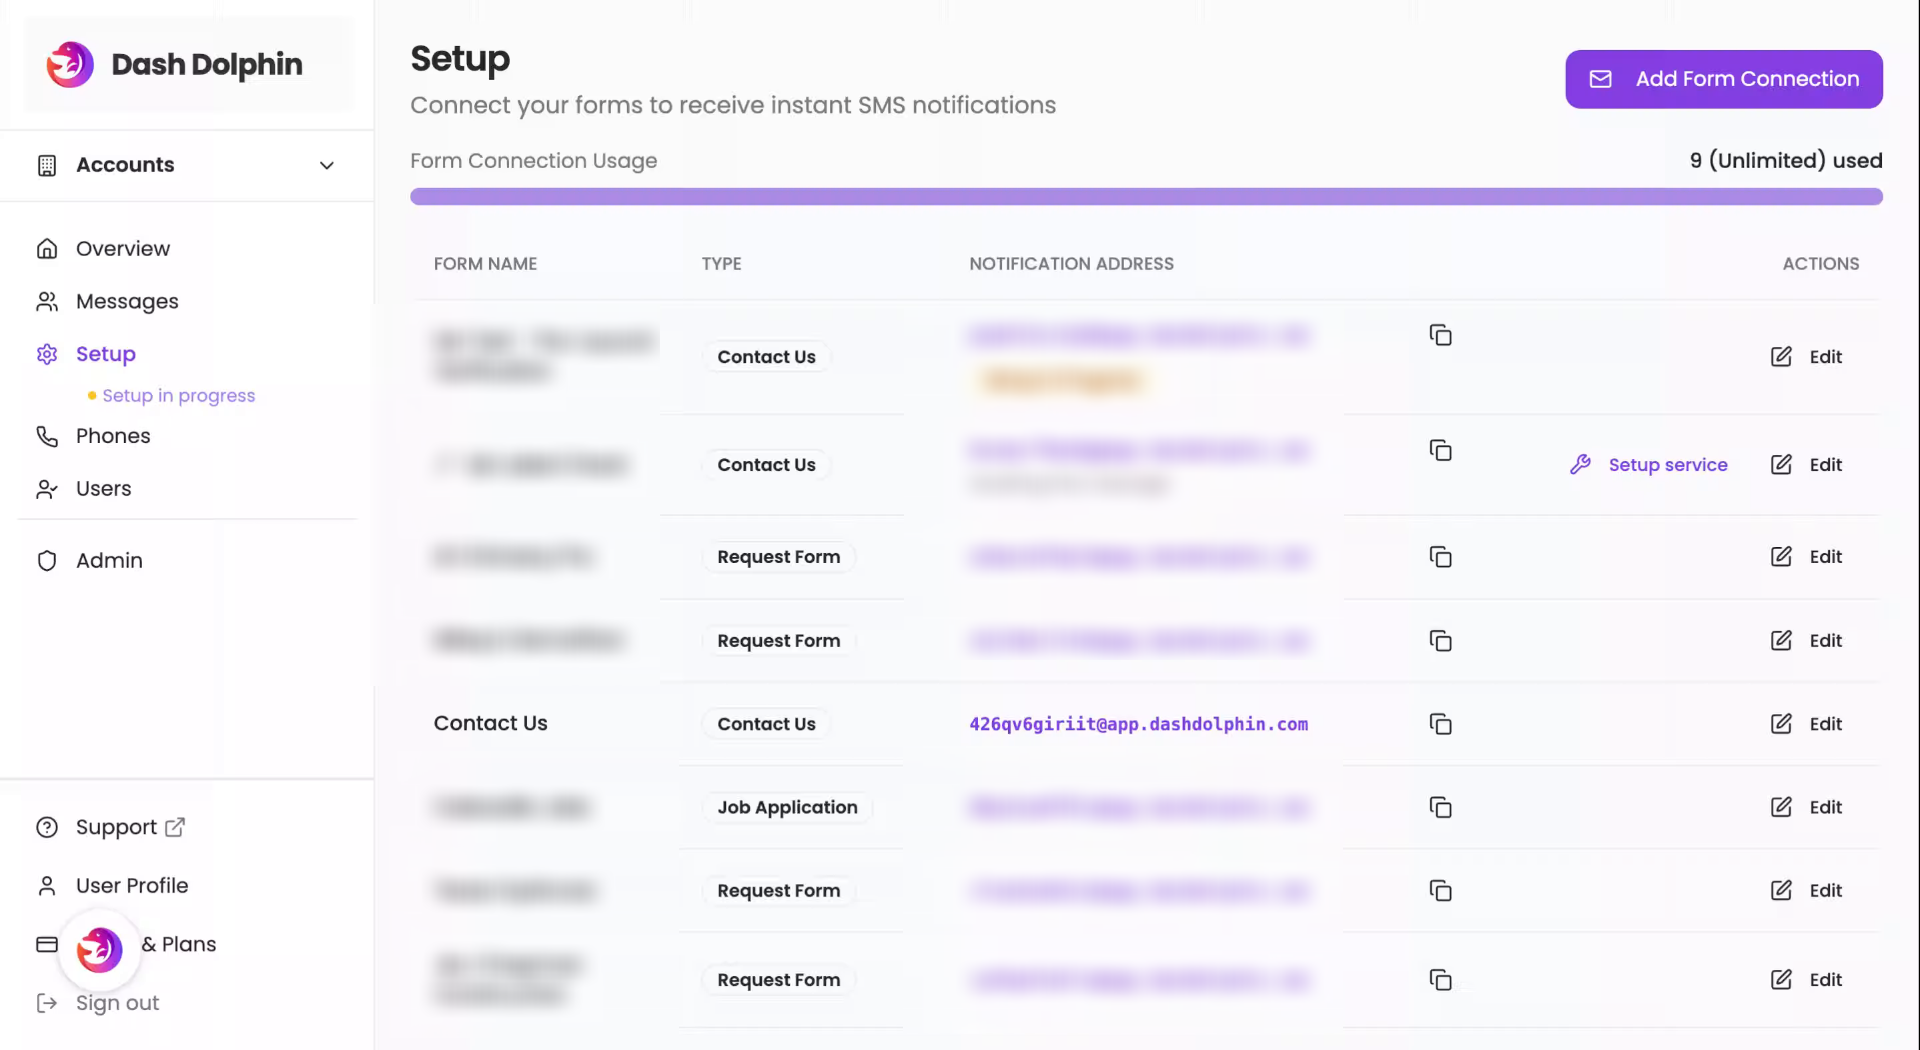
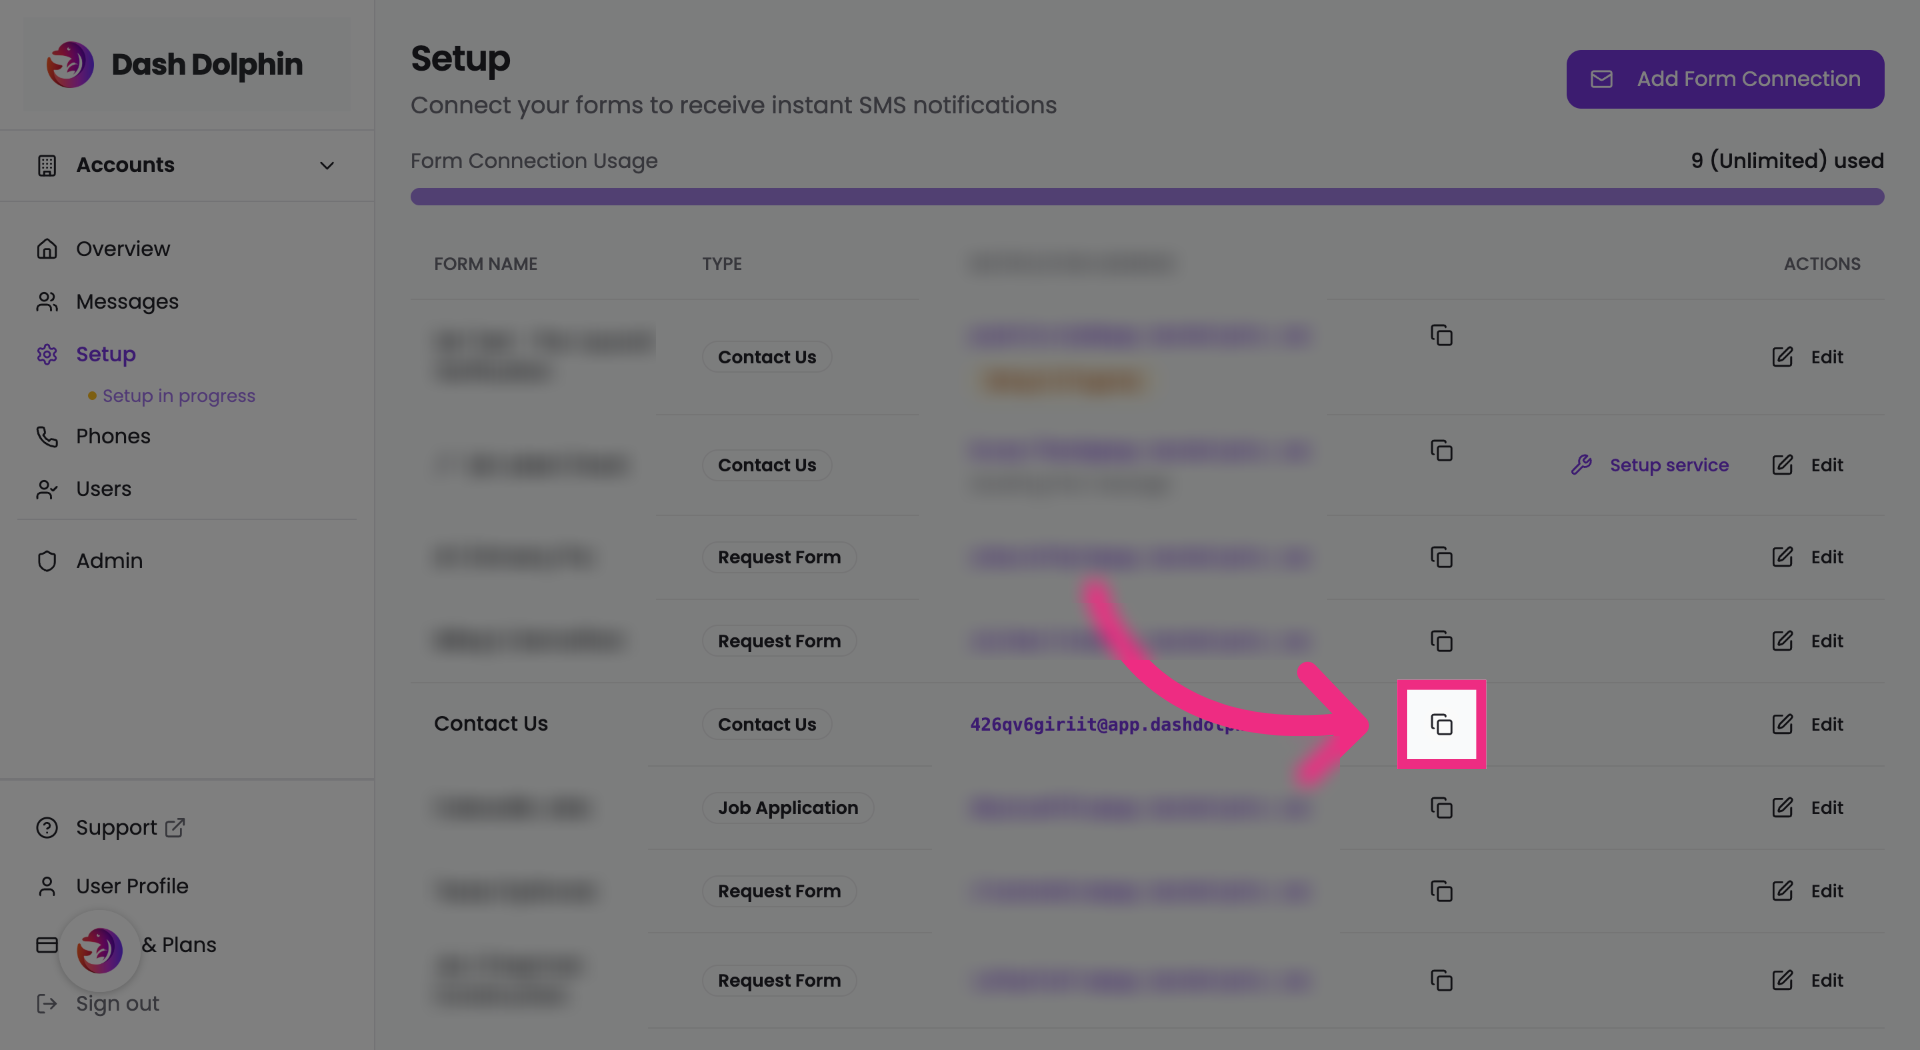
2. Copy Notification Email
Copy the notification email address from your Dash Dolphin connection.
3. Open ActiveCampaign
Open your ActiveCampaign dashboard.
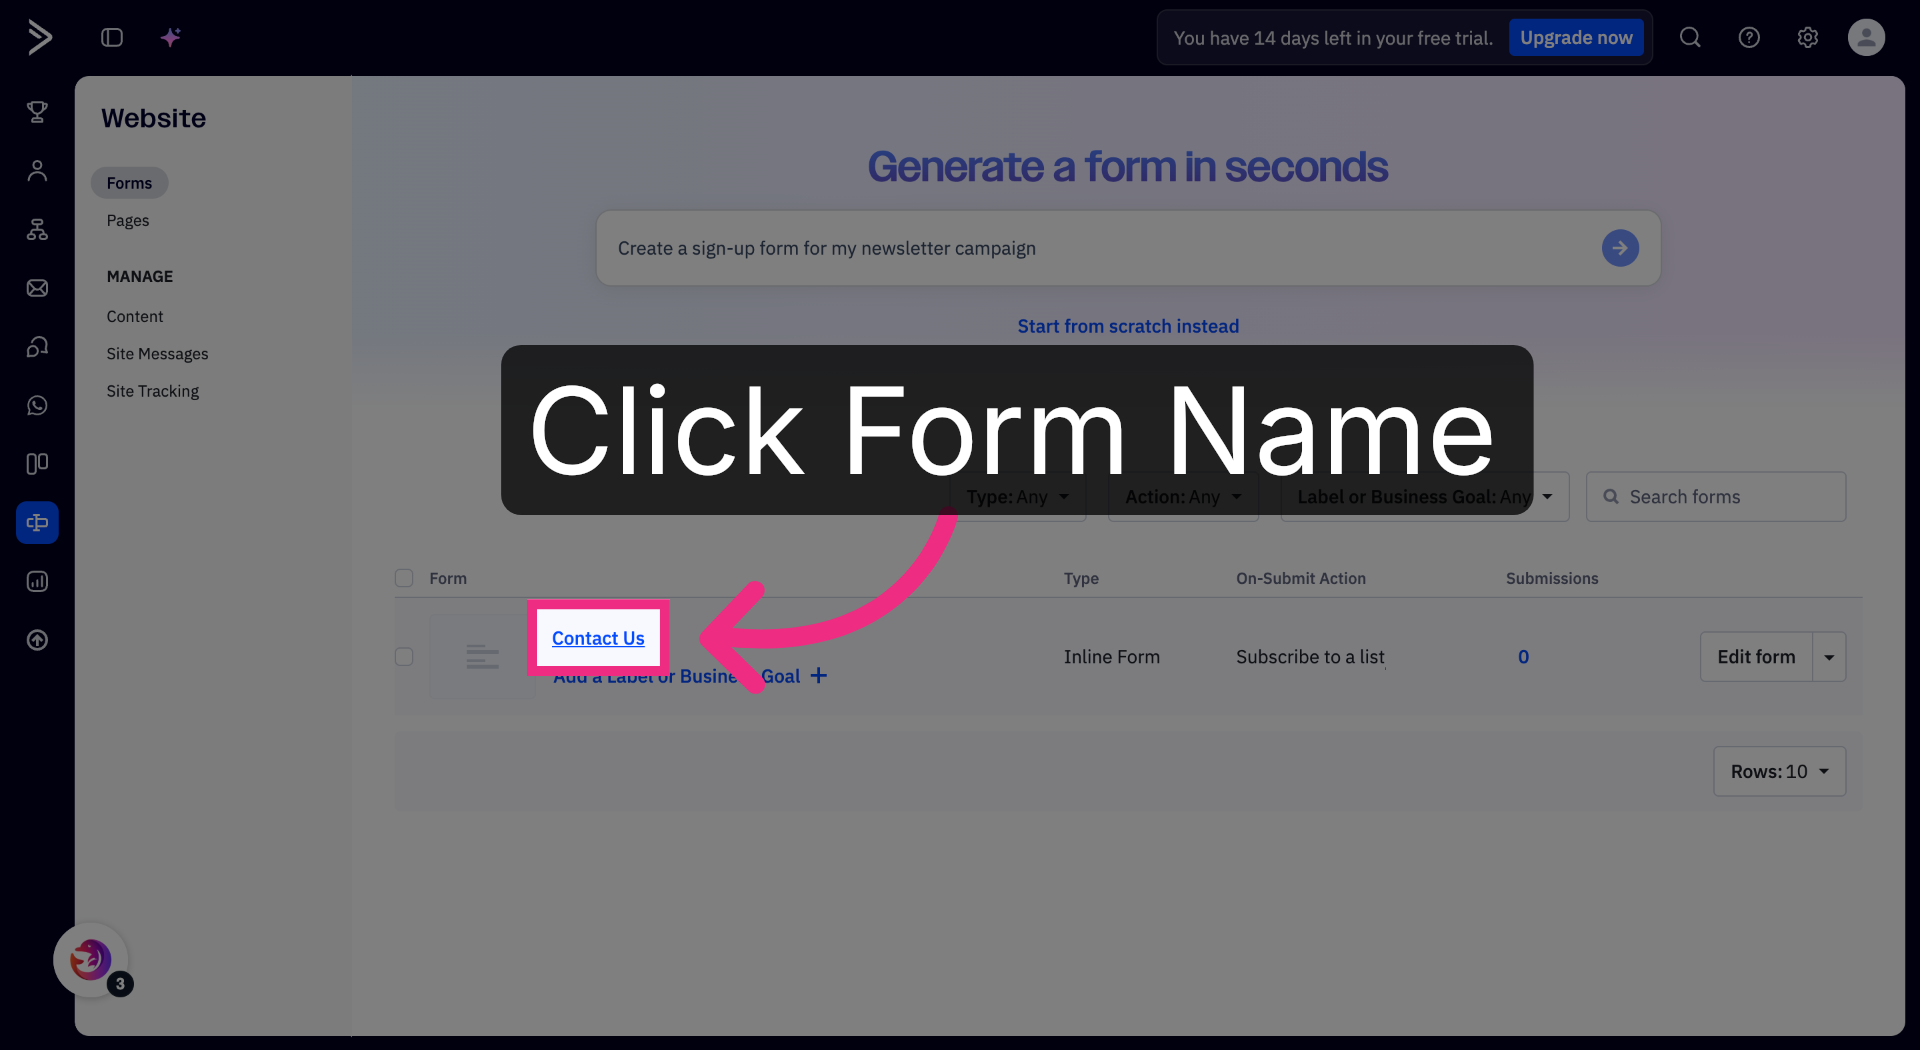
4. Open Forms
Open the Forms section from the sidebar.
5. Open Contact Us Form
Open your Contact Us form.
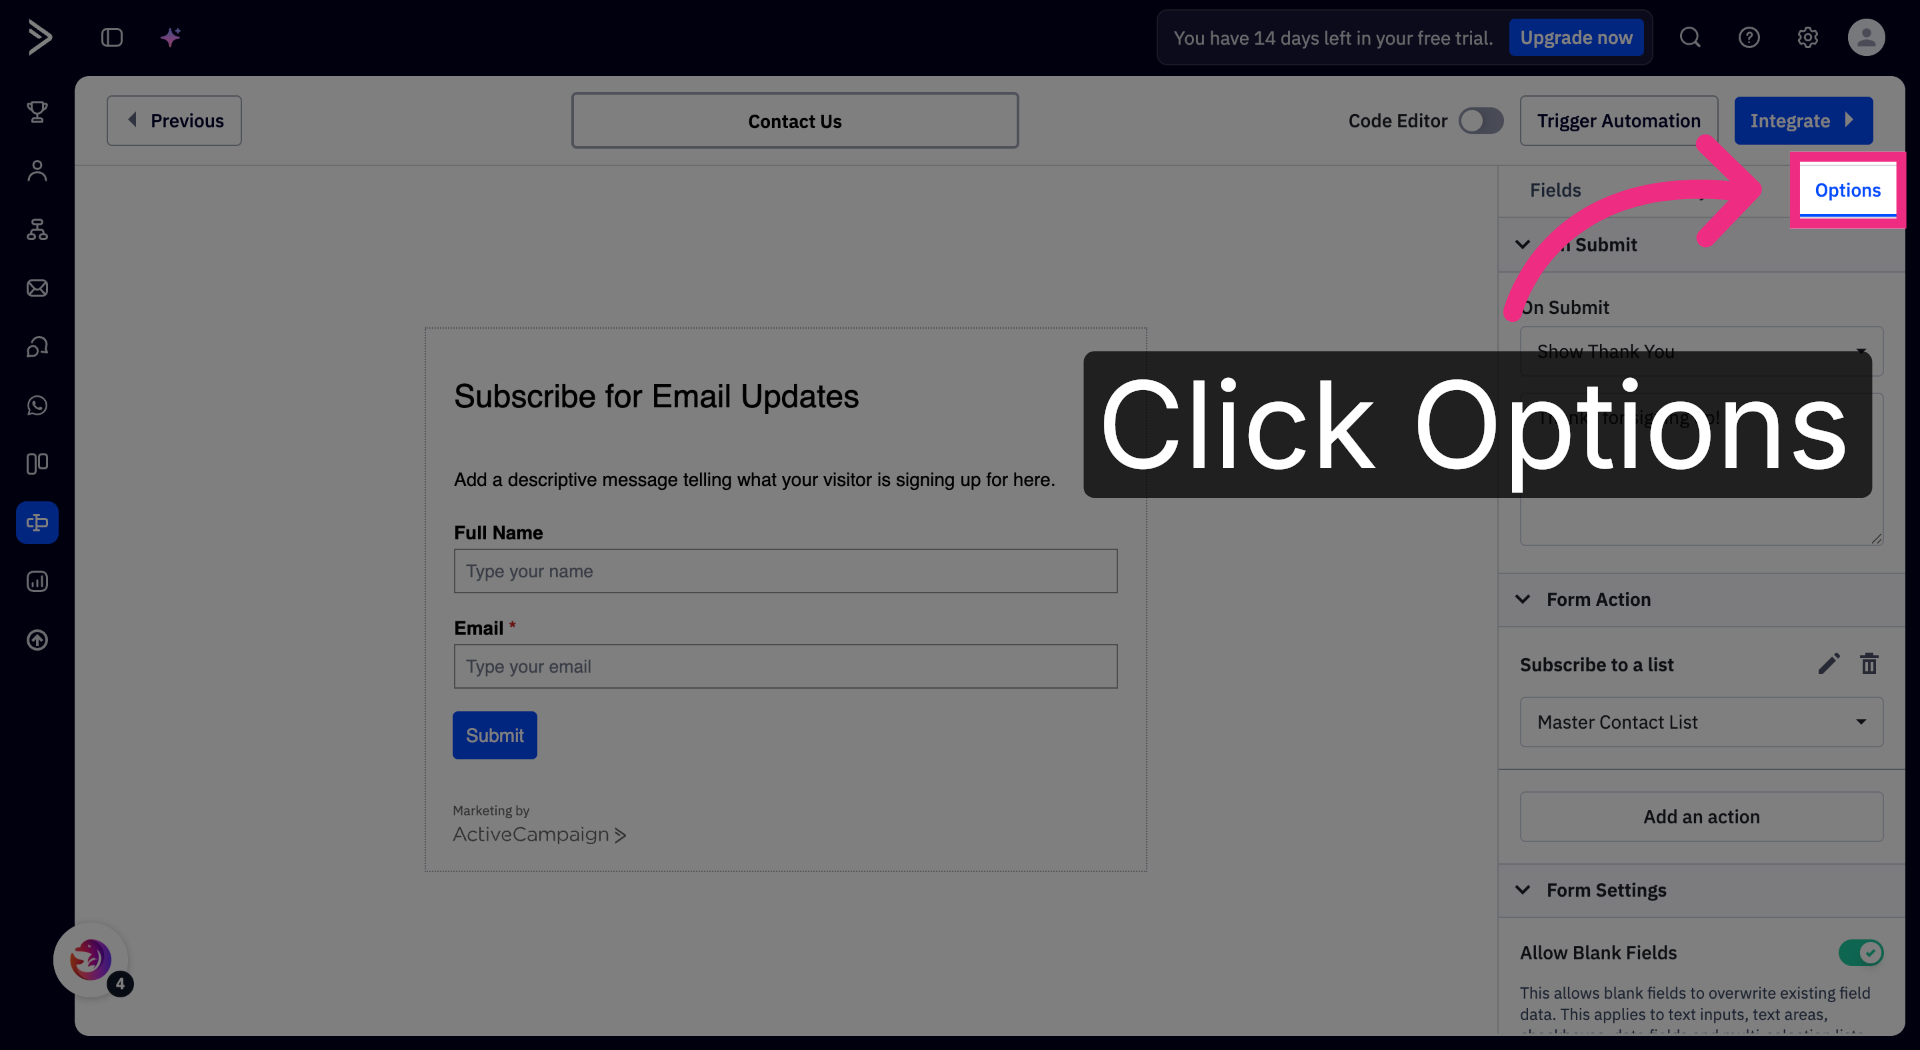
6. Open Options Tab
Open the Options tab.
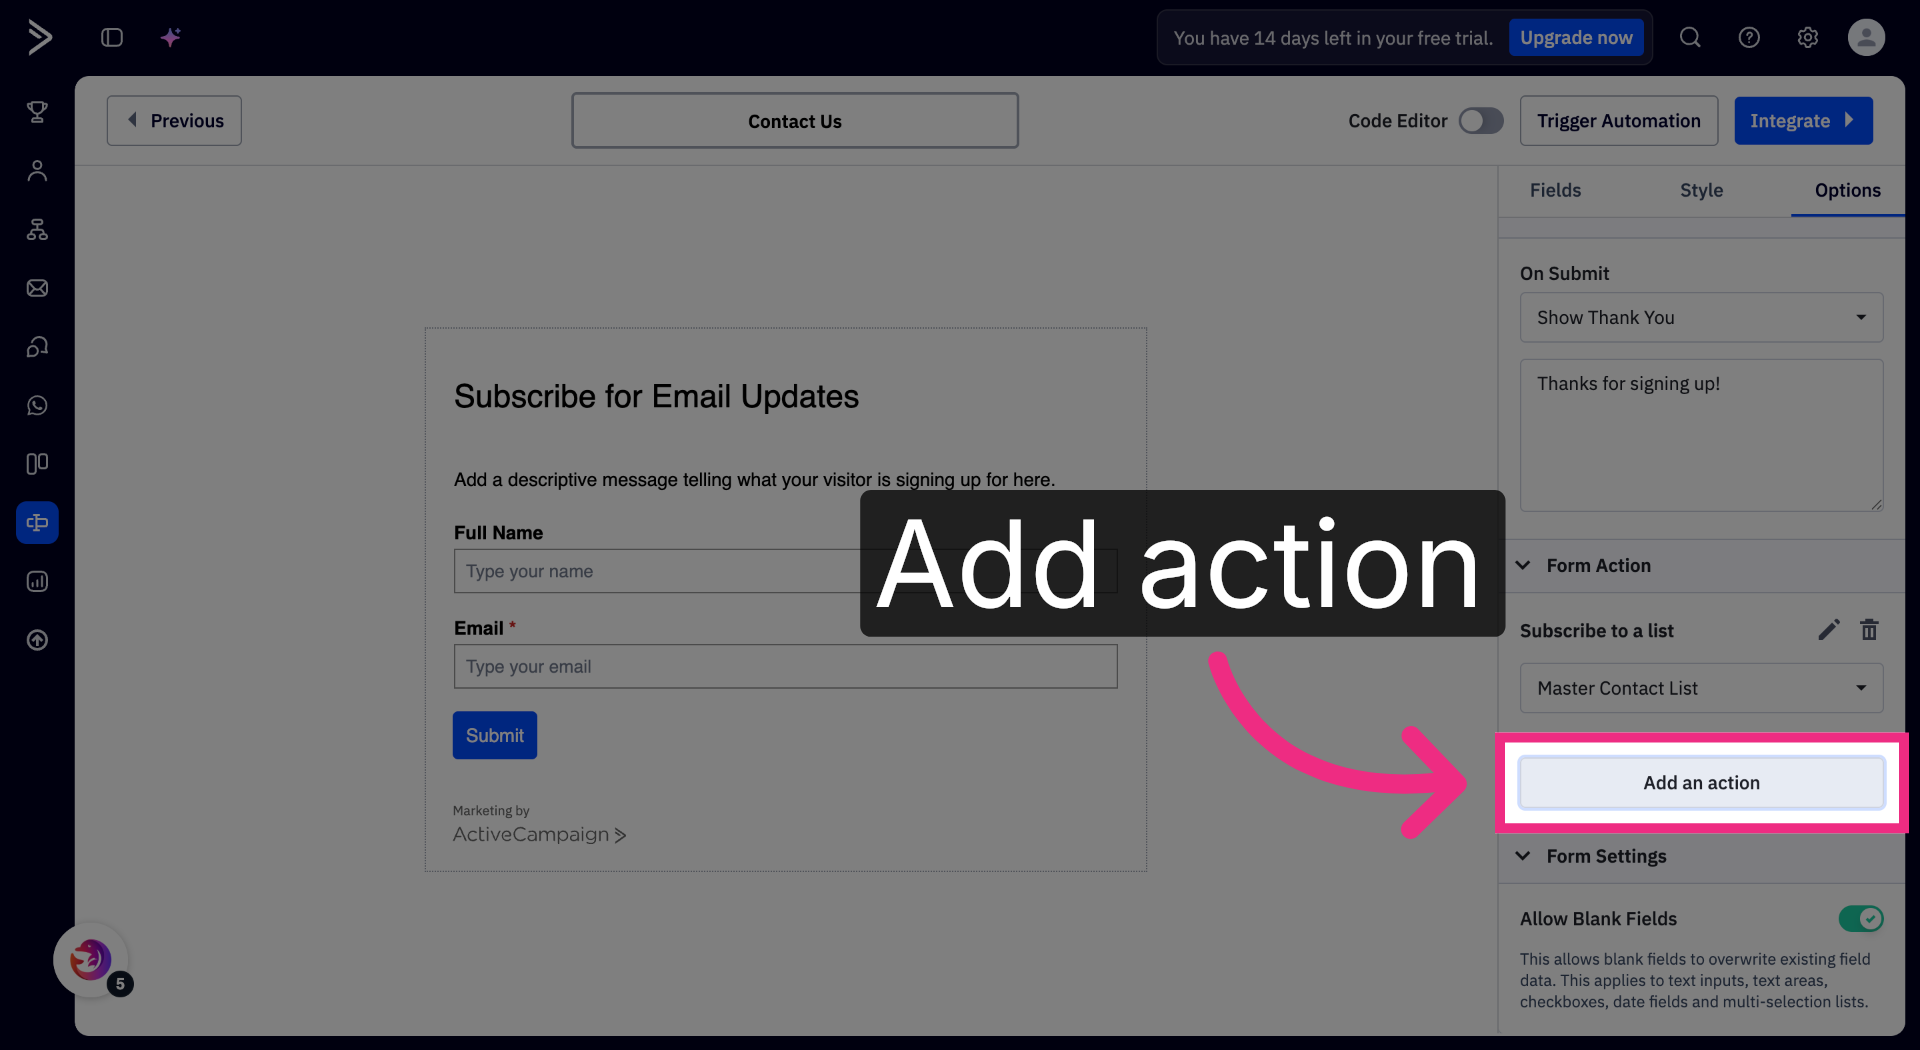
7. Add an Action
Under Form Action, click Add an action.
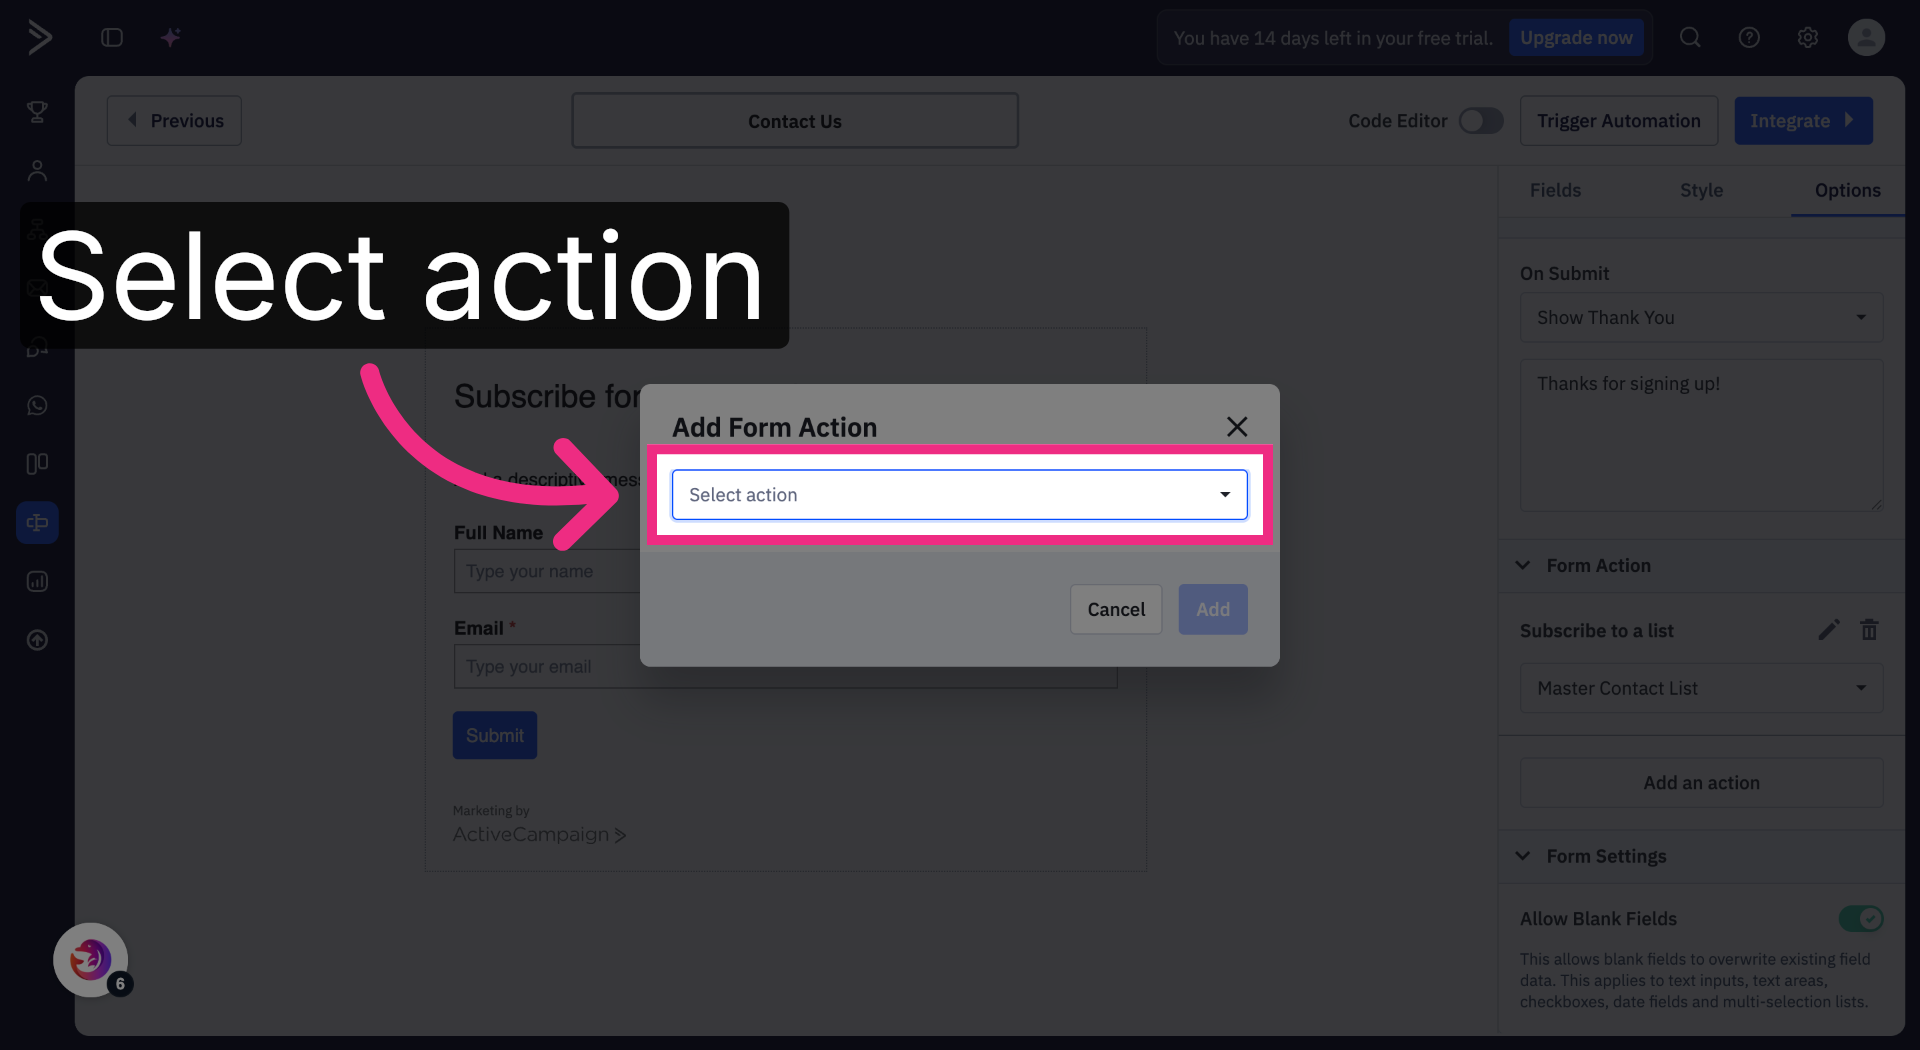
8. Open Action Dropdown
Open the Select action dropdown.
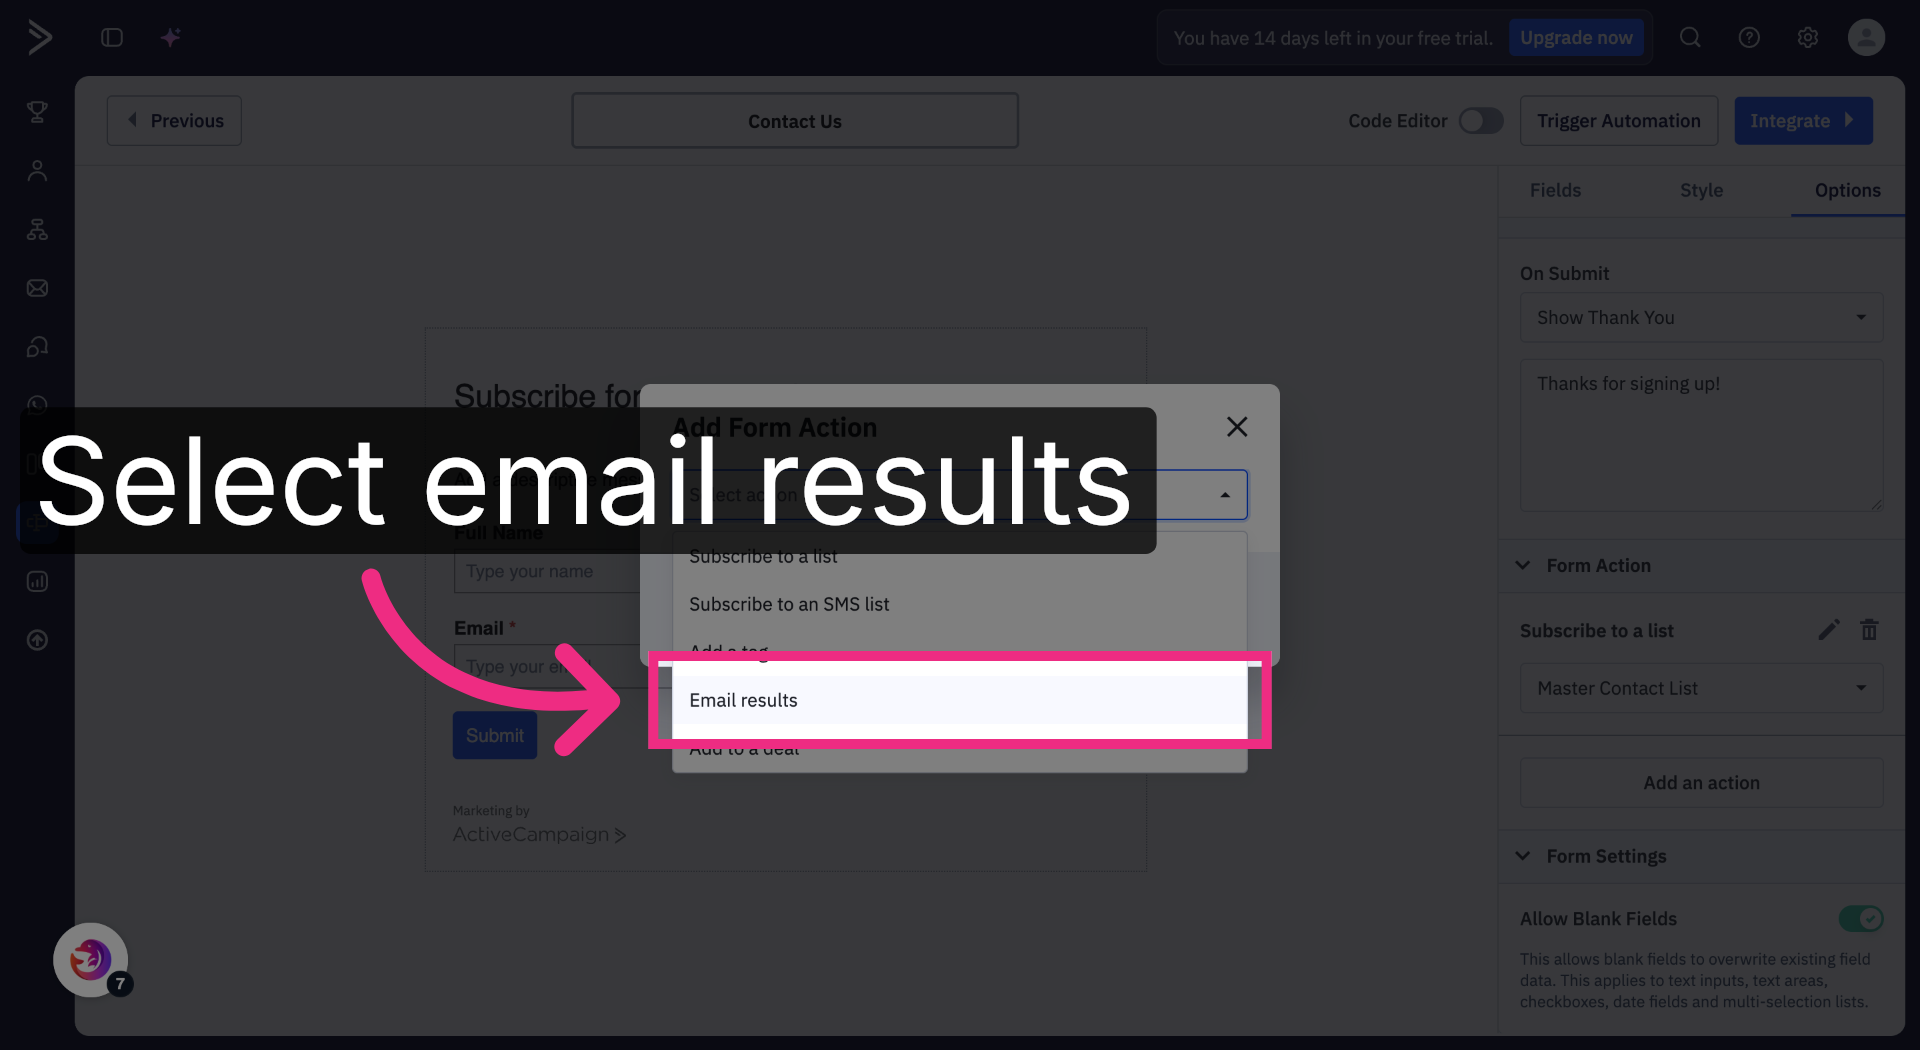
9. Select Email Results
Select Email results from the dropdown.
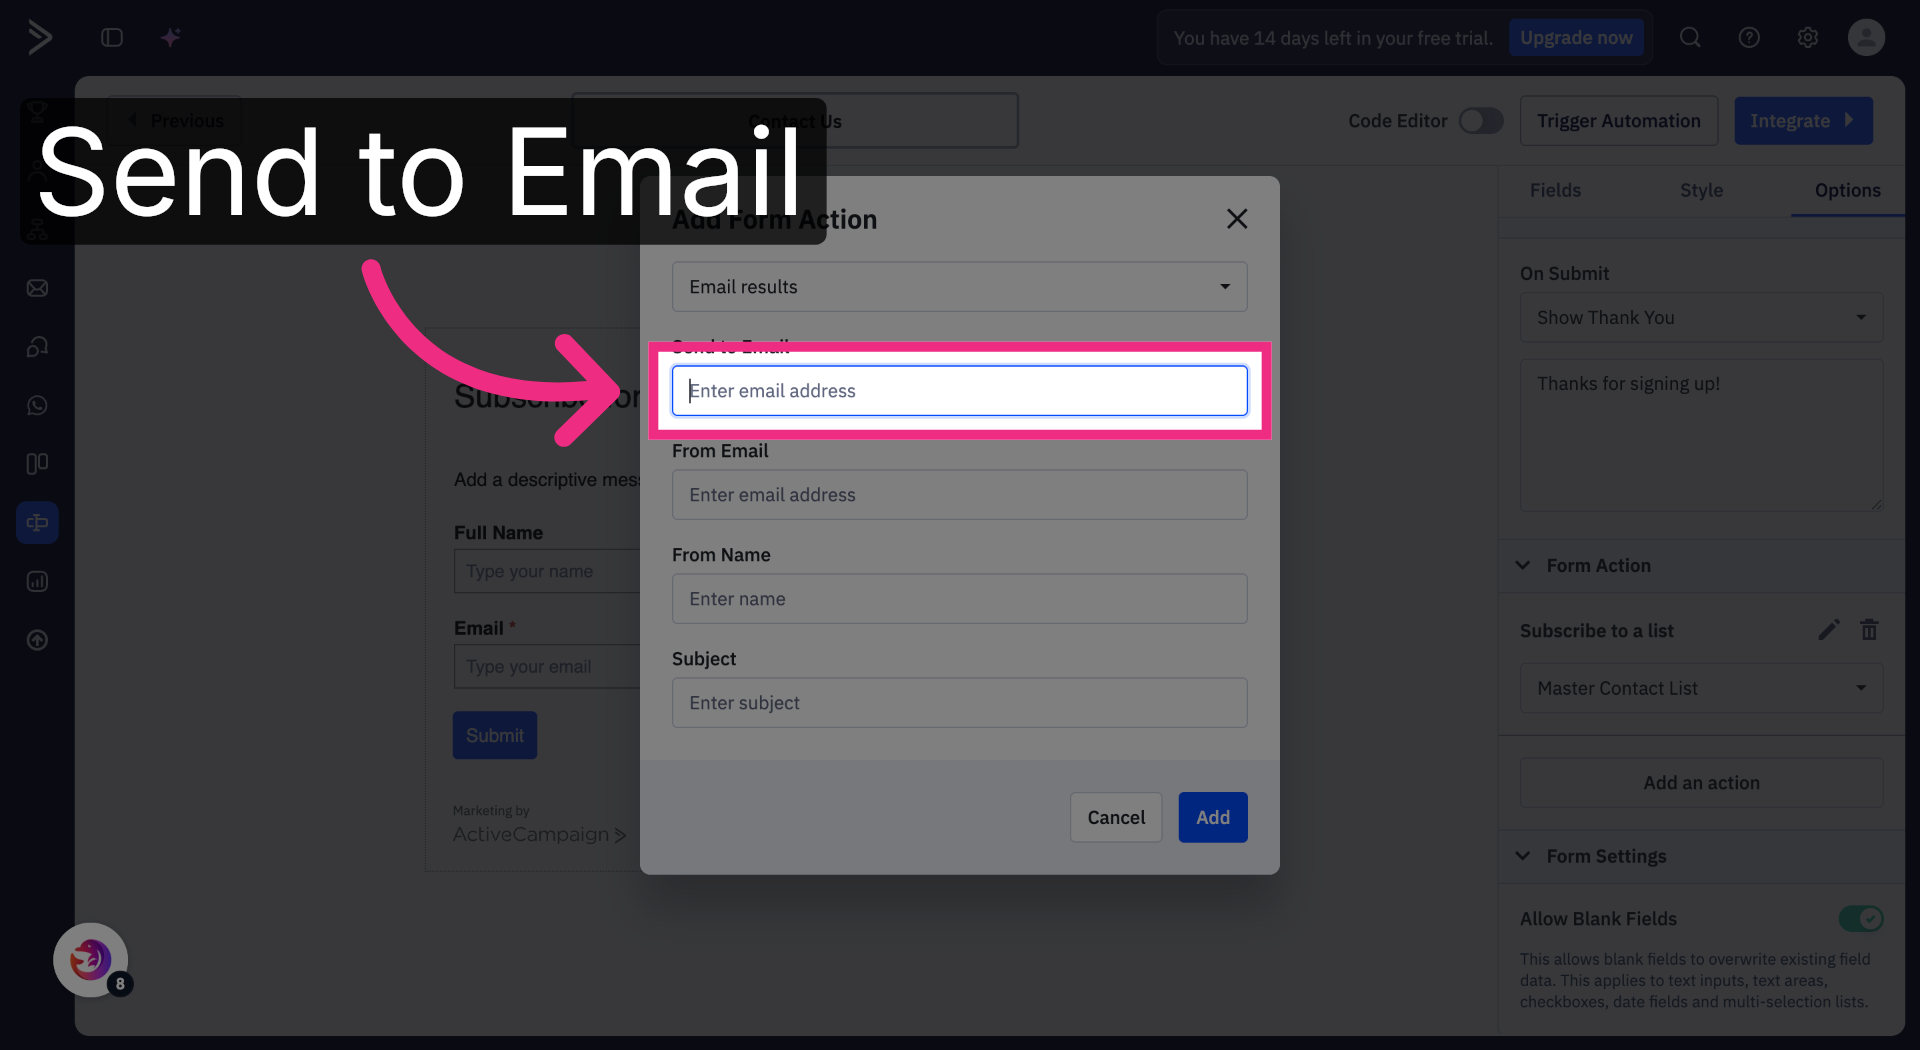
10. Click Send to Email Field
Click into the Send to Email field.
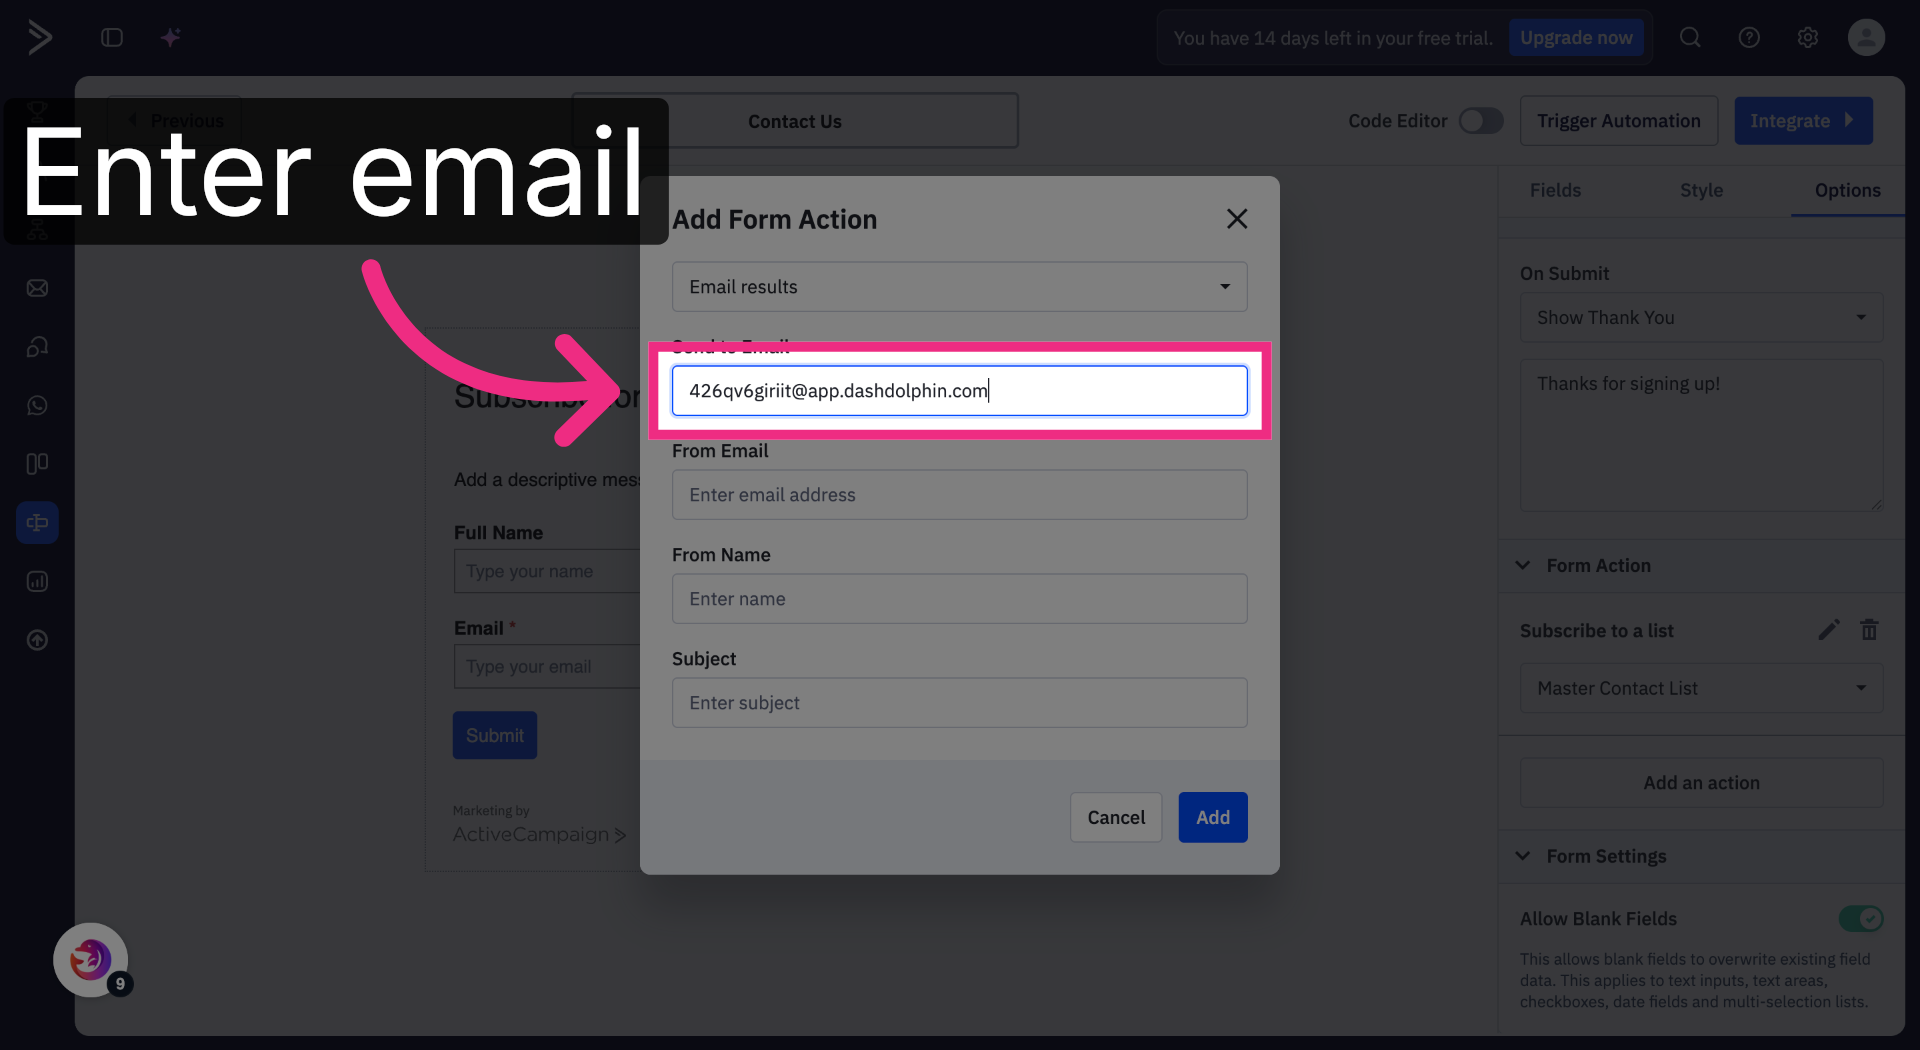
11. Paste Notification Email
Paste the Dash Dolphin notification email into the field.
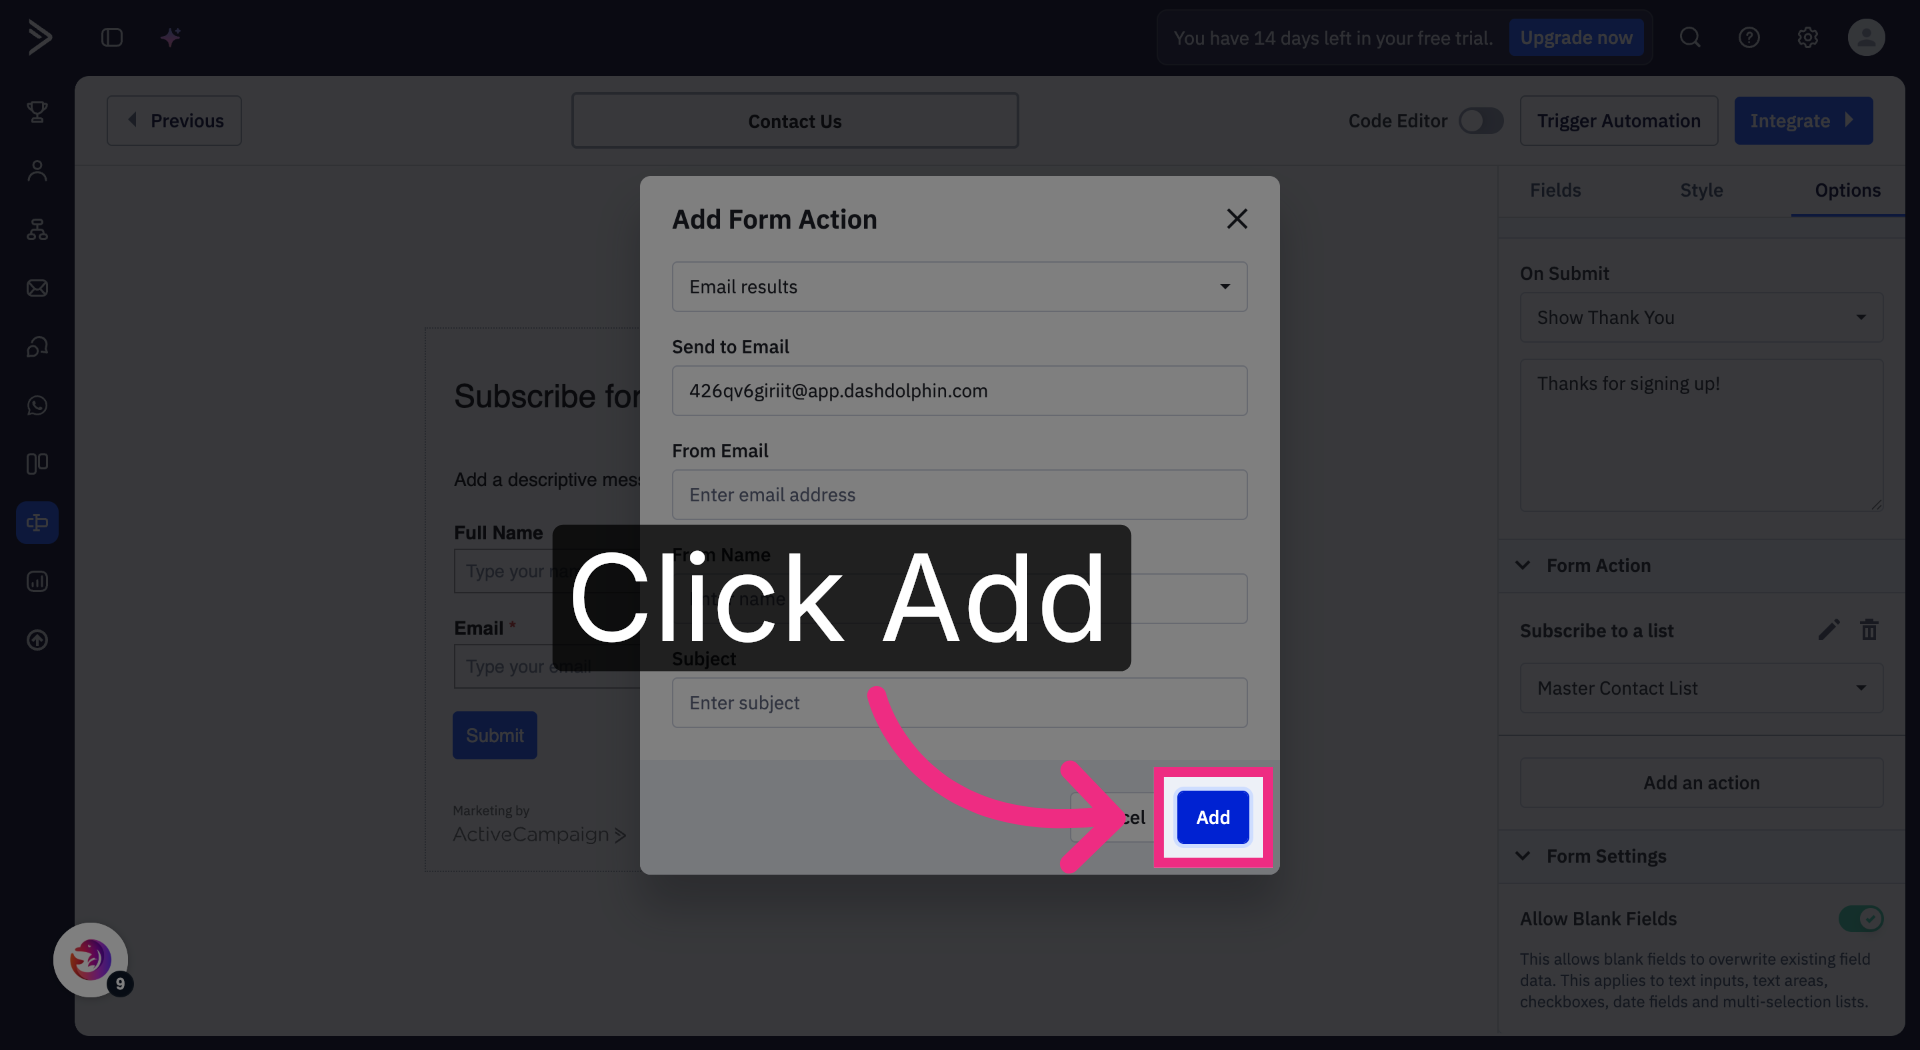
12. Click Add
Click Add to save the action.
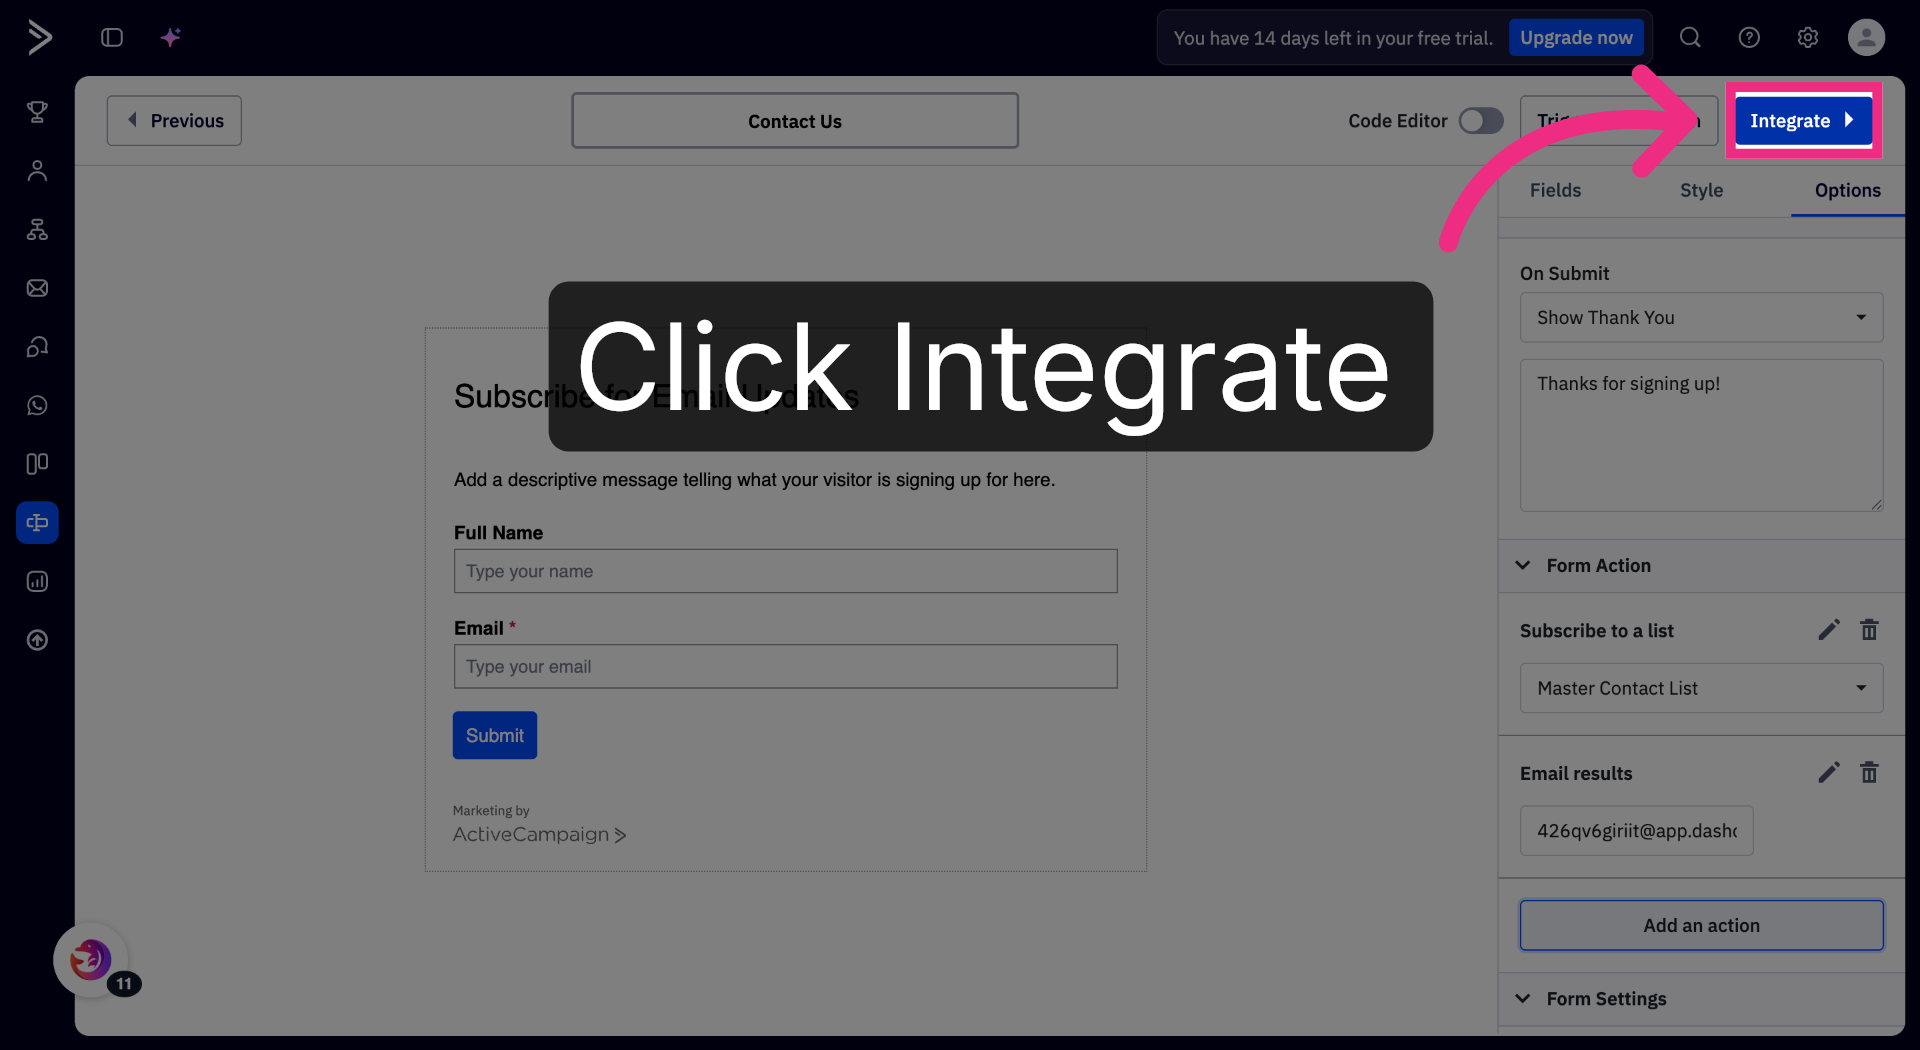
13. Click Integrate
Click the Integrate button to open the embed view.
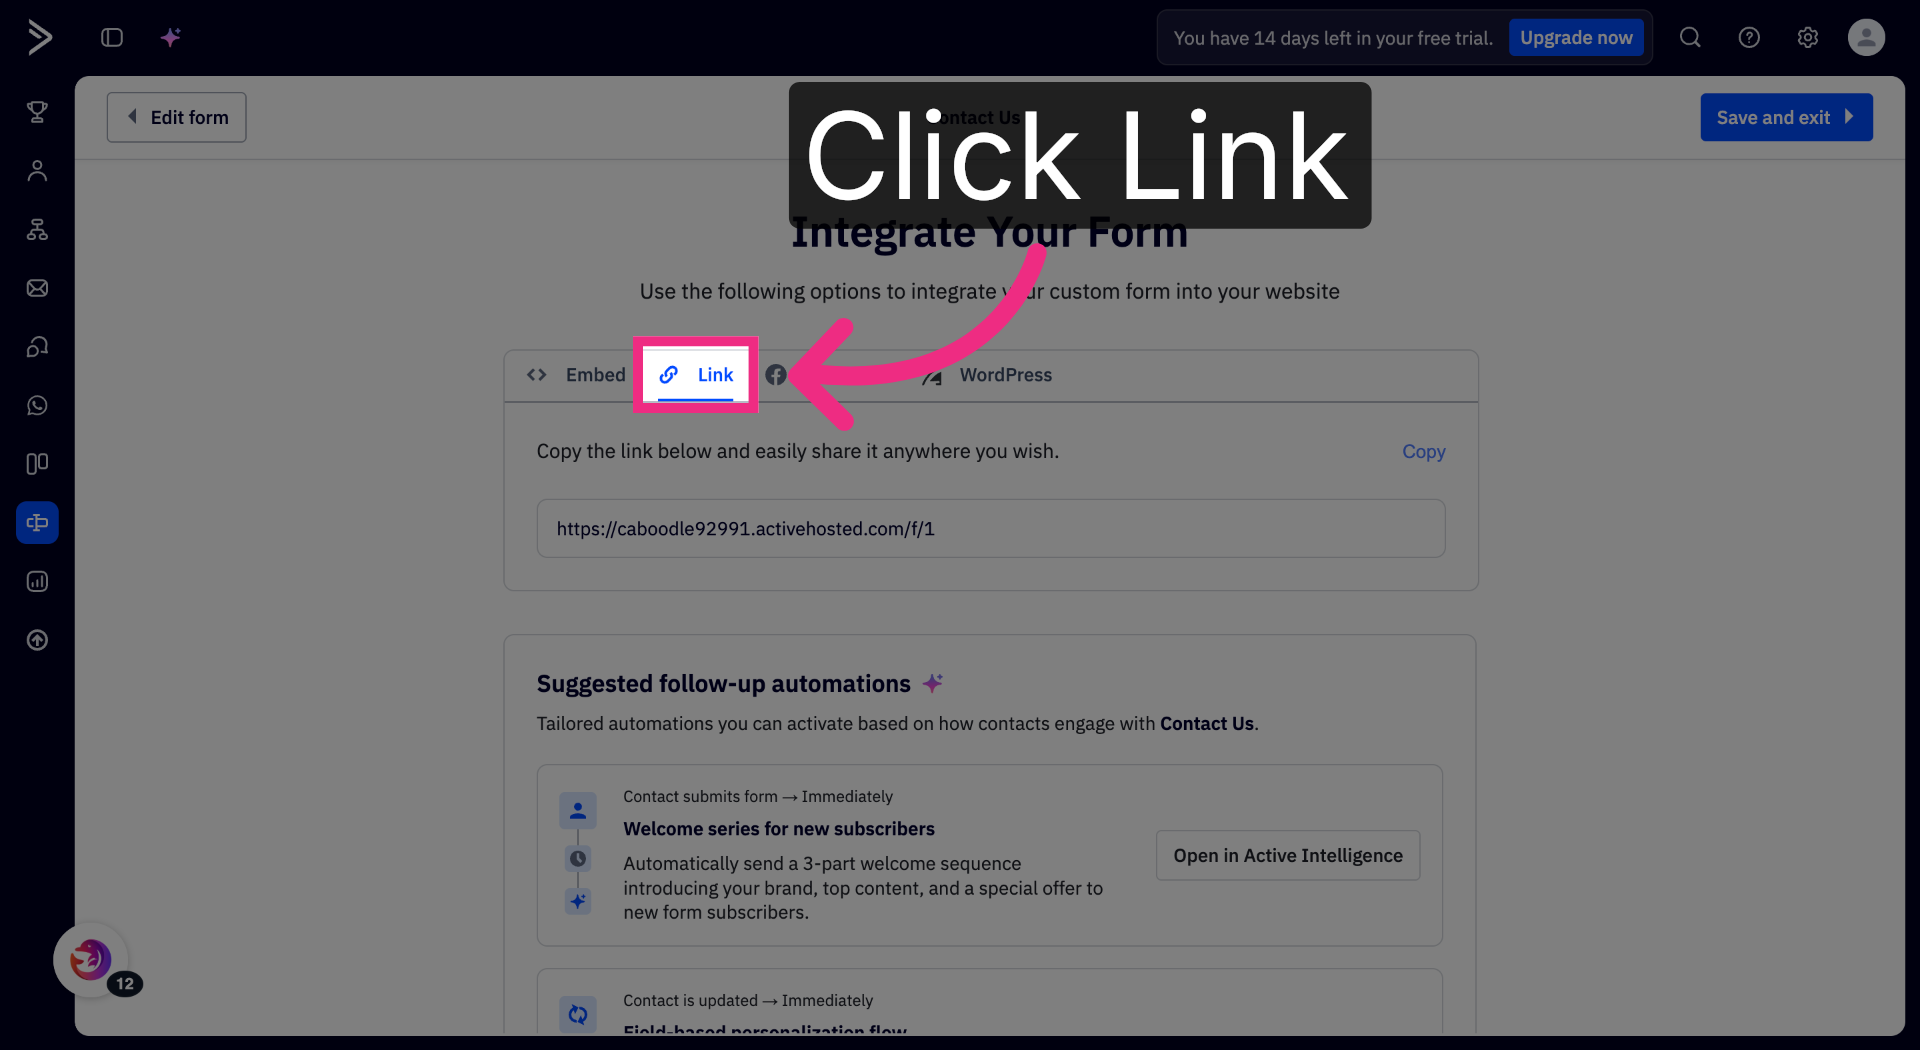
14. Open Link Tab
Open the Link tab.
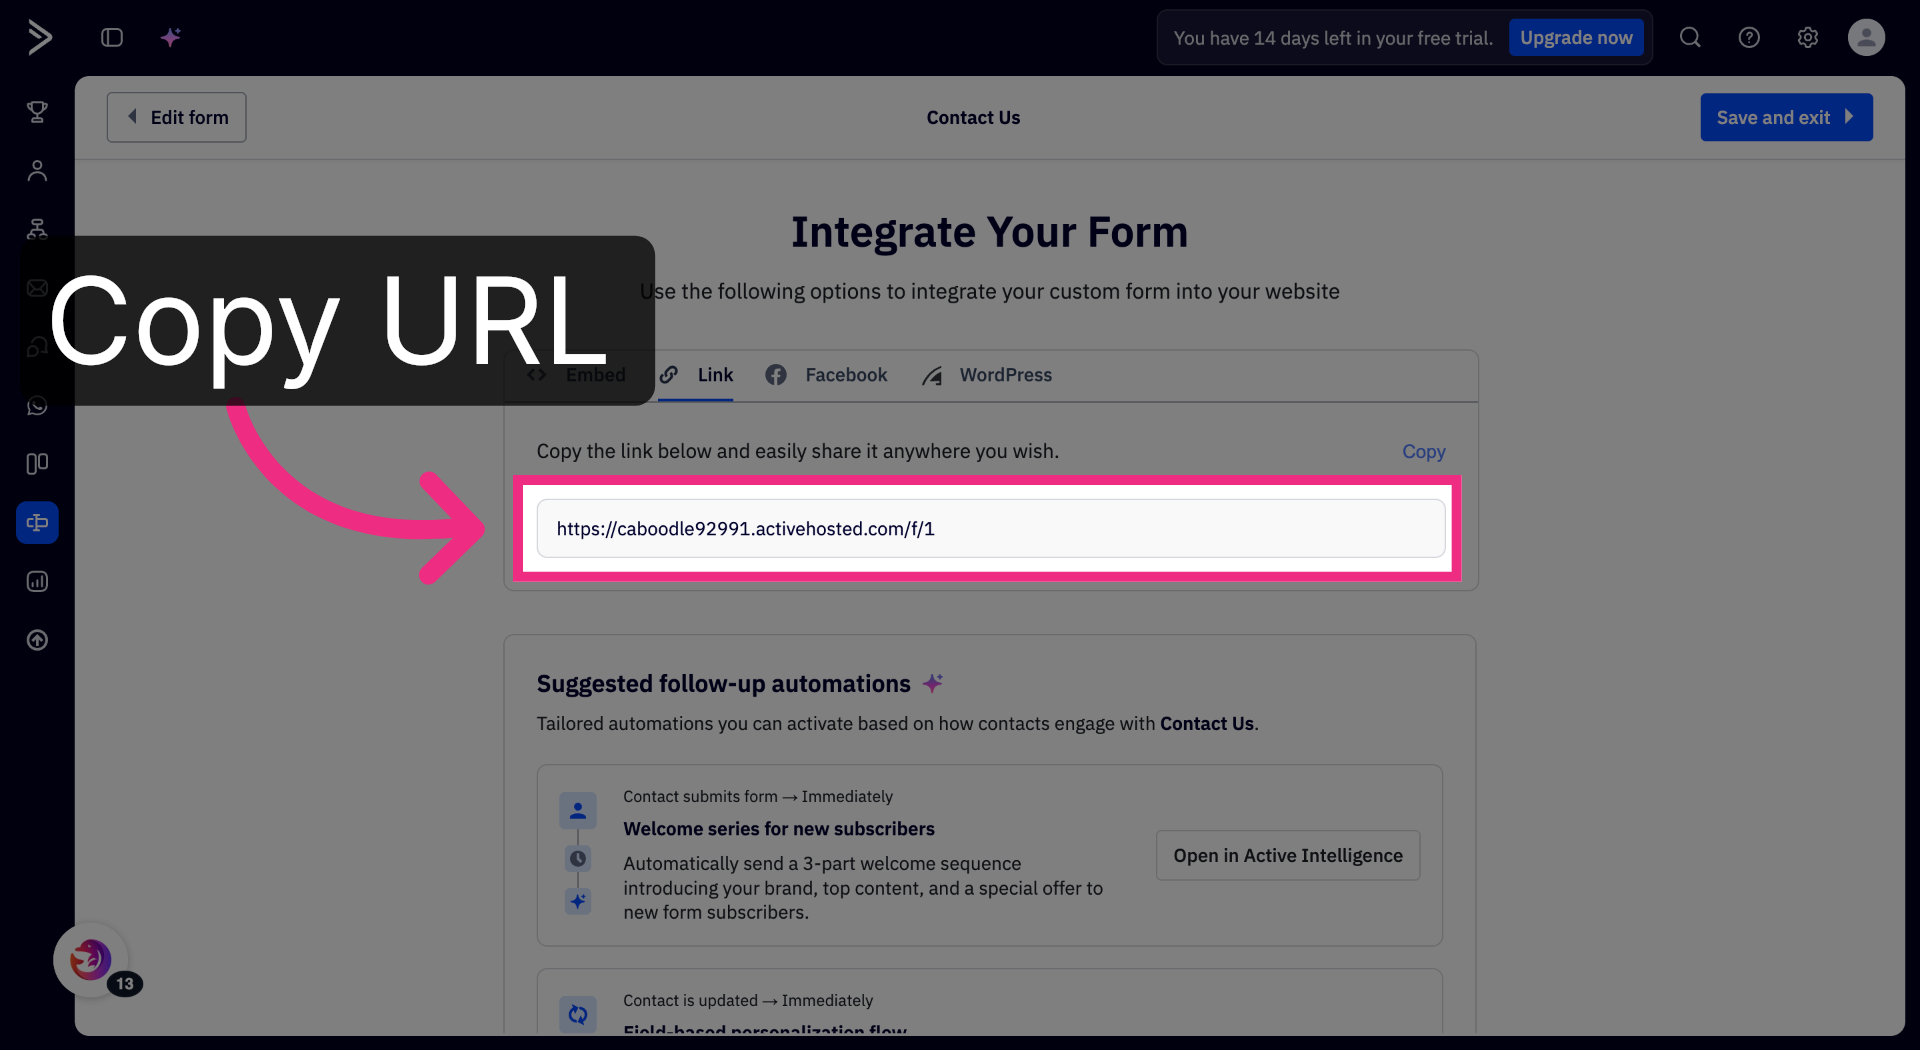
15. Copy Form URL
Copy your form URL.
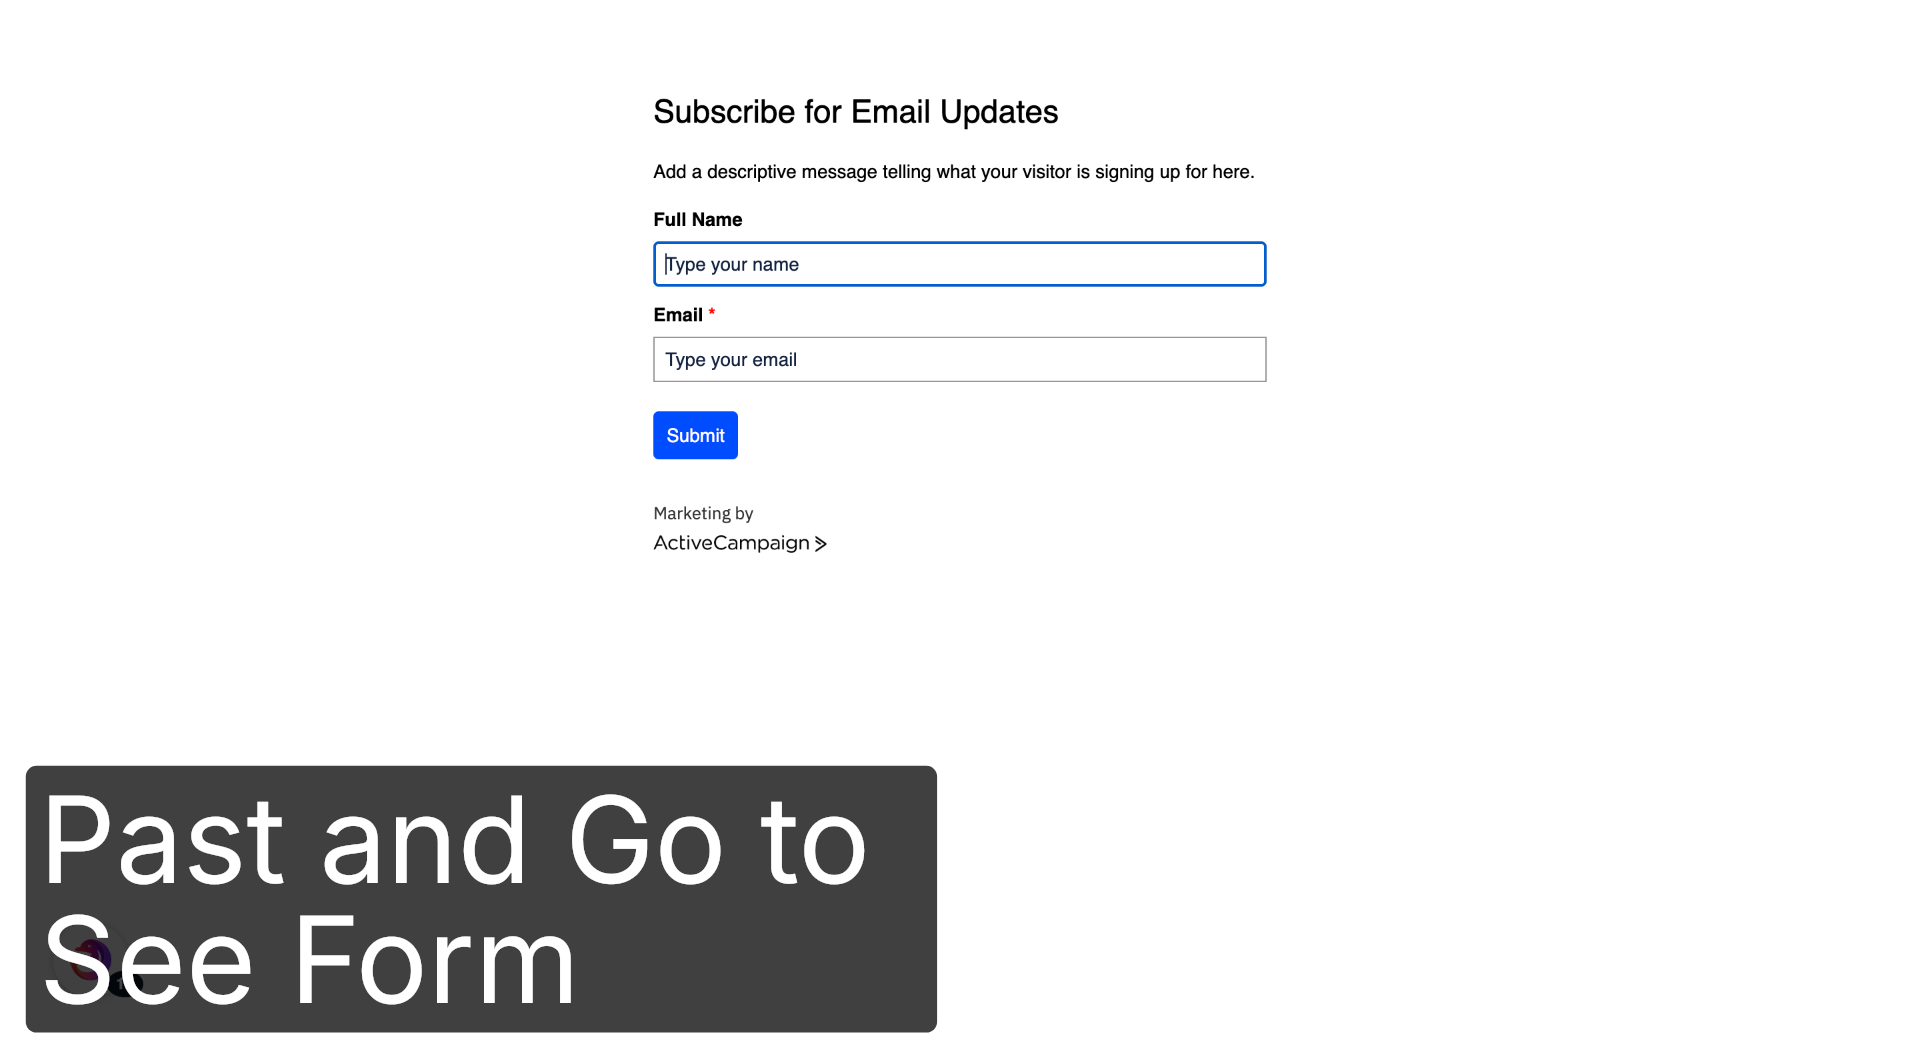
16. View Live Form
Open the URL to confirm your live form loads.
Thanks for following along. Connect with us at app.dashdolphin.com or book a demo at dashdolphin.com to get started.