Once you've created your connection and received your notification email address, you can configure your Ninja Forms form to forward submissions to Dash Dolphin.
1. Introduction
This guide shows you how to send your Ninja Forms submissions to Dash Dolphin for instant SMS alerts.
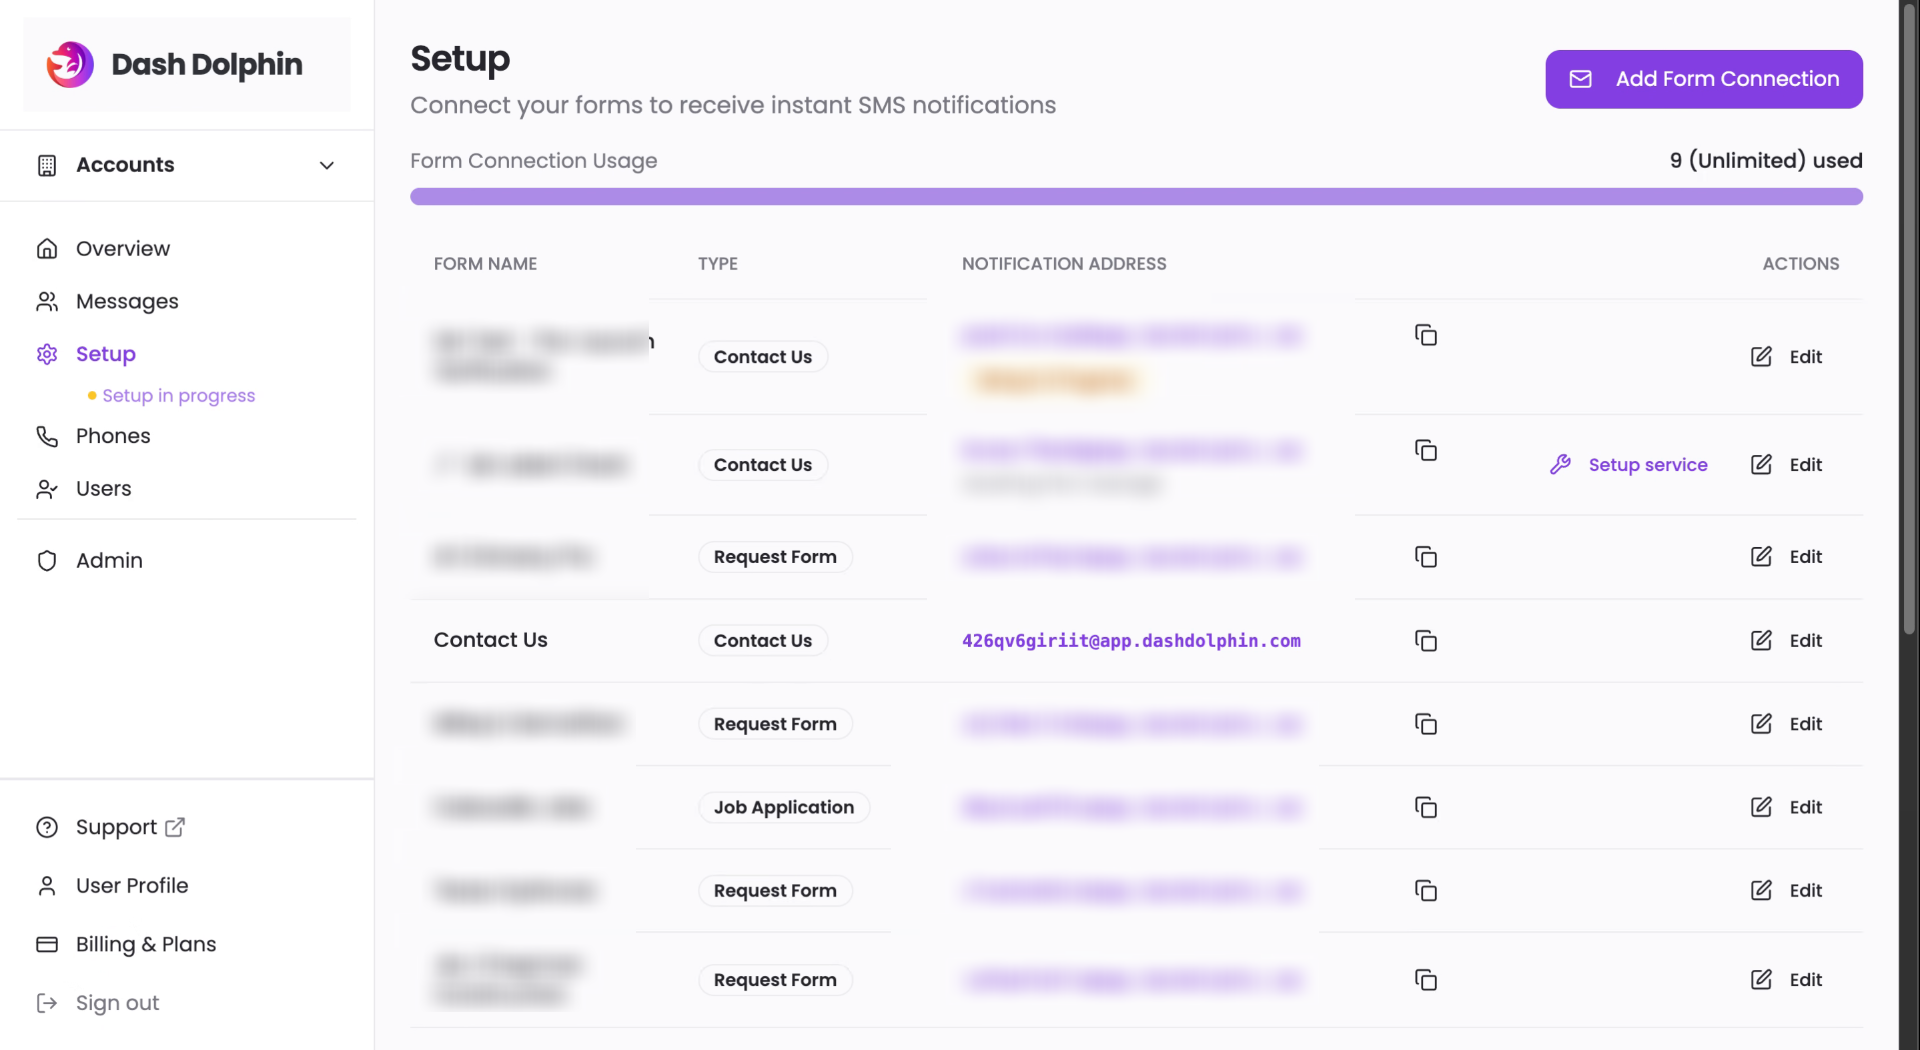
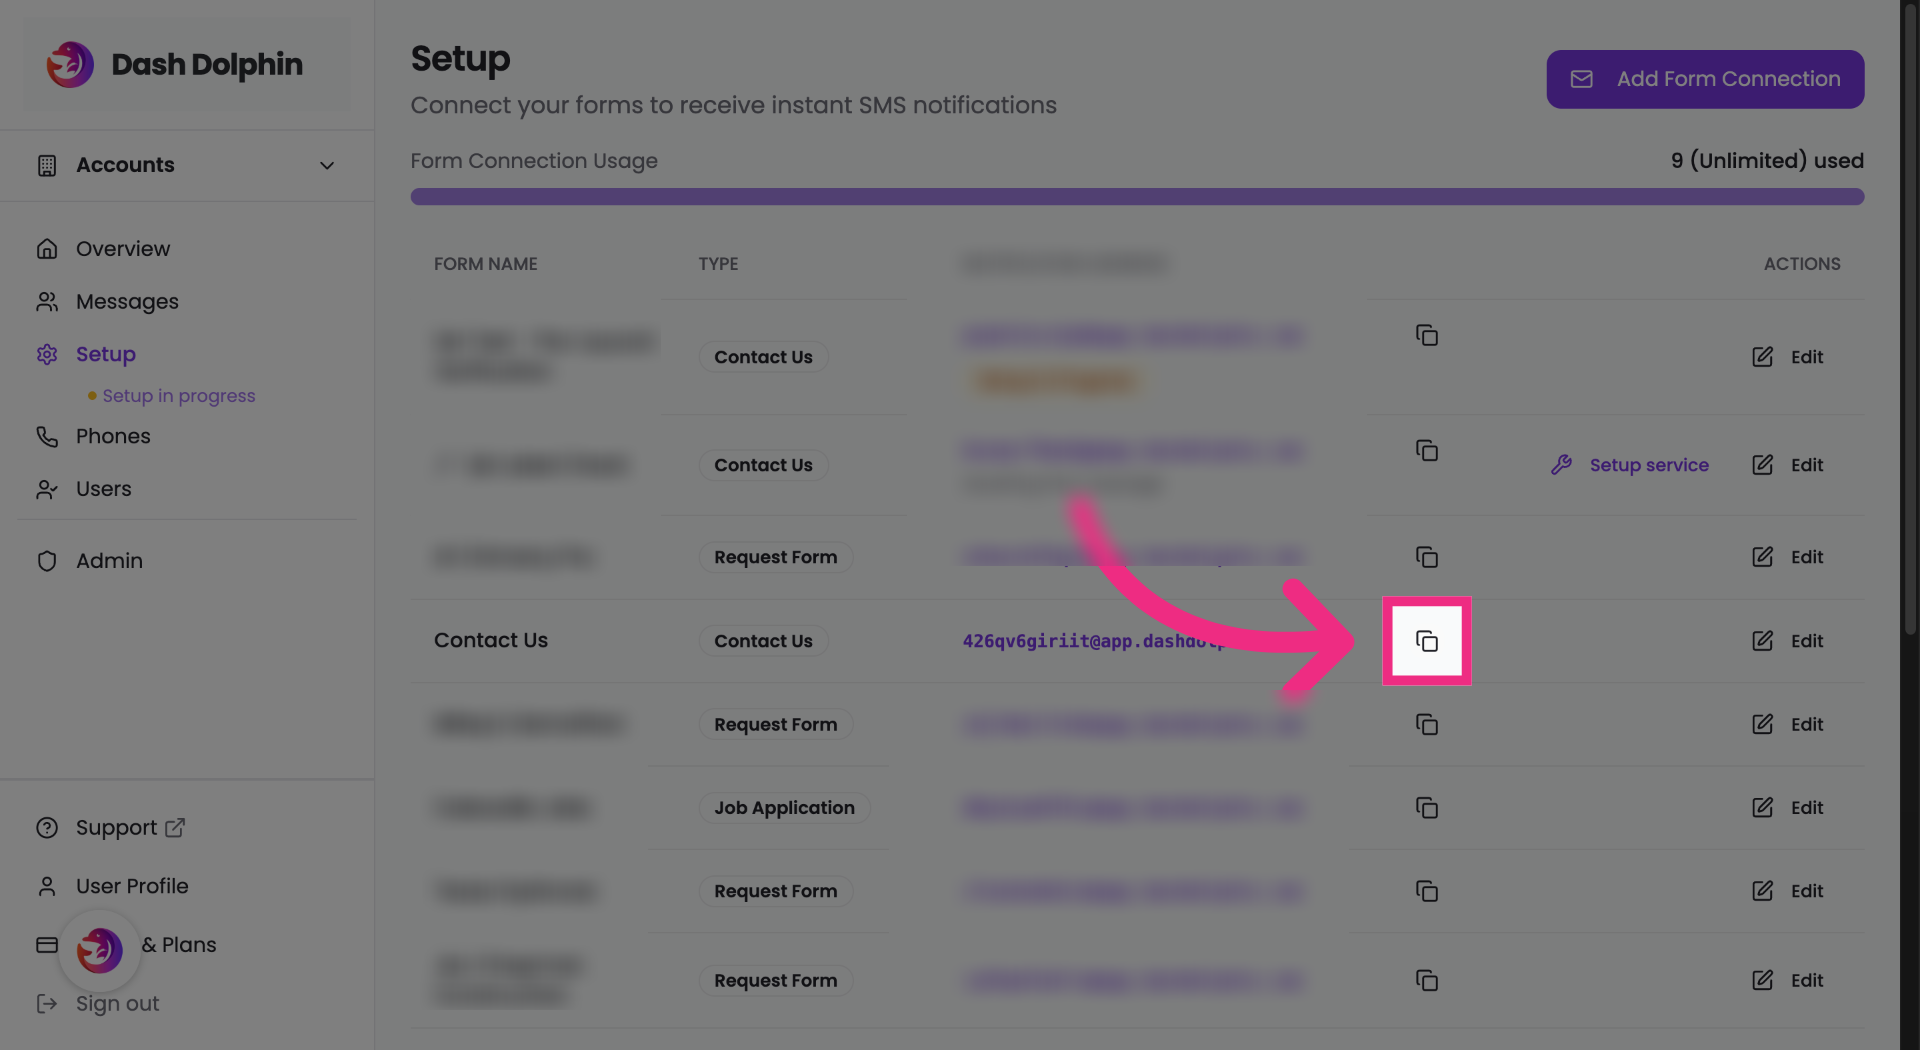
2. Access Dash Dolphin Alerts
Copy the notification email address from your Dash Dolphin connection.
3. Switch To Caboodle Build Site
Open your WordPress dashboard.
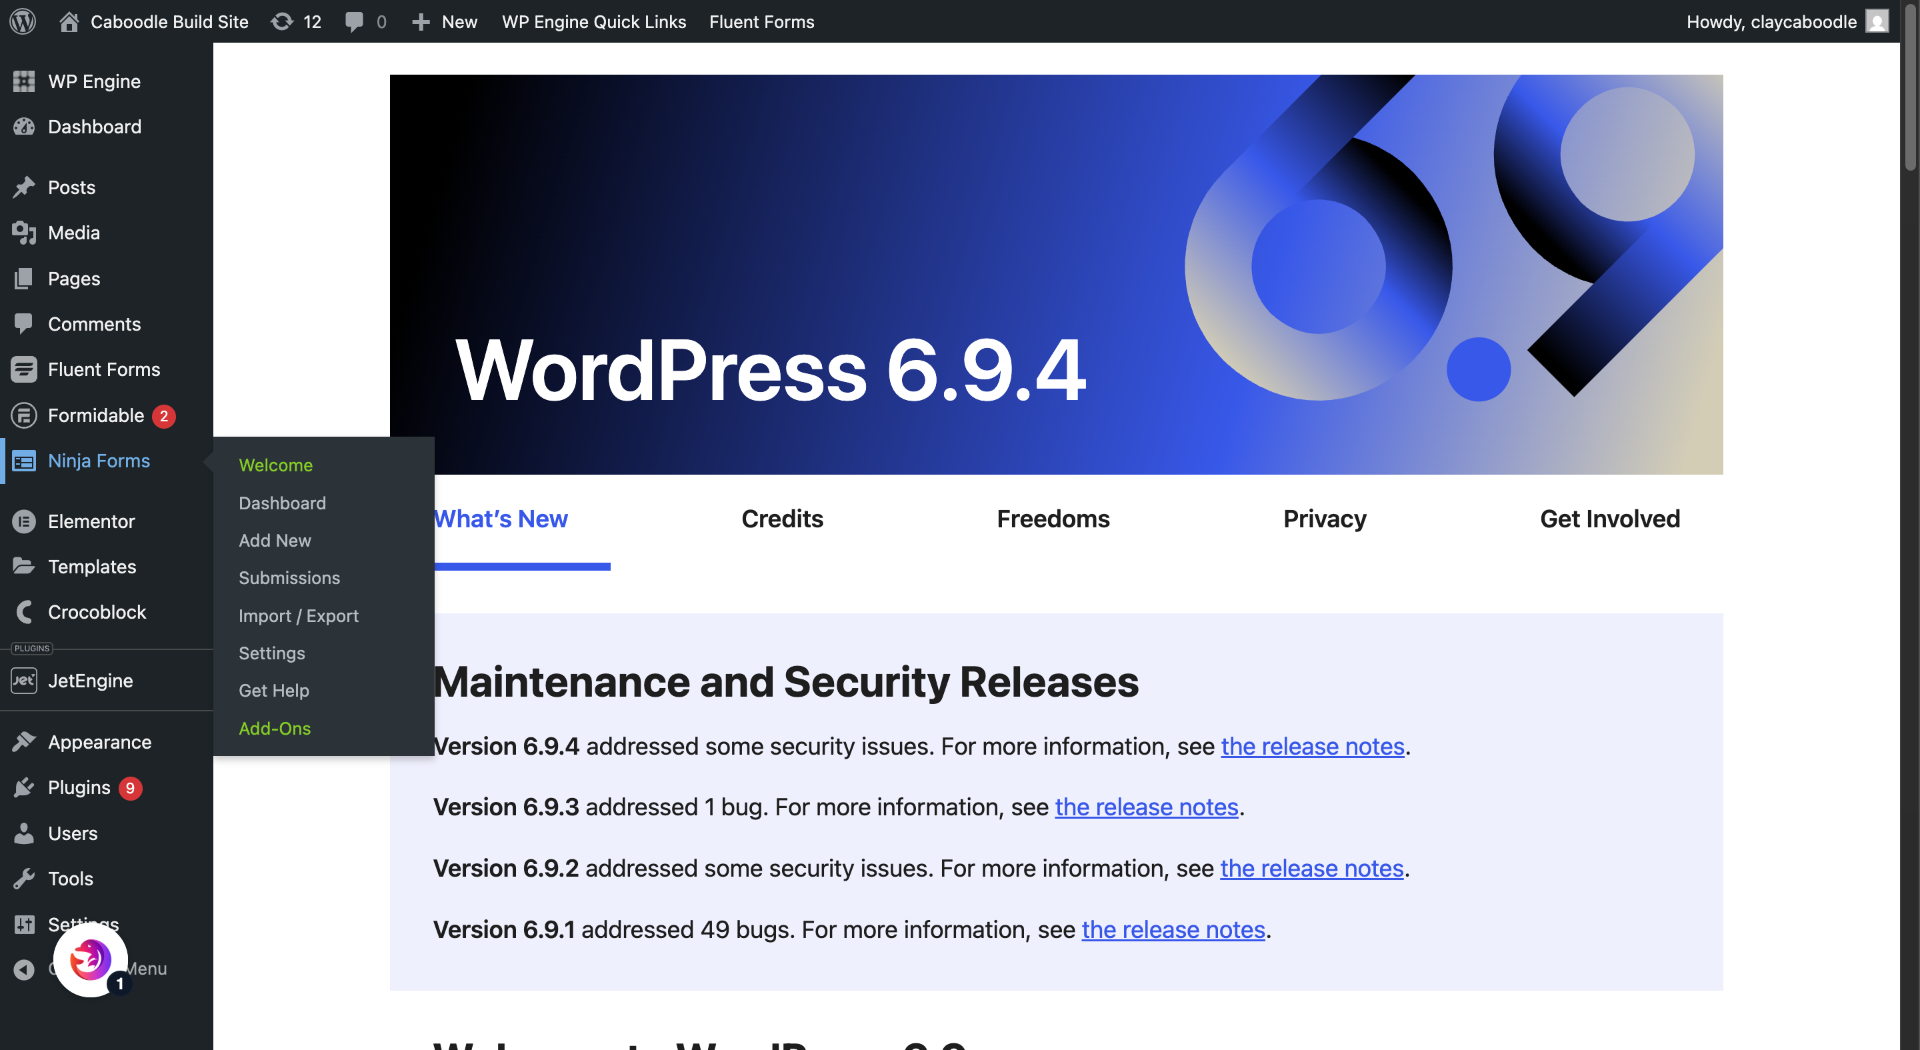
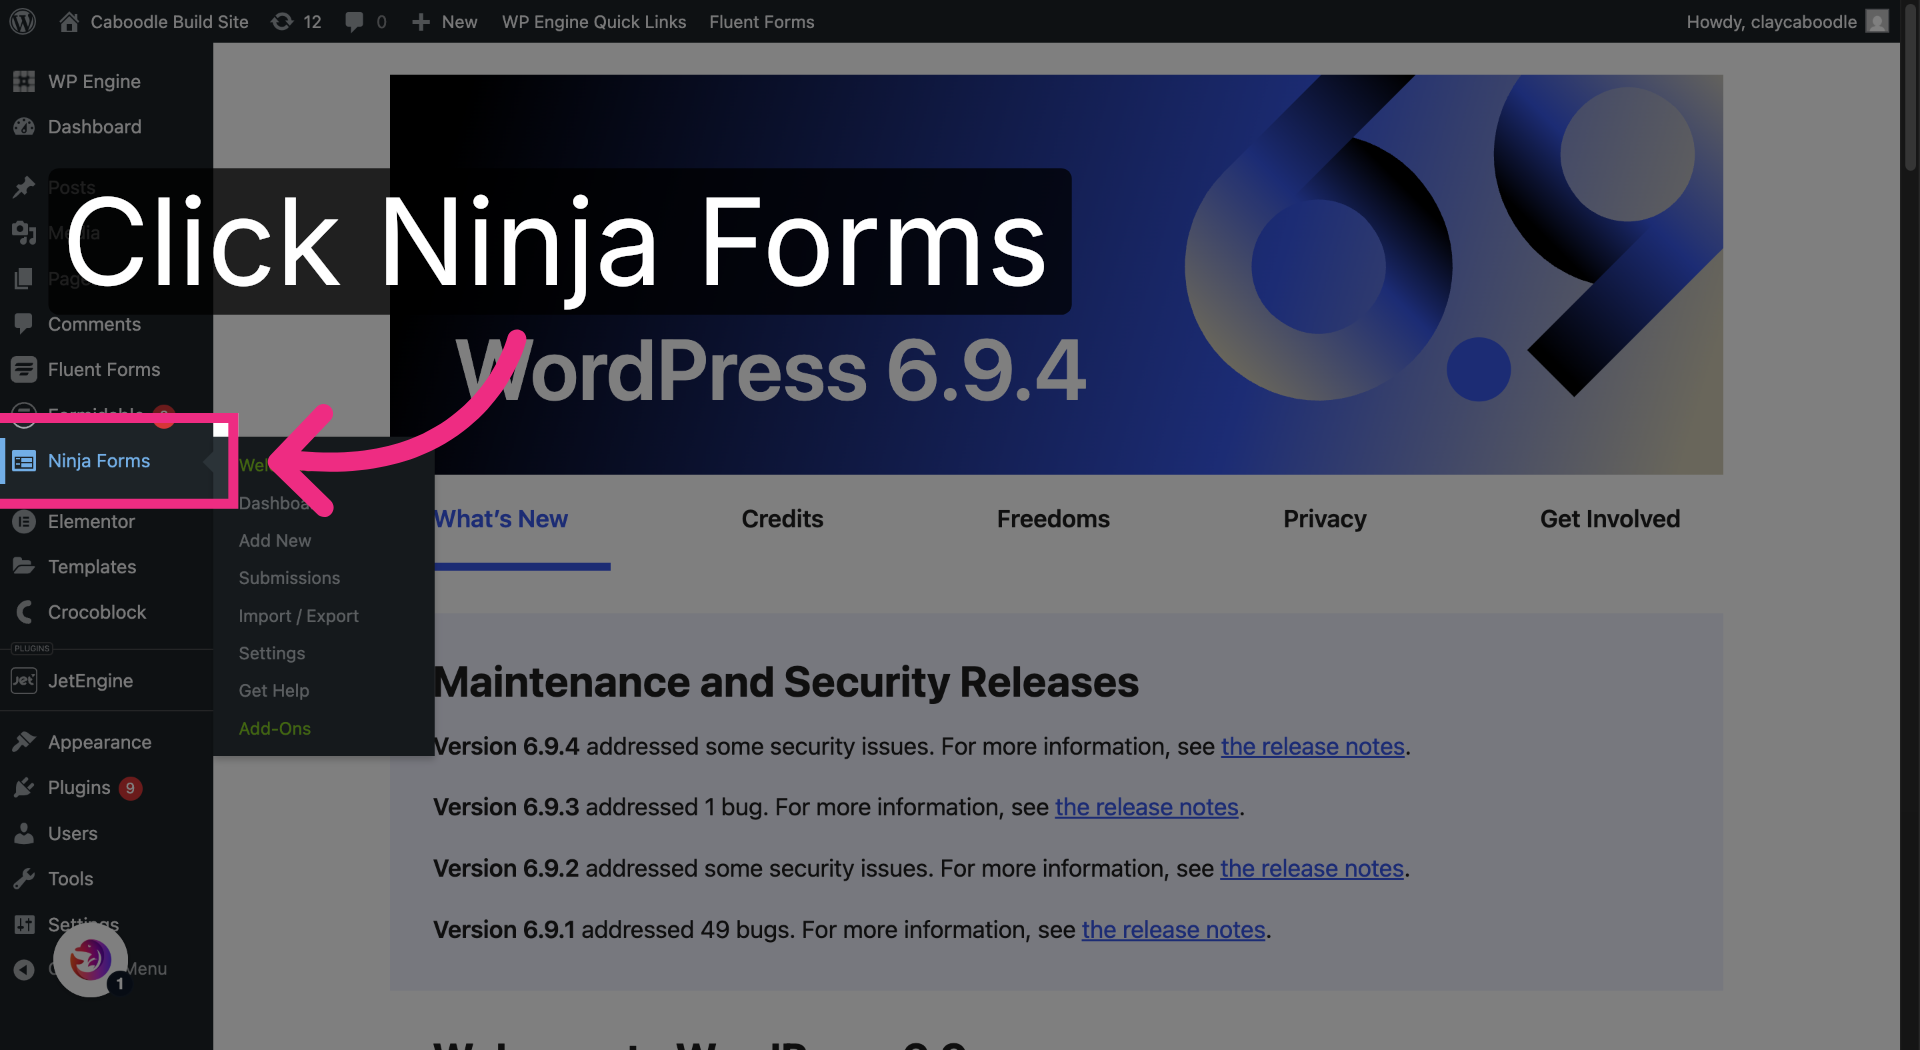
4. Open Ninja Forms Plugin
Open the Ninja Forms plugin.
5. Navigate To Dashboard
Open the Ninja Forms dashboard.

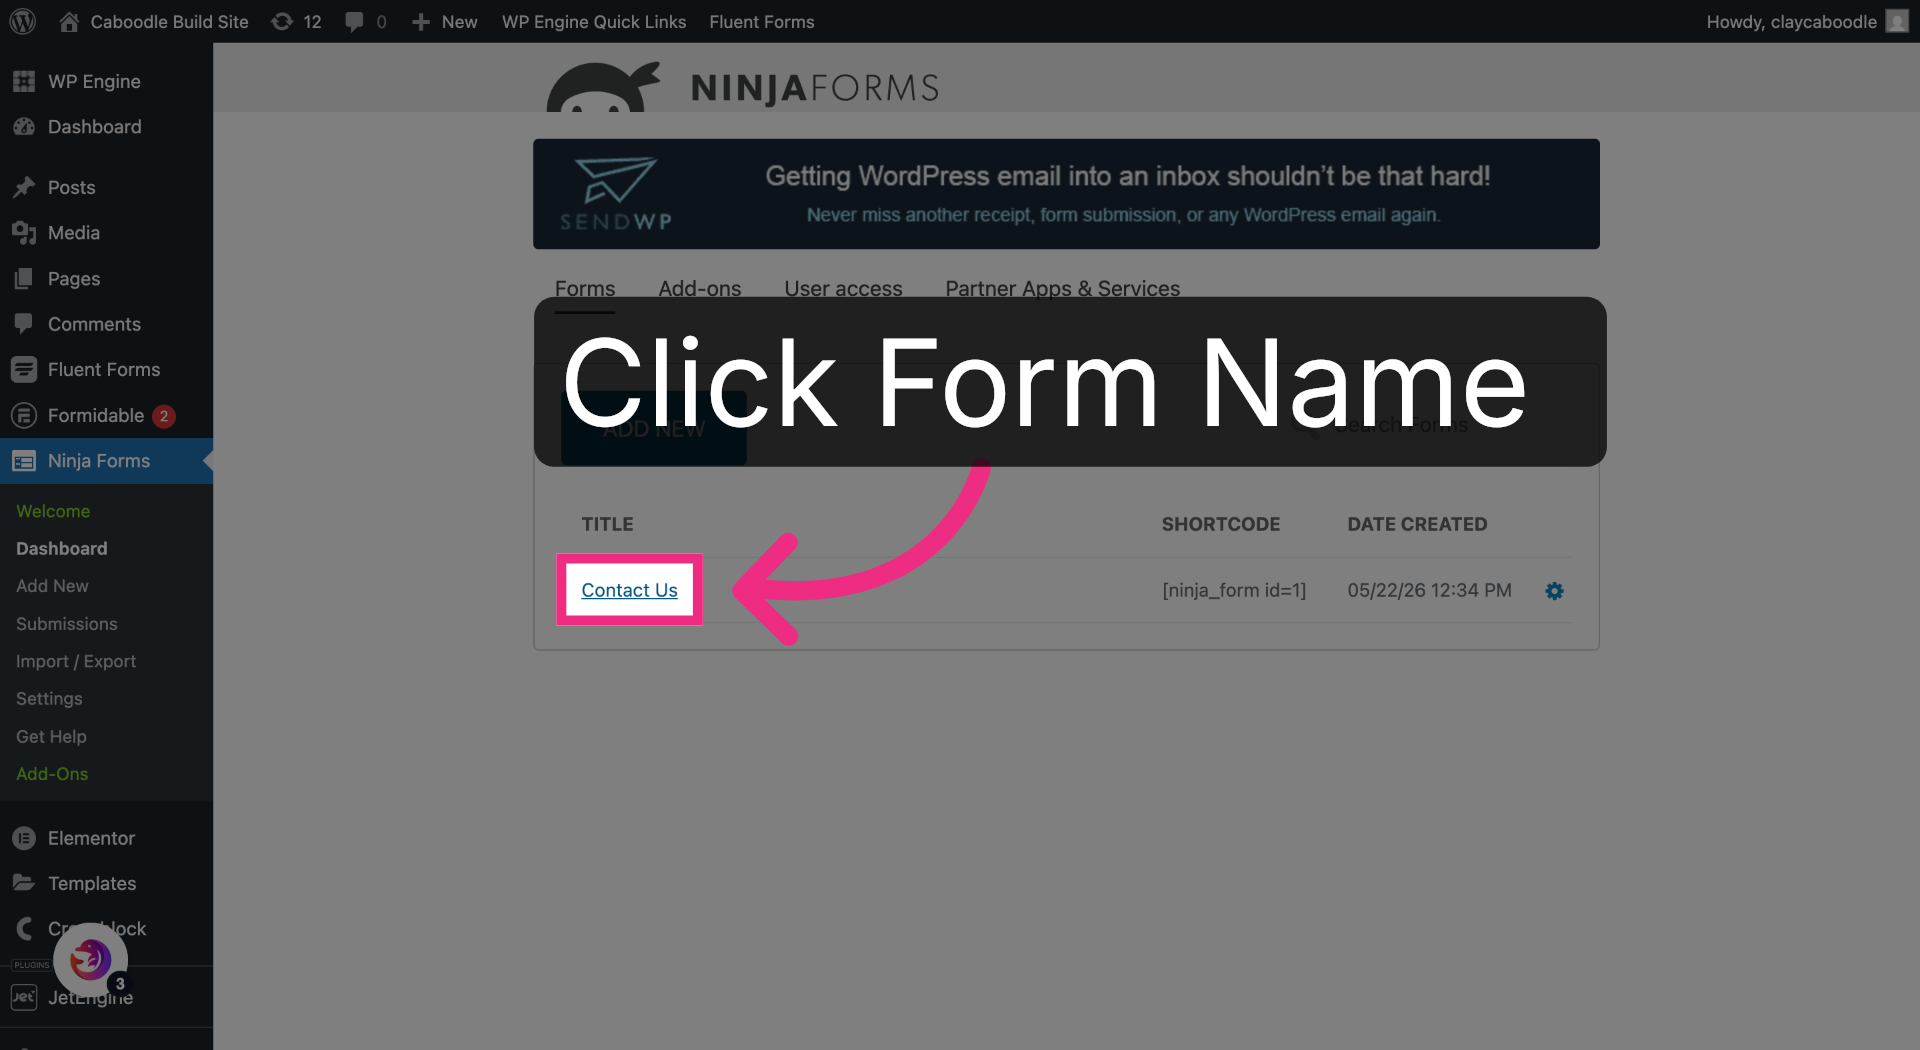
6. Access Contact Us Form
Open your form.
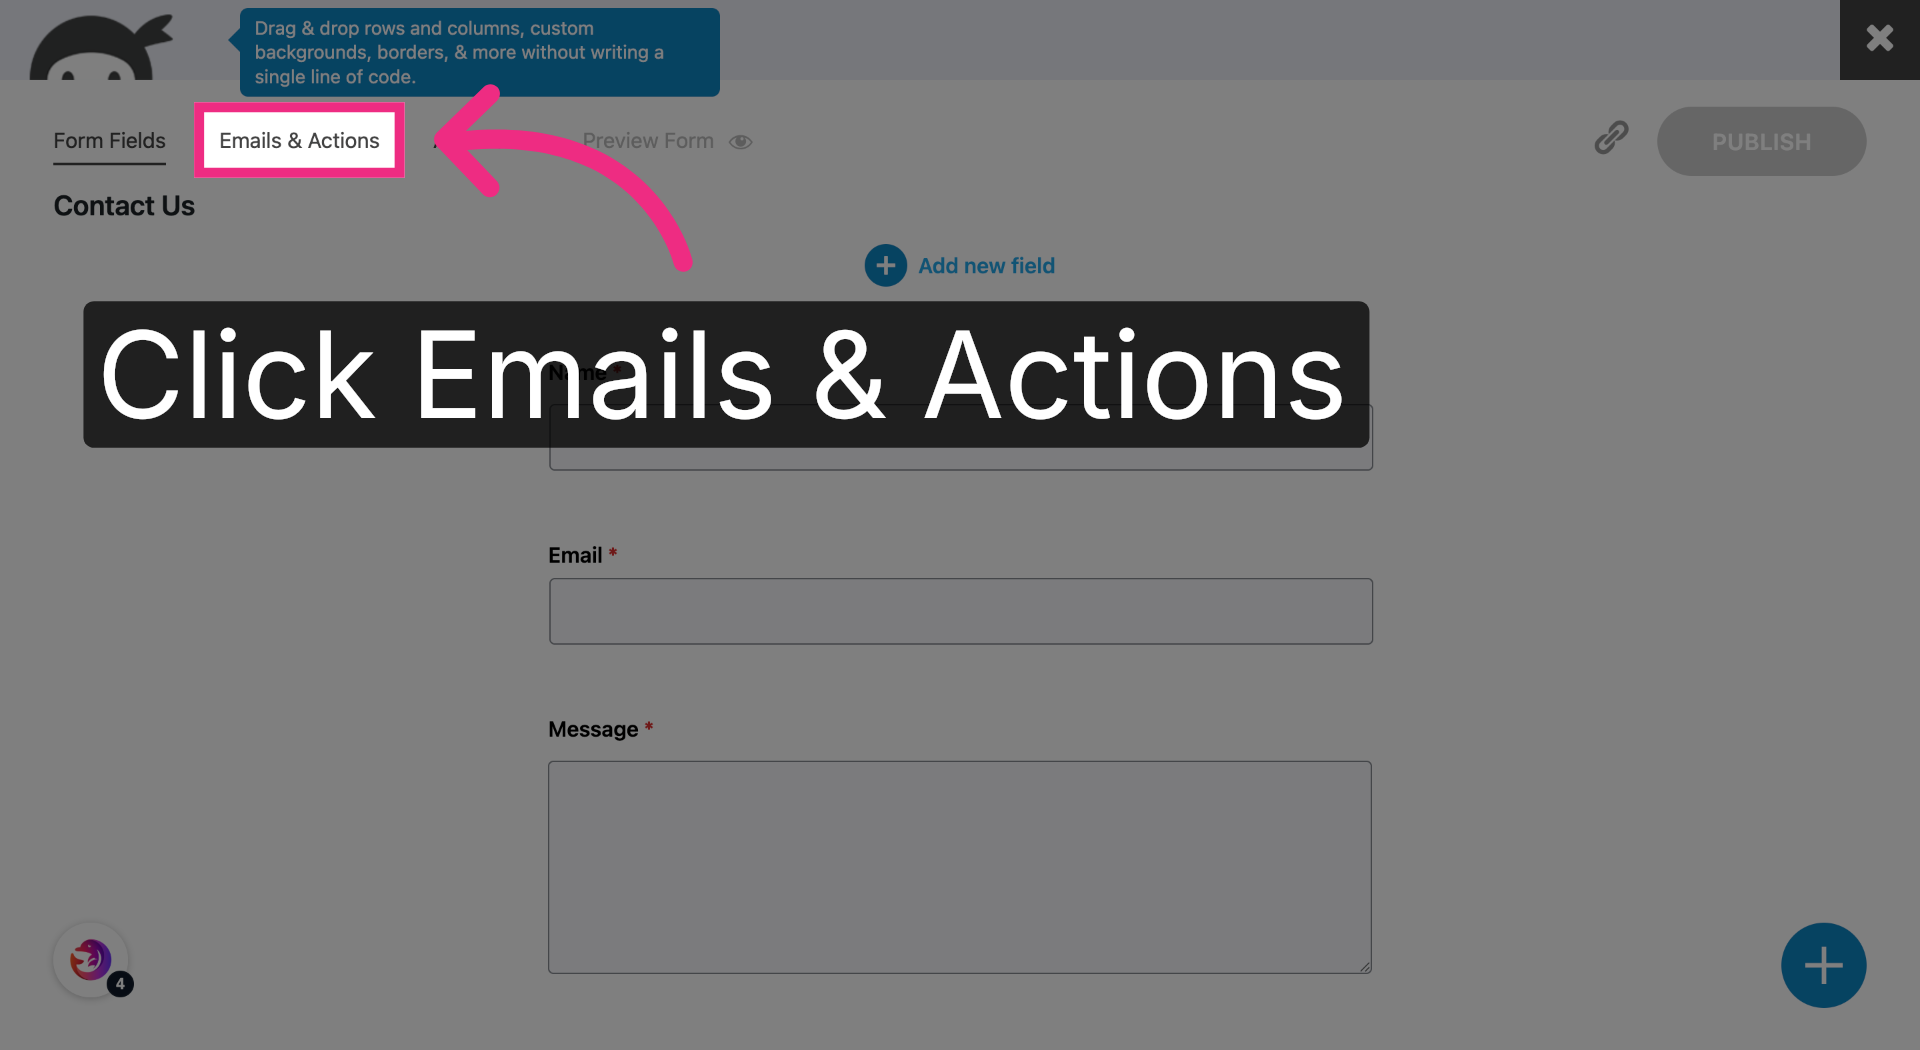
7. Open Emails & Actions Settings
Open the Emails & Actions tab.
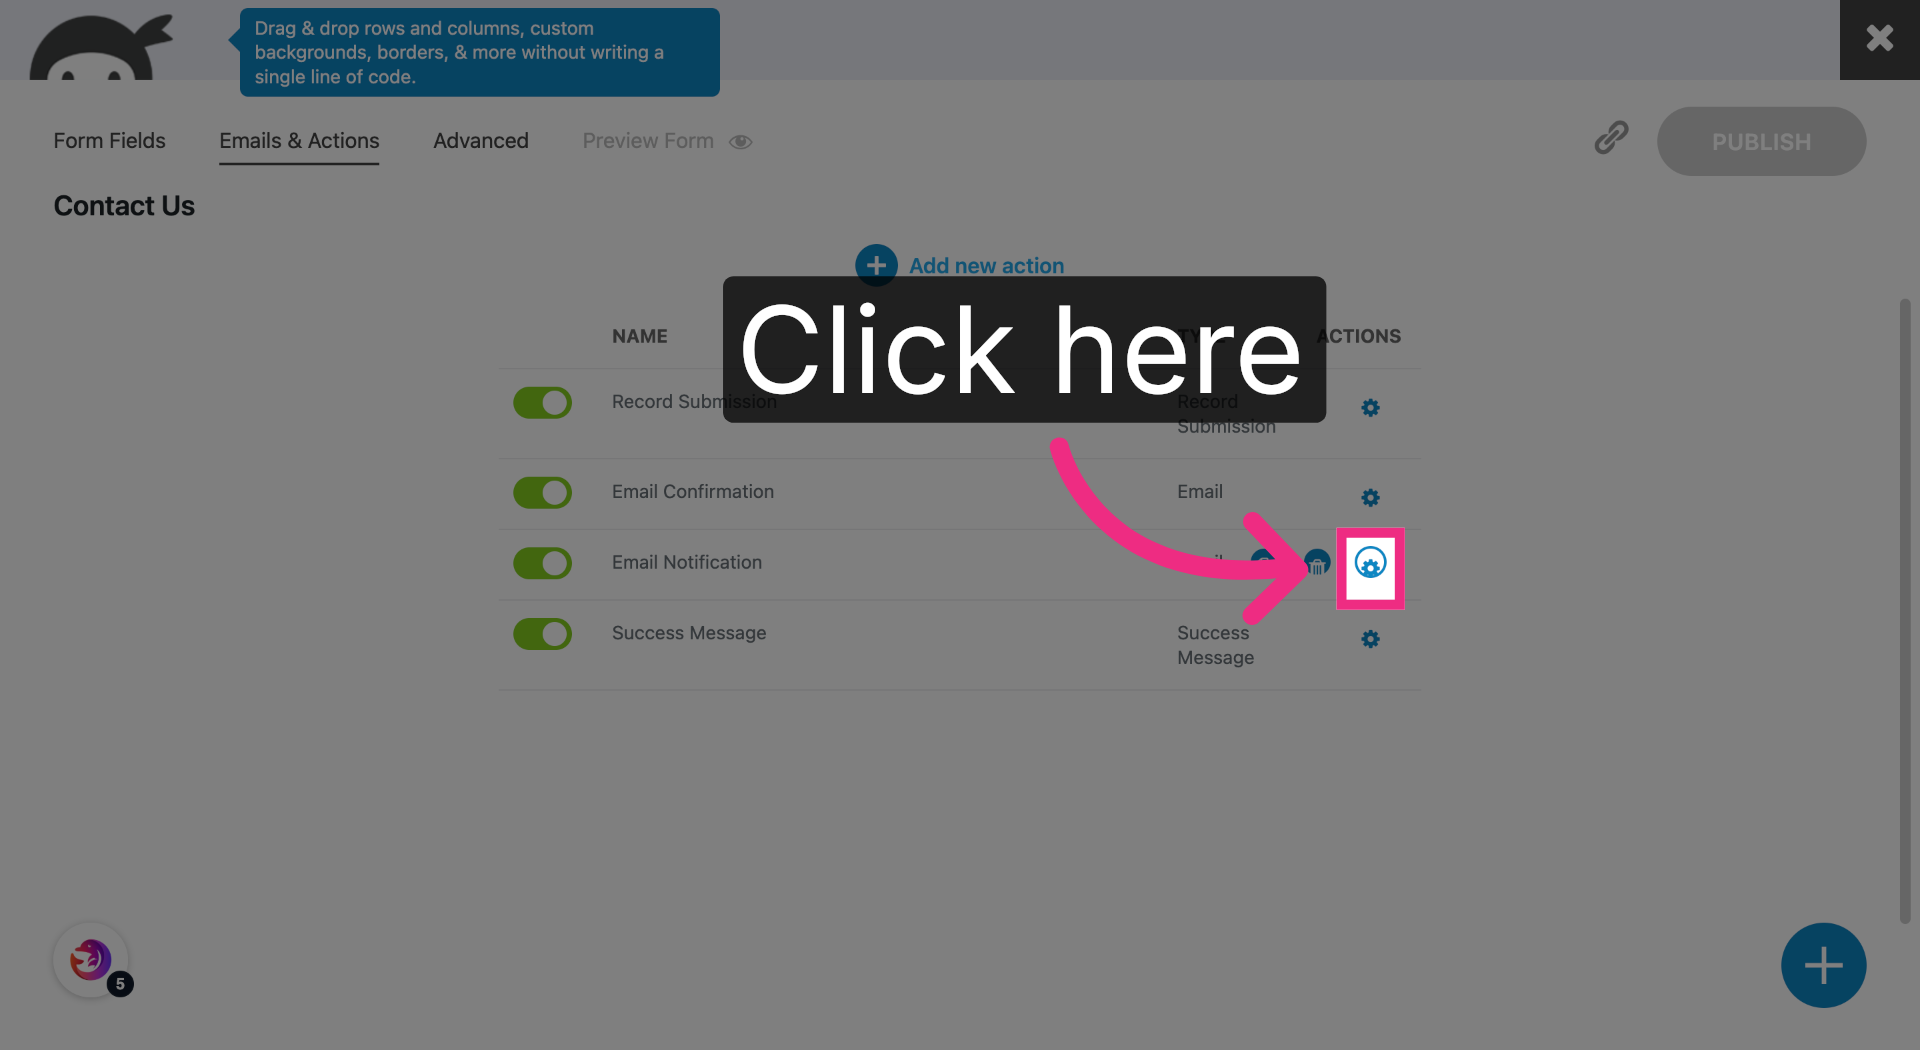
8. Add New Email Action
Open the form's email notification settings.
9. Edit Recipient Field
Click the To field.
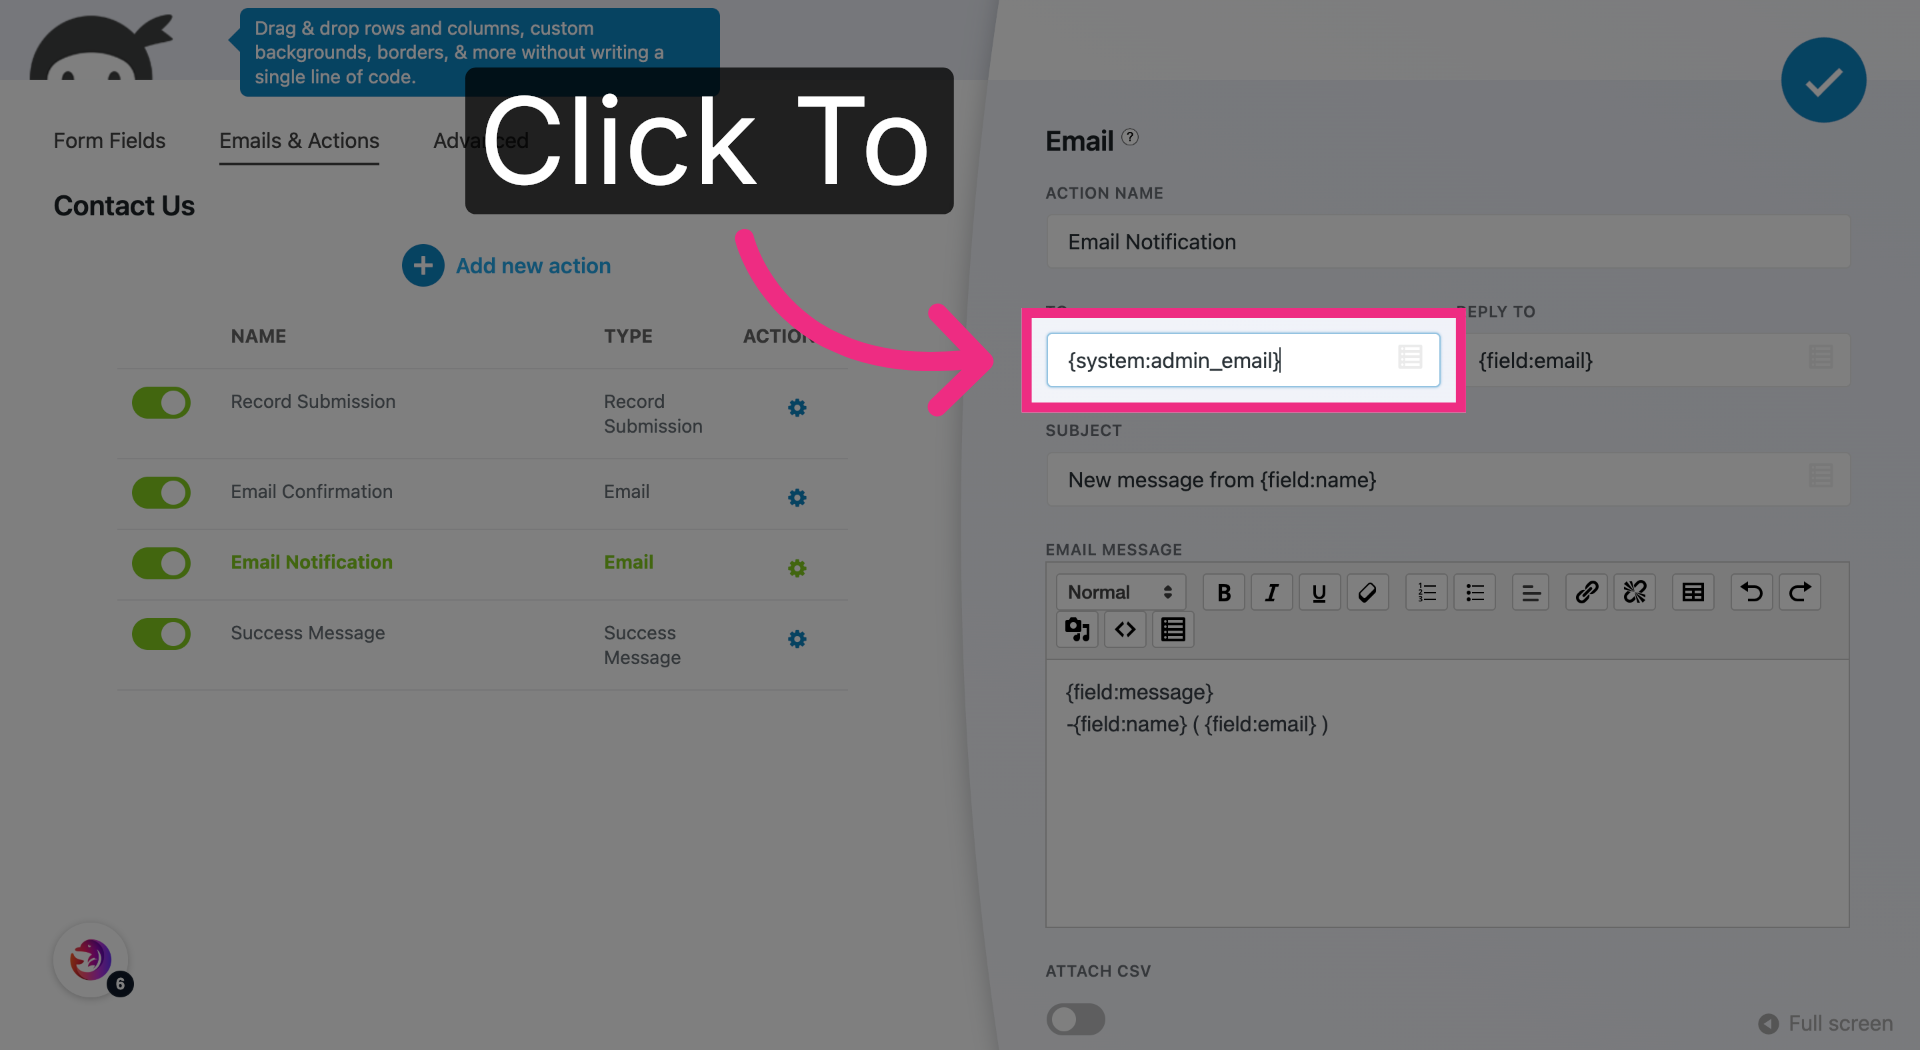
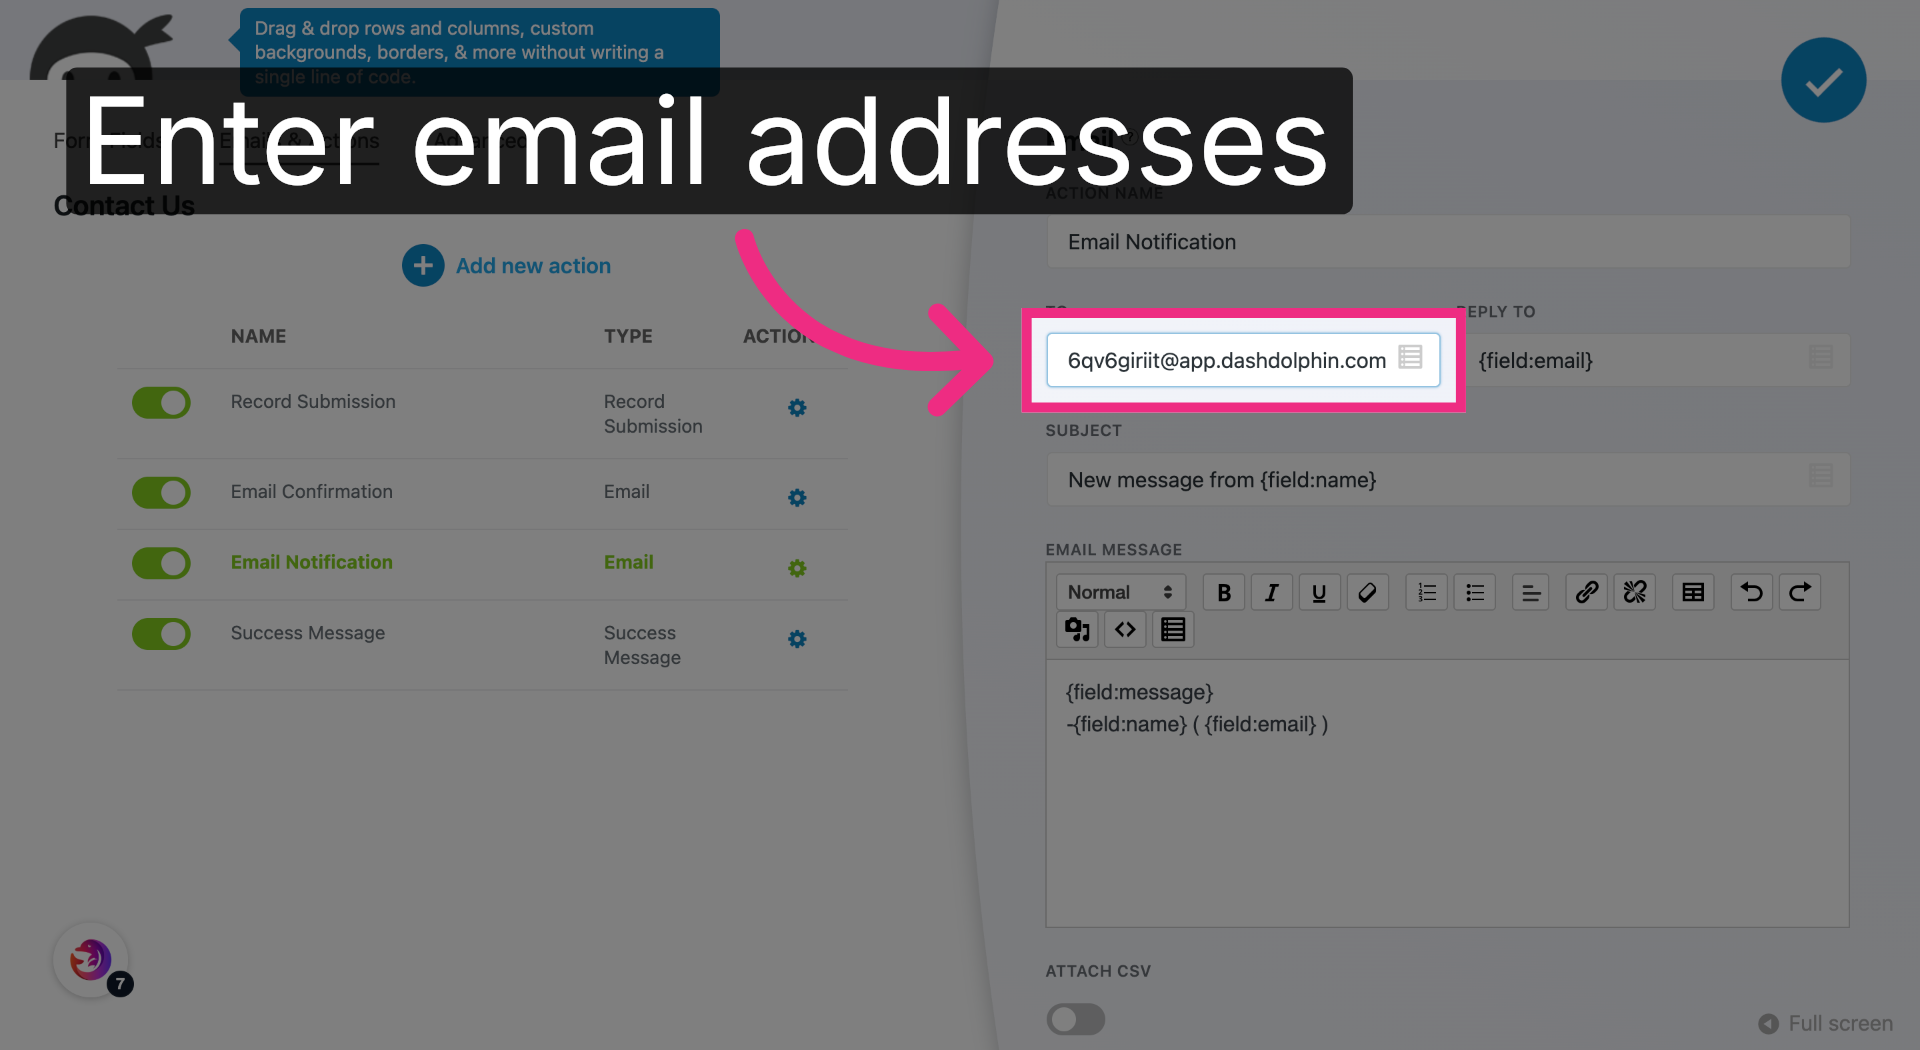
10. Enter Notification Emails
Add the Dash Dolphin notification email address after your existing admin email, separated by a comma.
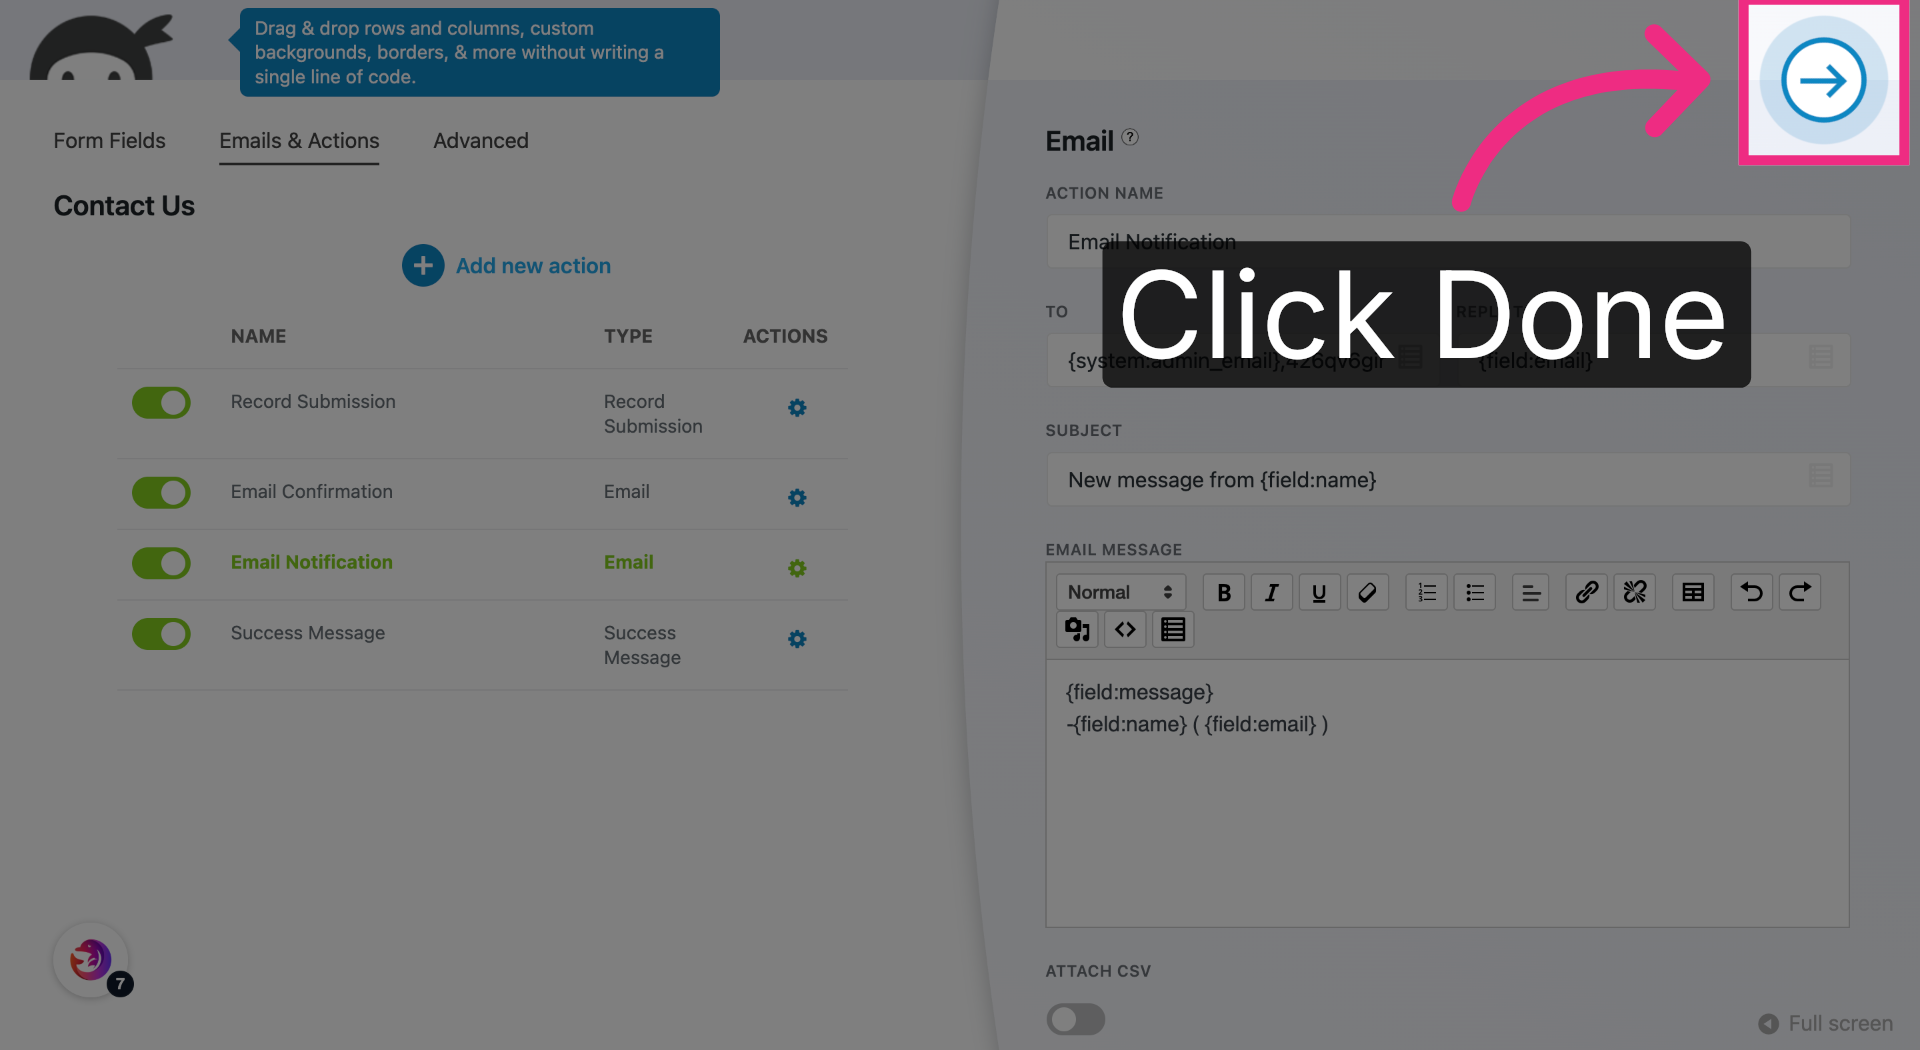
11. Confirm Email Settings
Apply the notification settings.
12. Publish Form Changes
Publish your form changes.

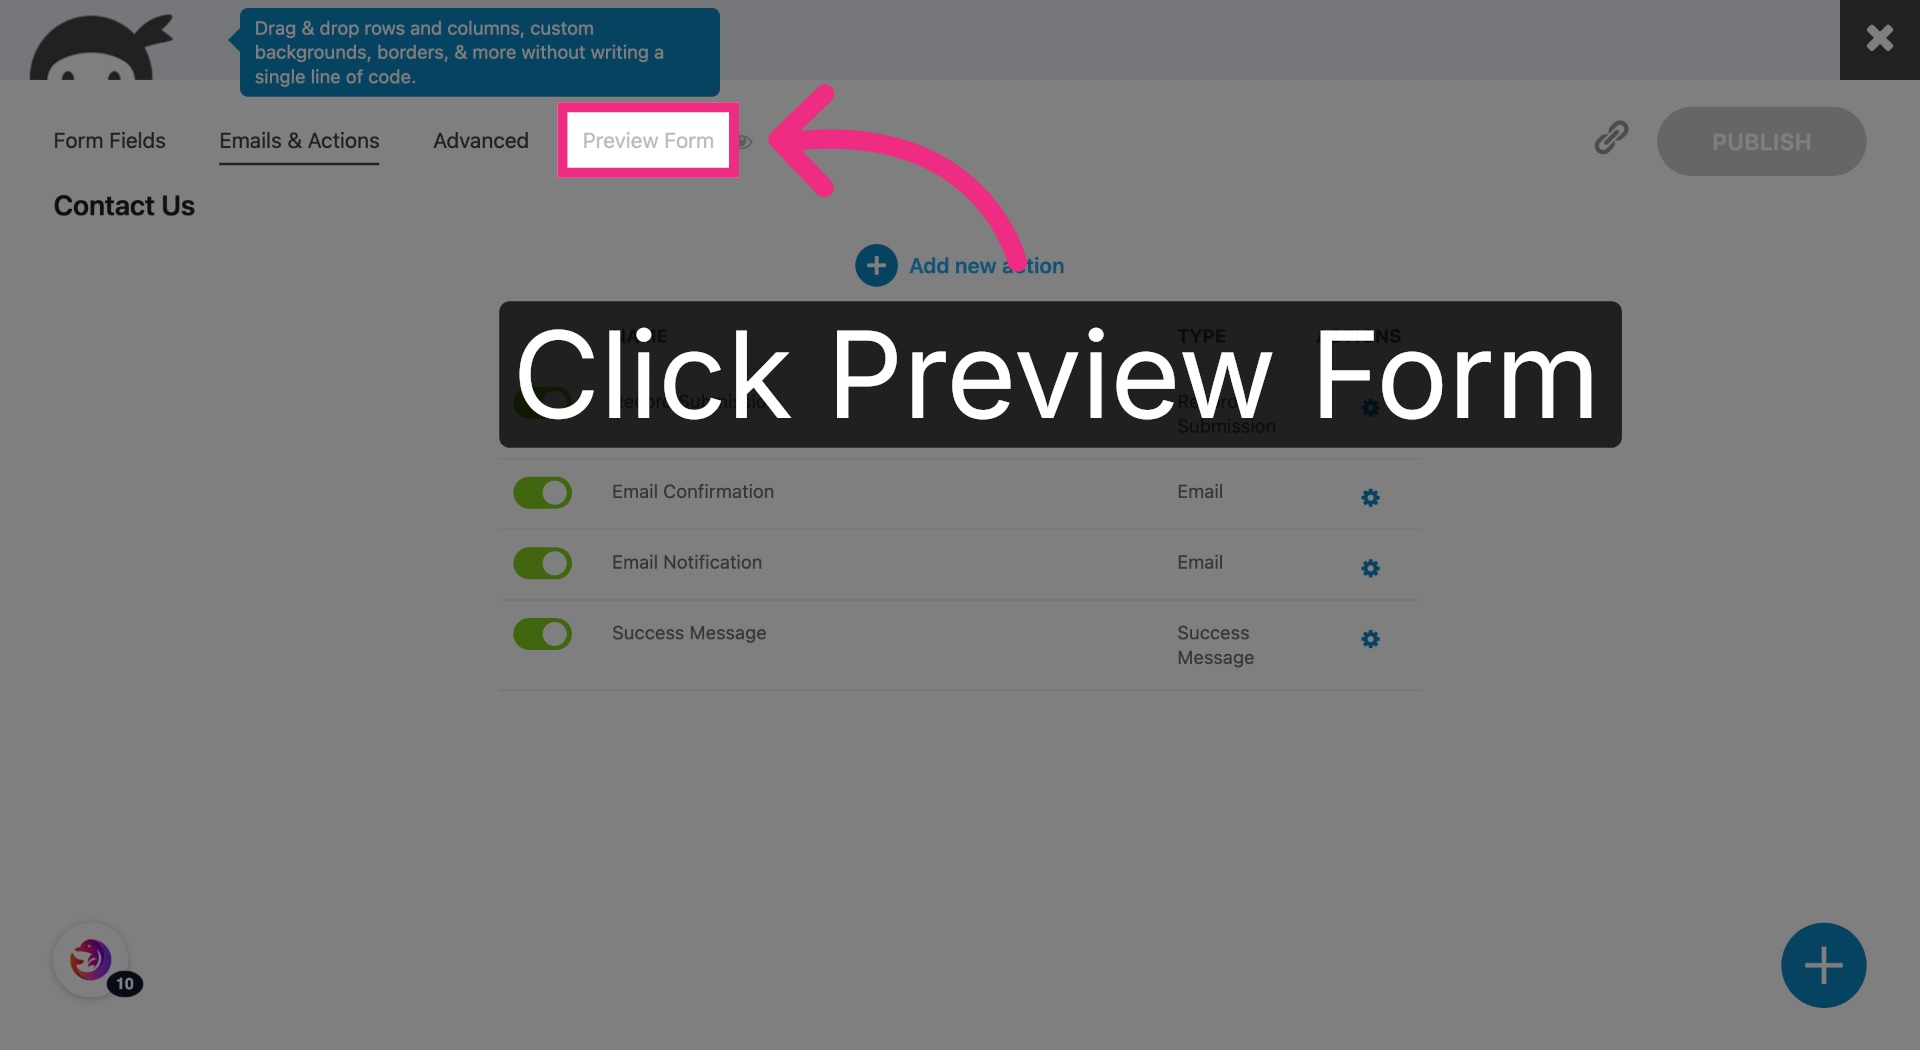
13. Preview Updated Form
Preview the form and submit a test entry to confirm SMS delivery.
You have successfully configured your Ninja Forms form to send notification emails to Dash Dolphin, enabling instant SMS alerts. Test the setup by submitting a form and verifying the SMS notification delivery.