Once you've created your connection and received your notification email address, you can configure your WooCommerce store to forward order notifications to Dash Dolphin.
1. Introduction
You'll learn how to send WooCommerce order notification emails to Dash Dolphin for instant SMS alerts.
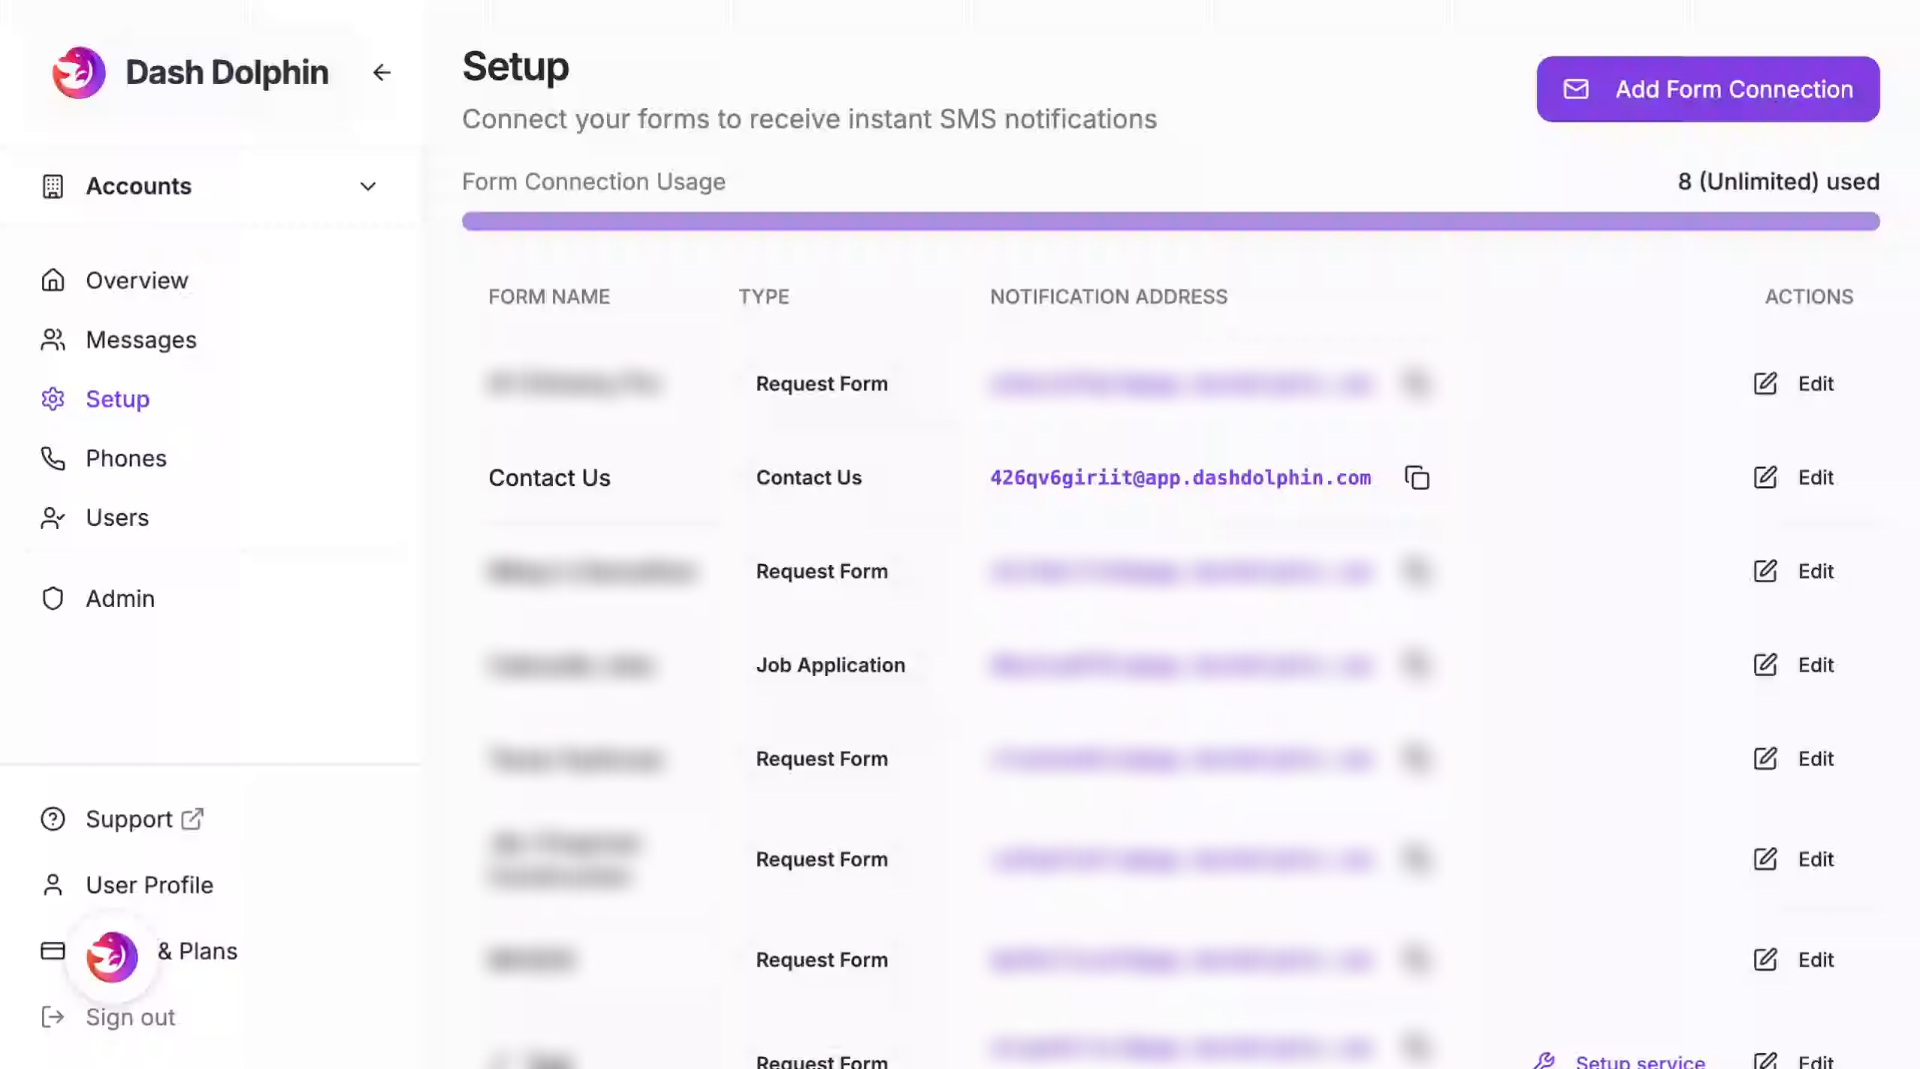
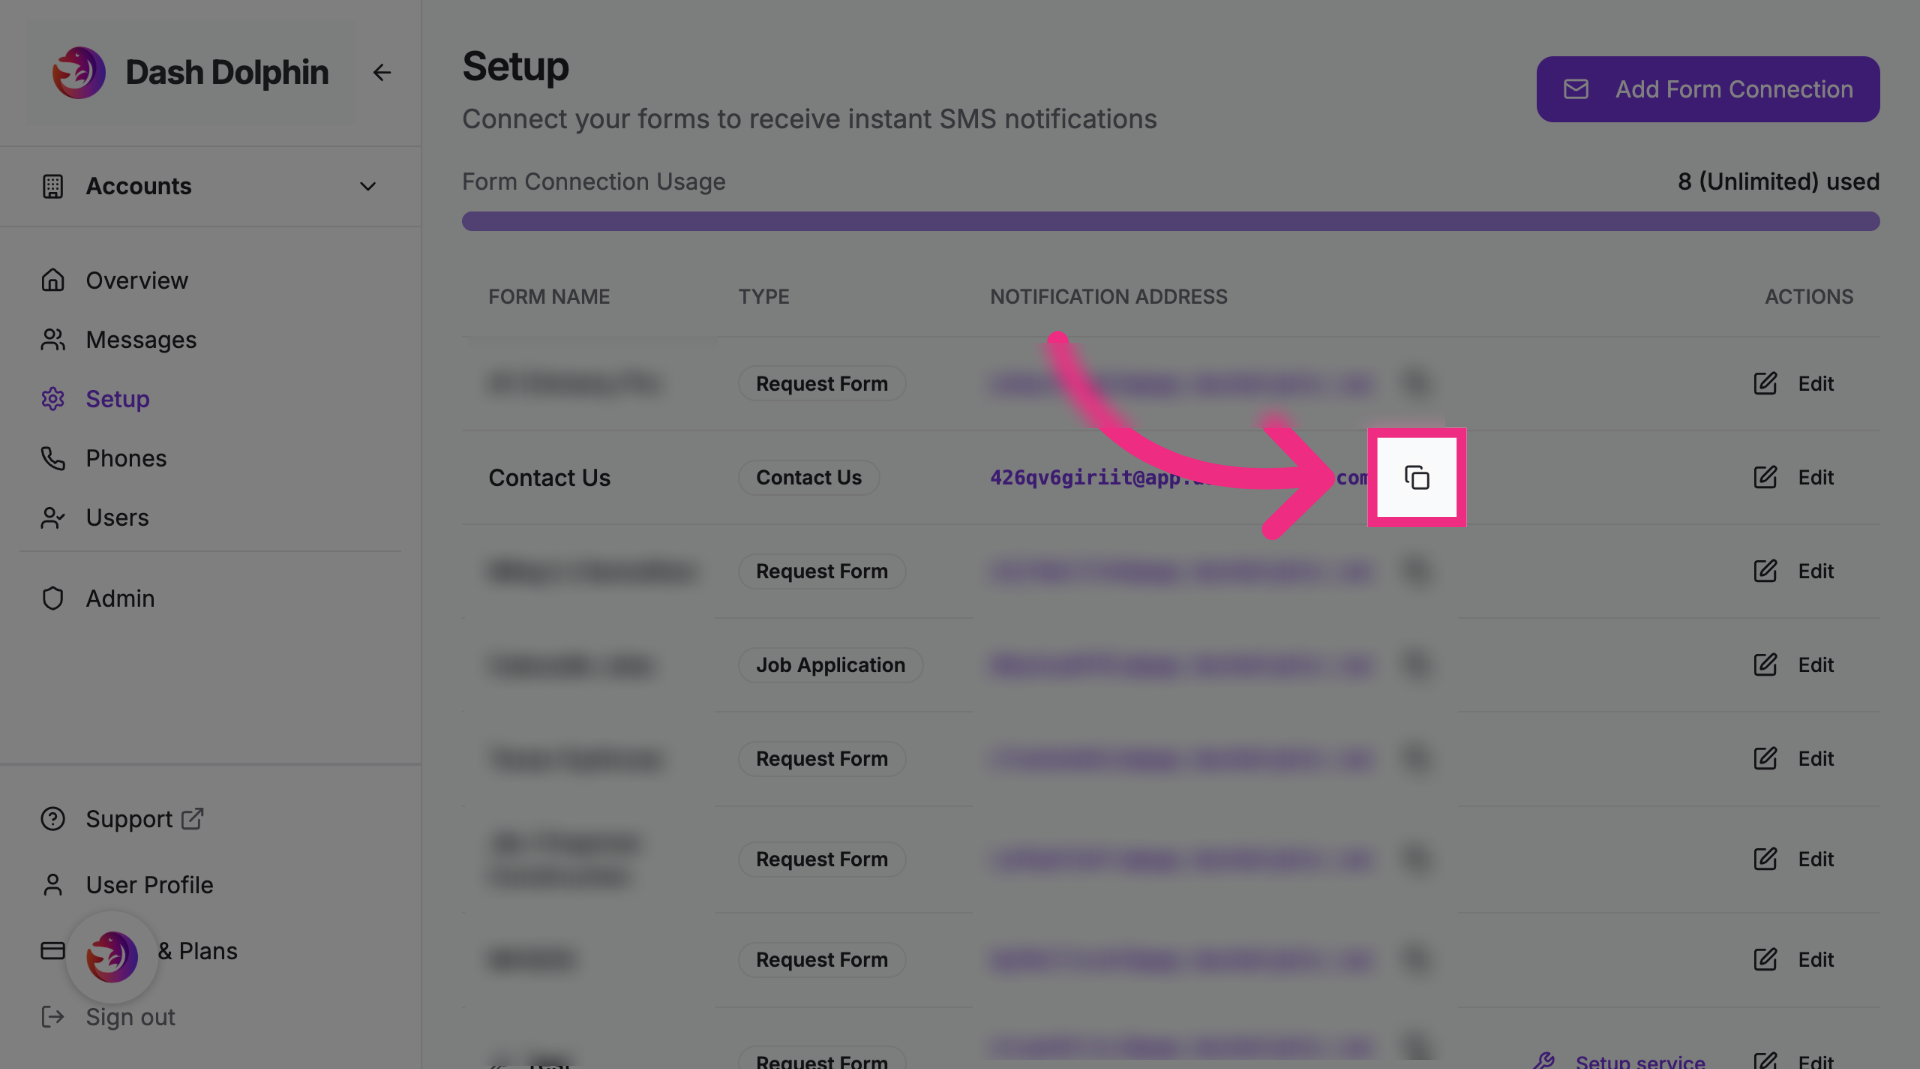
2. Copy Notification Email Address
Copy the notification email address from your Dash Dolphin connection.
3. Switch to WordPress Dashboard
Open your WordPress dashboard.
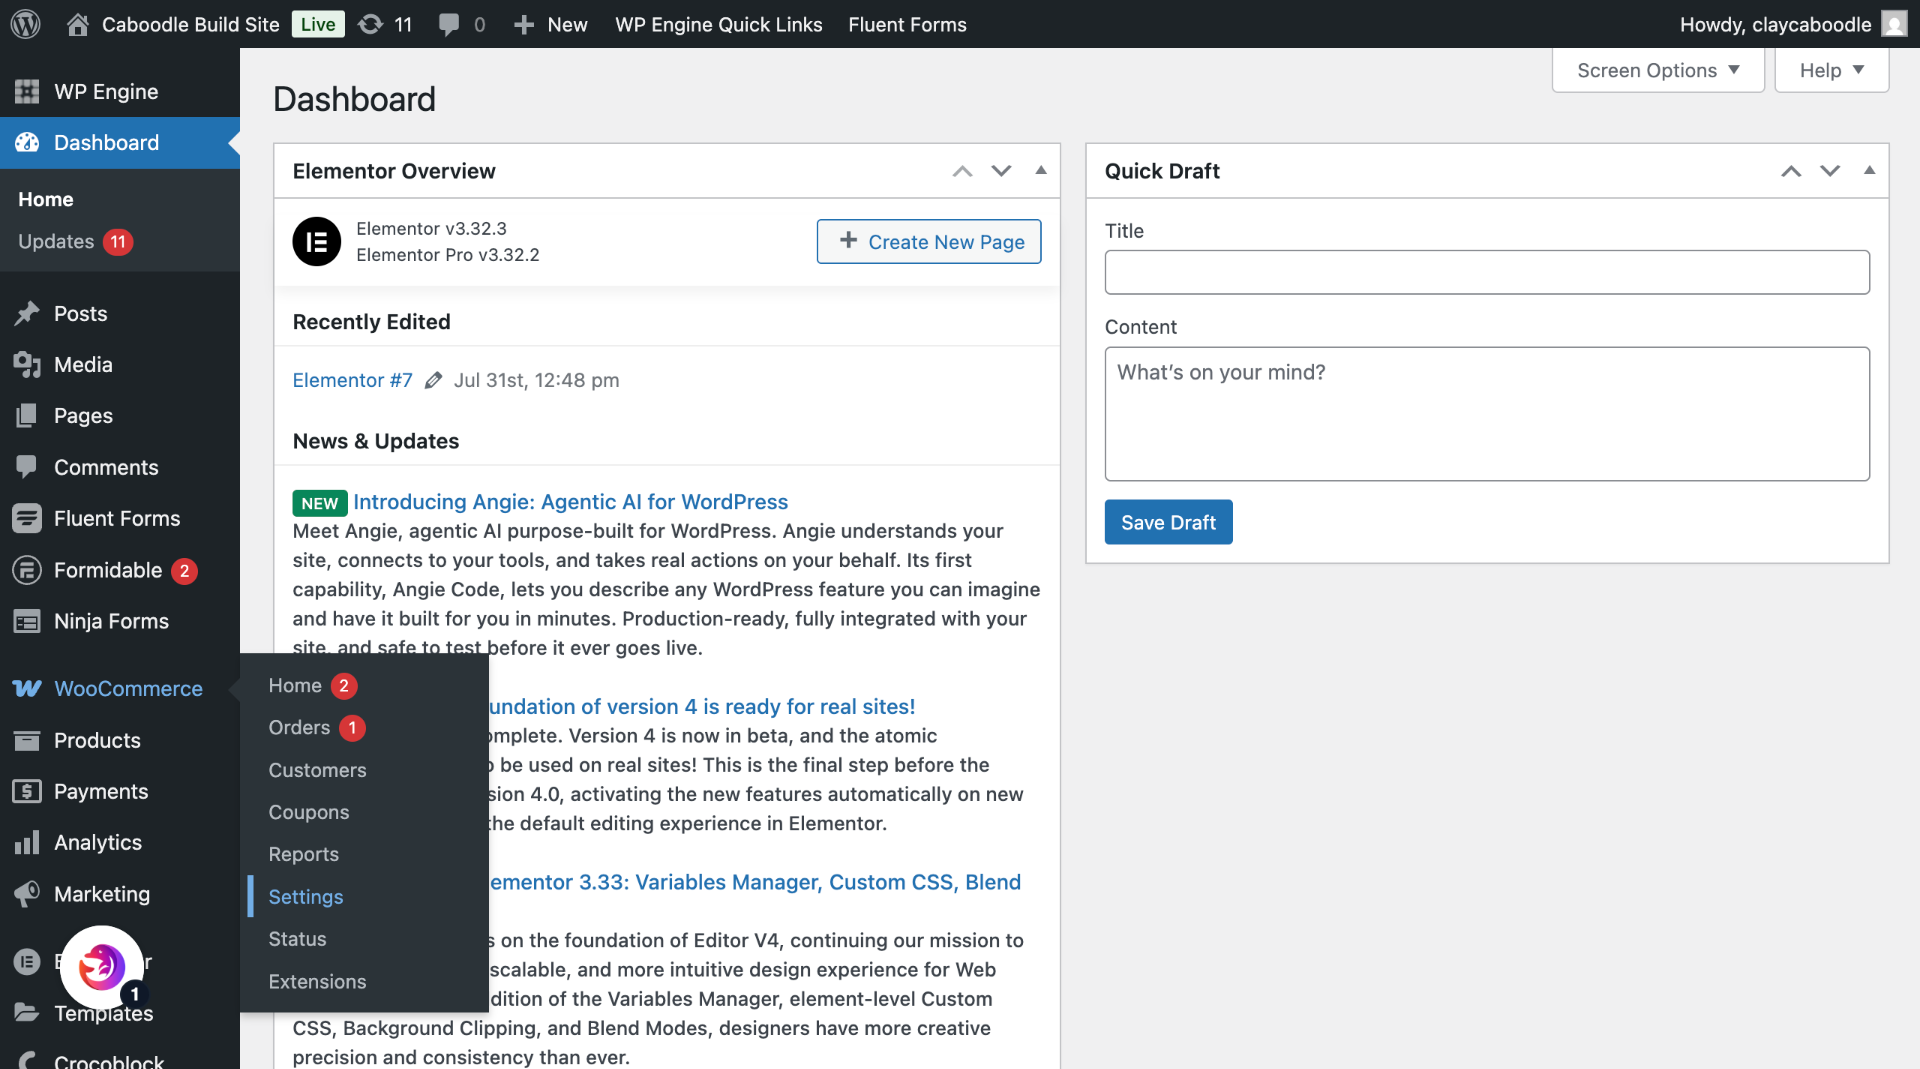
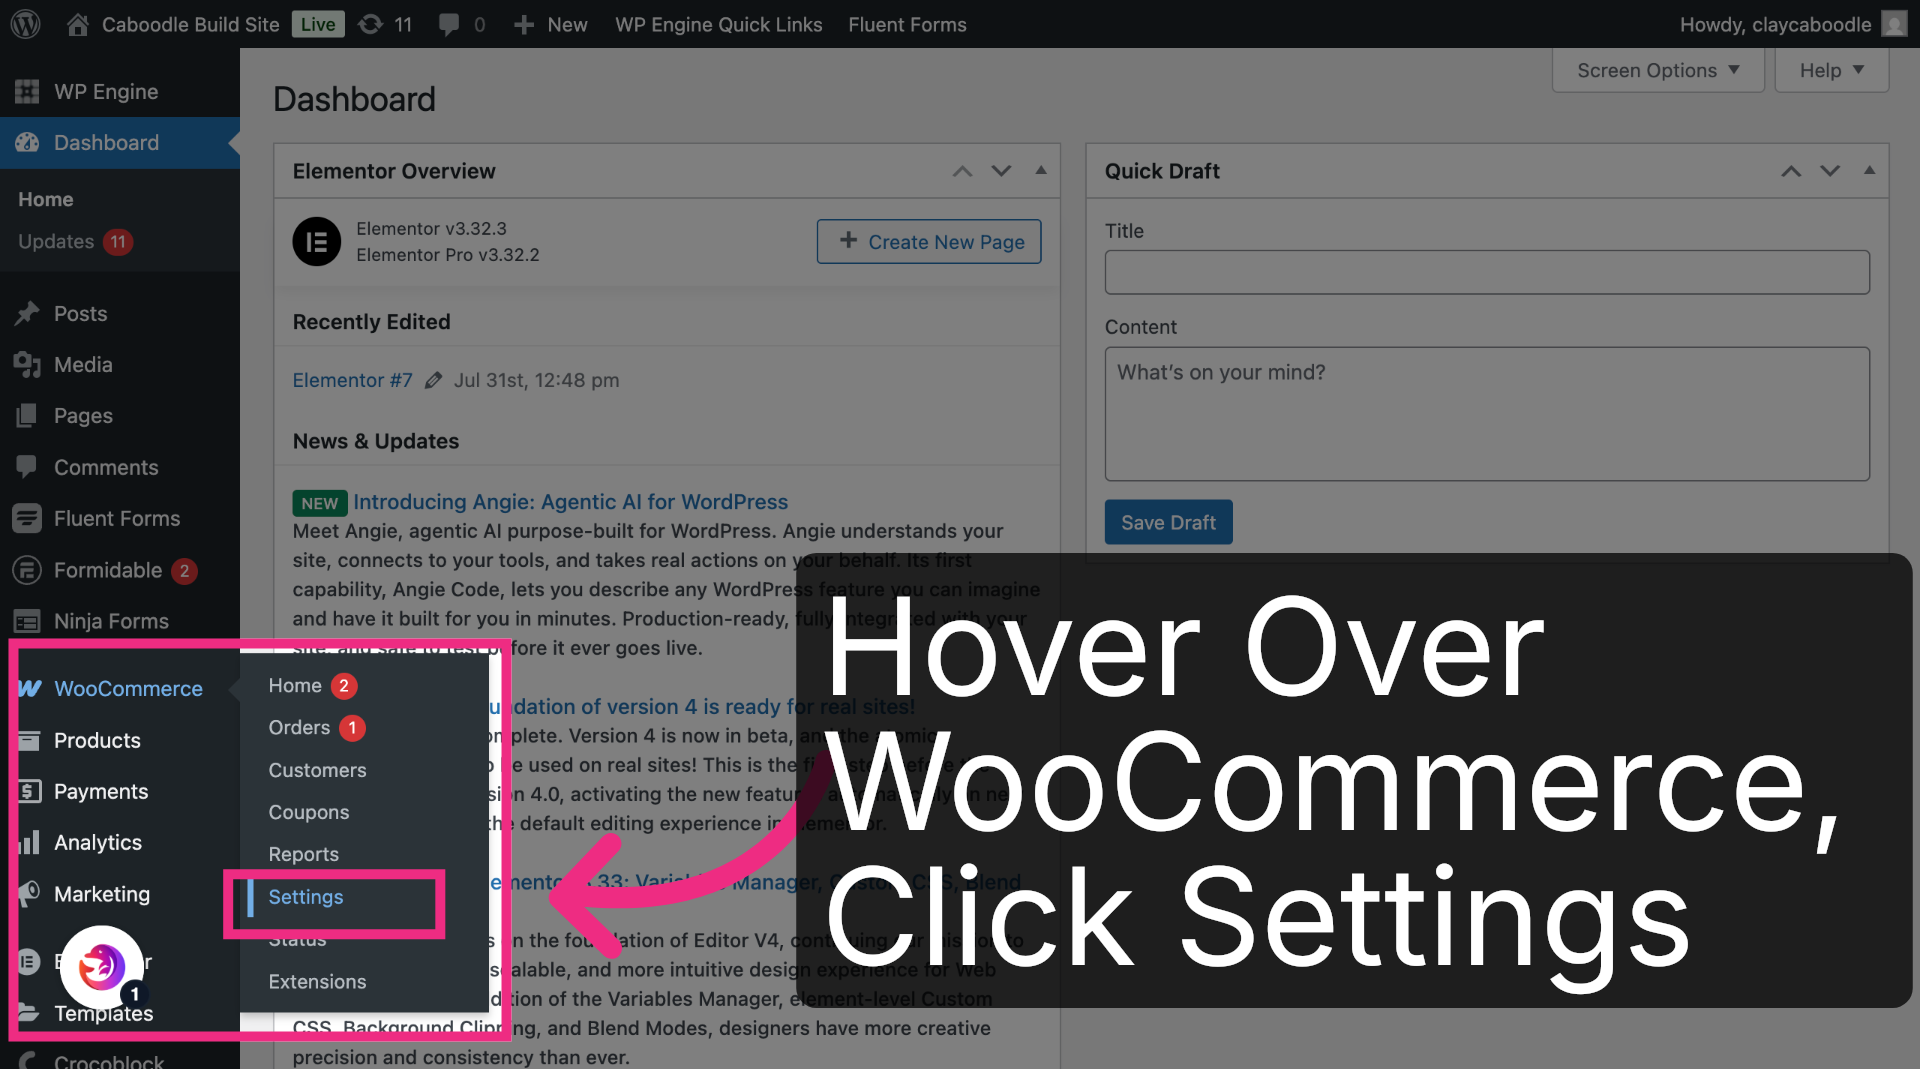
4. Open WooCommerce Settings
Hover over WooCommerce and click Settings.
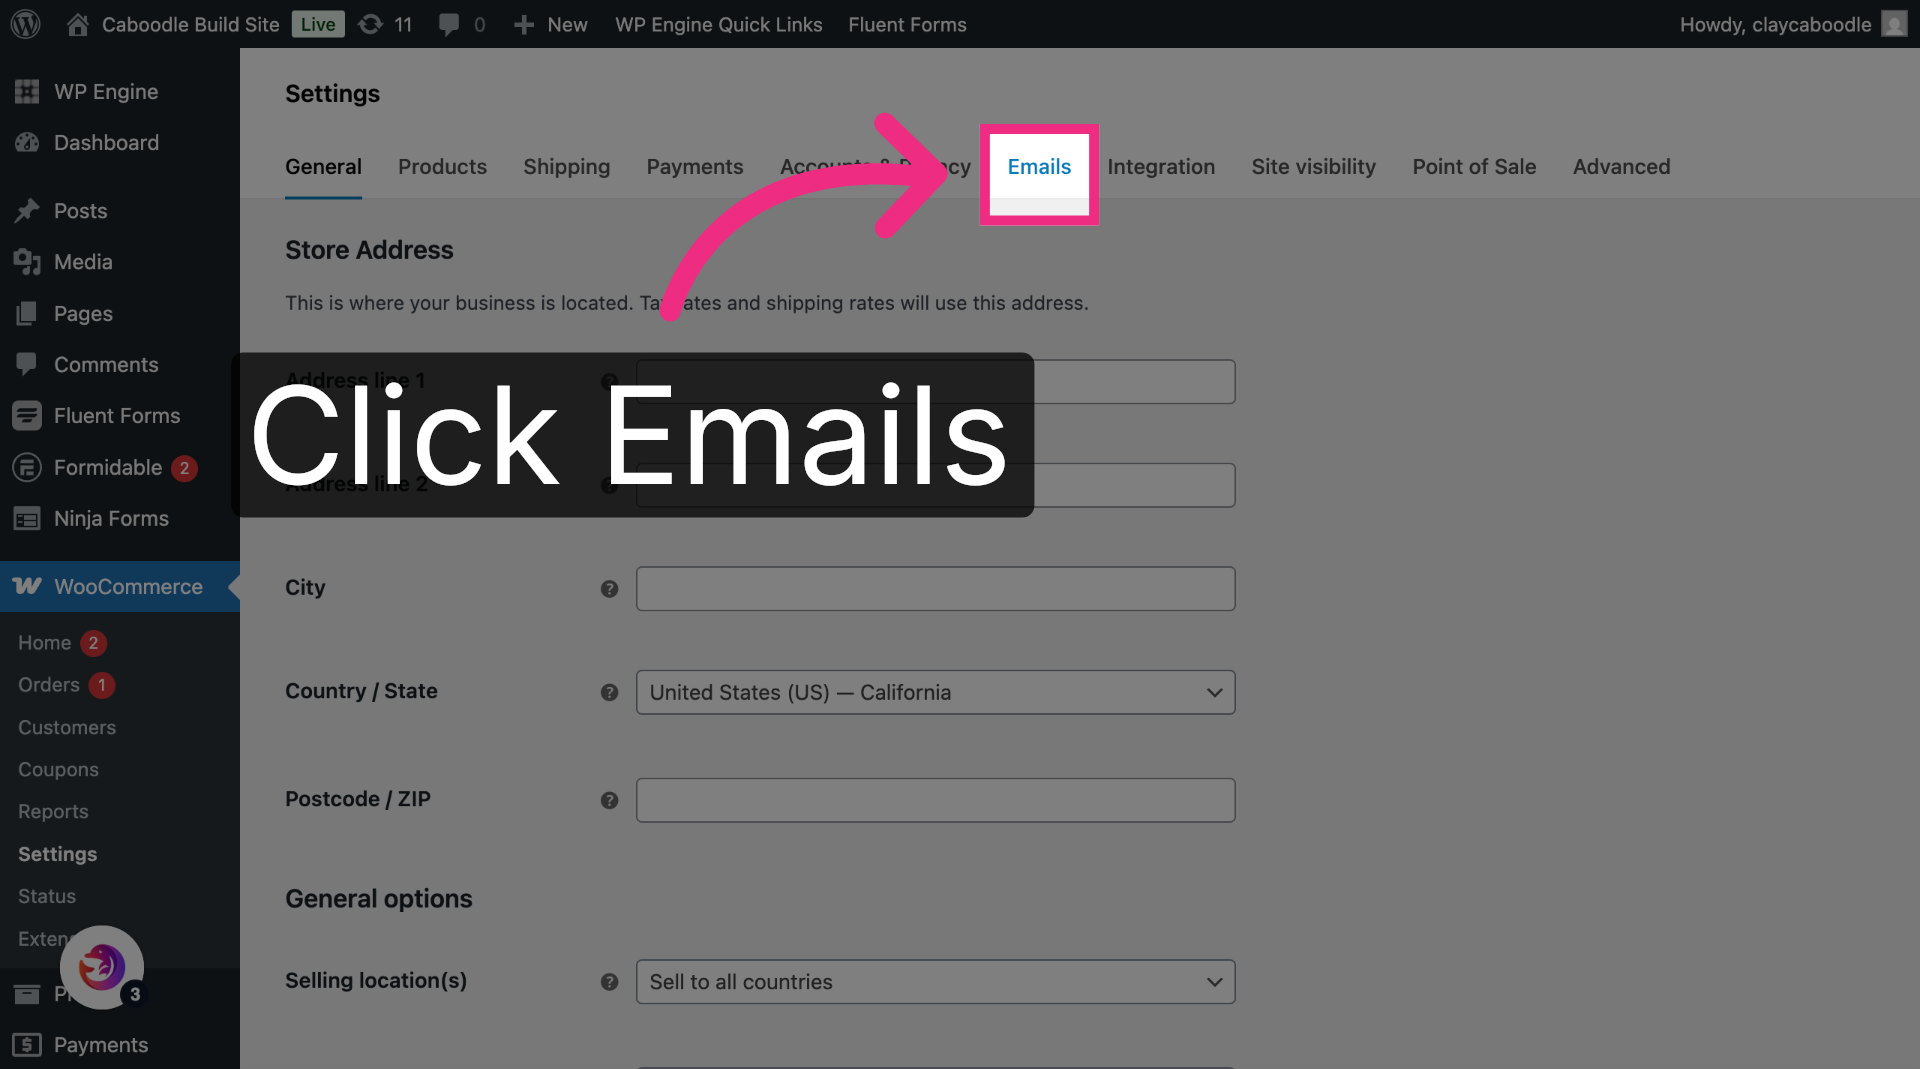
5. Navigate to Emails Tab
Click the Emails tab to view your store's email notifications.
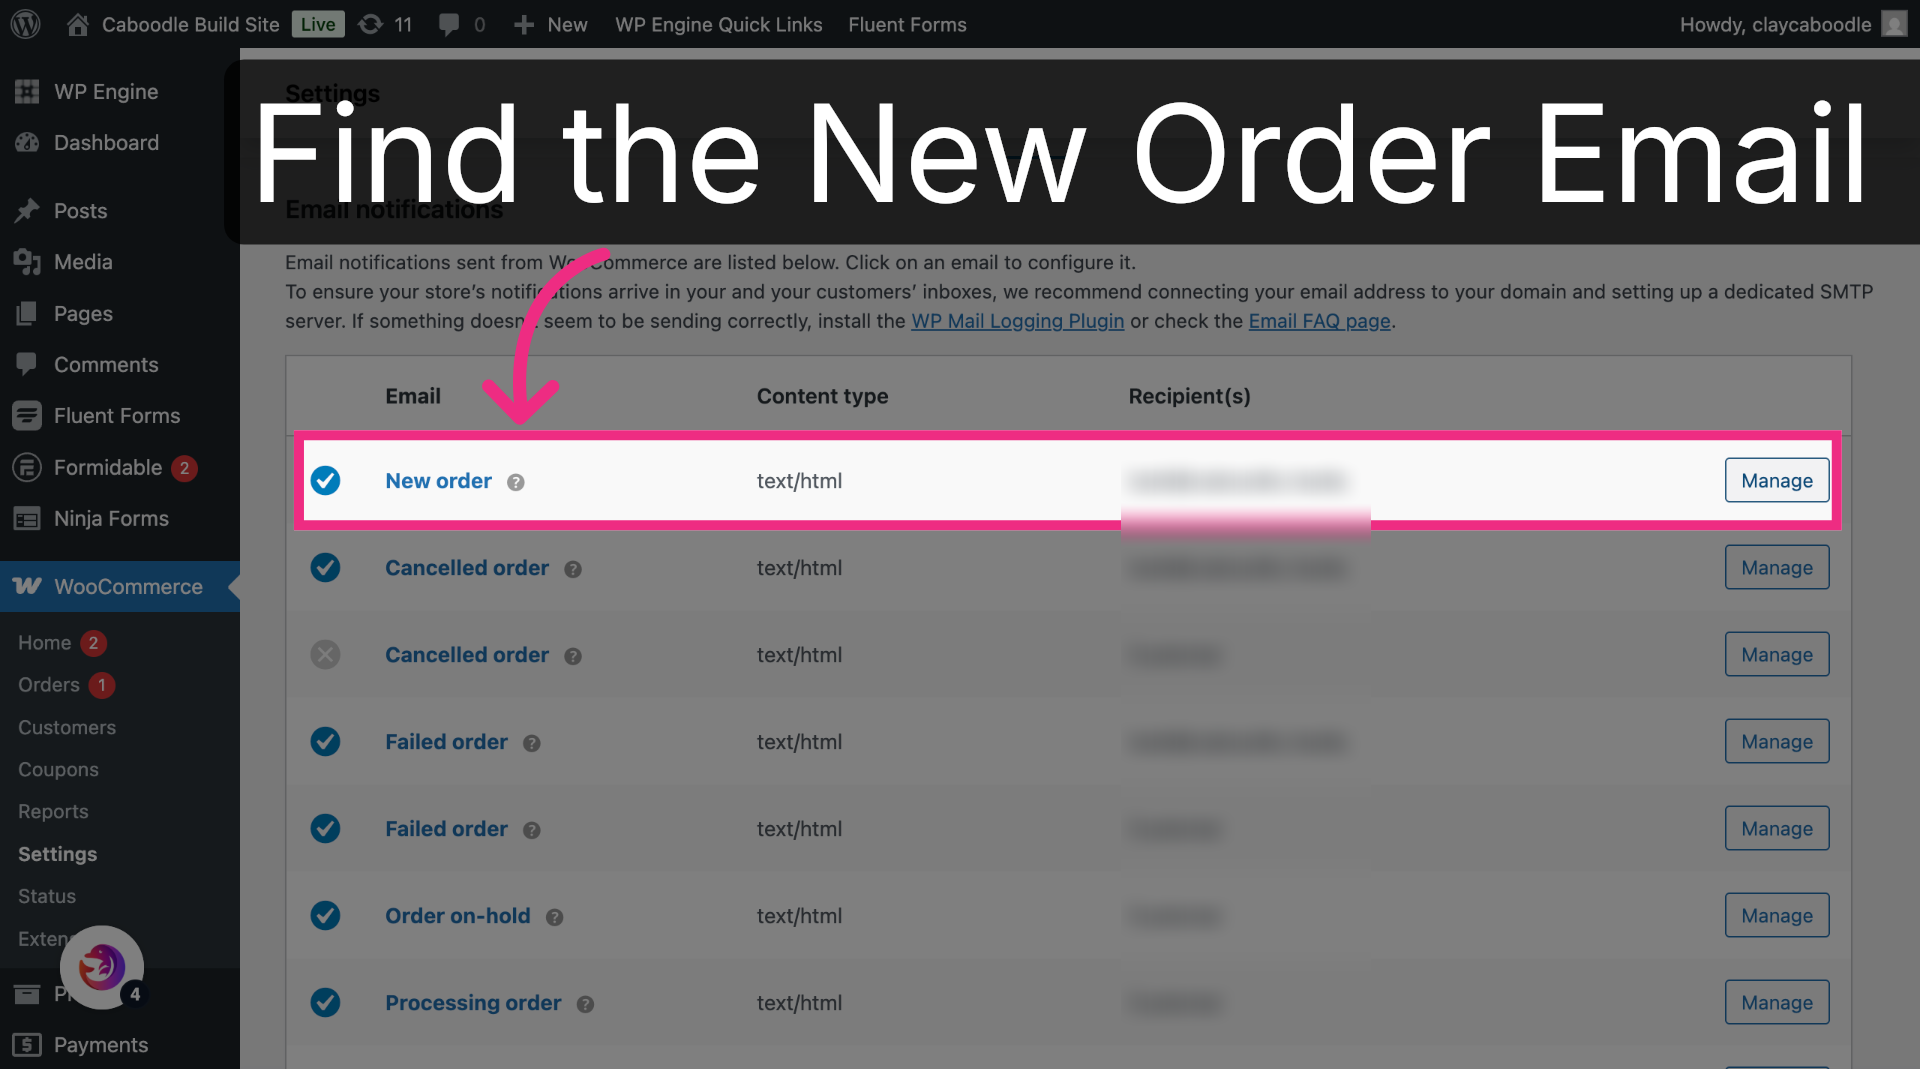
6. Find the New Order Email
Find the New order email. This is the notification sent every time a new order is placed.
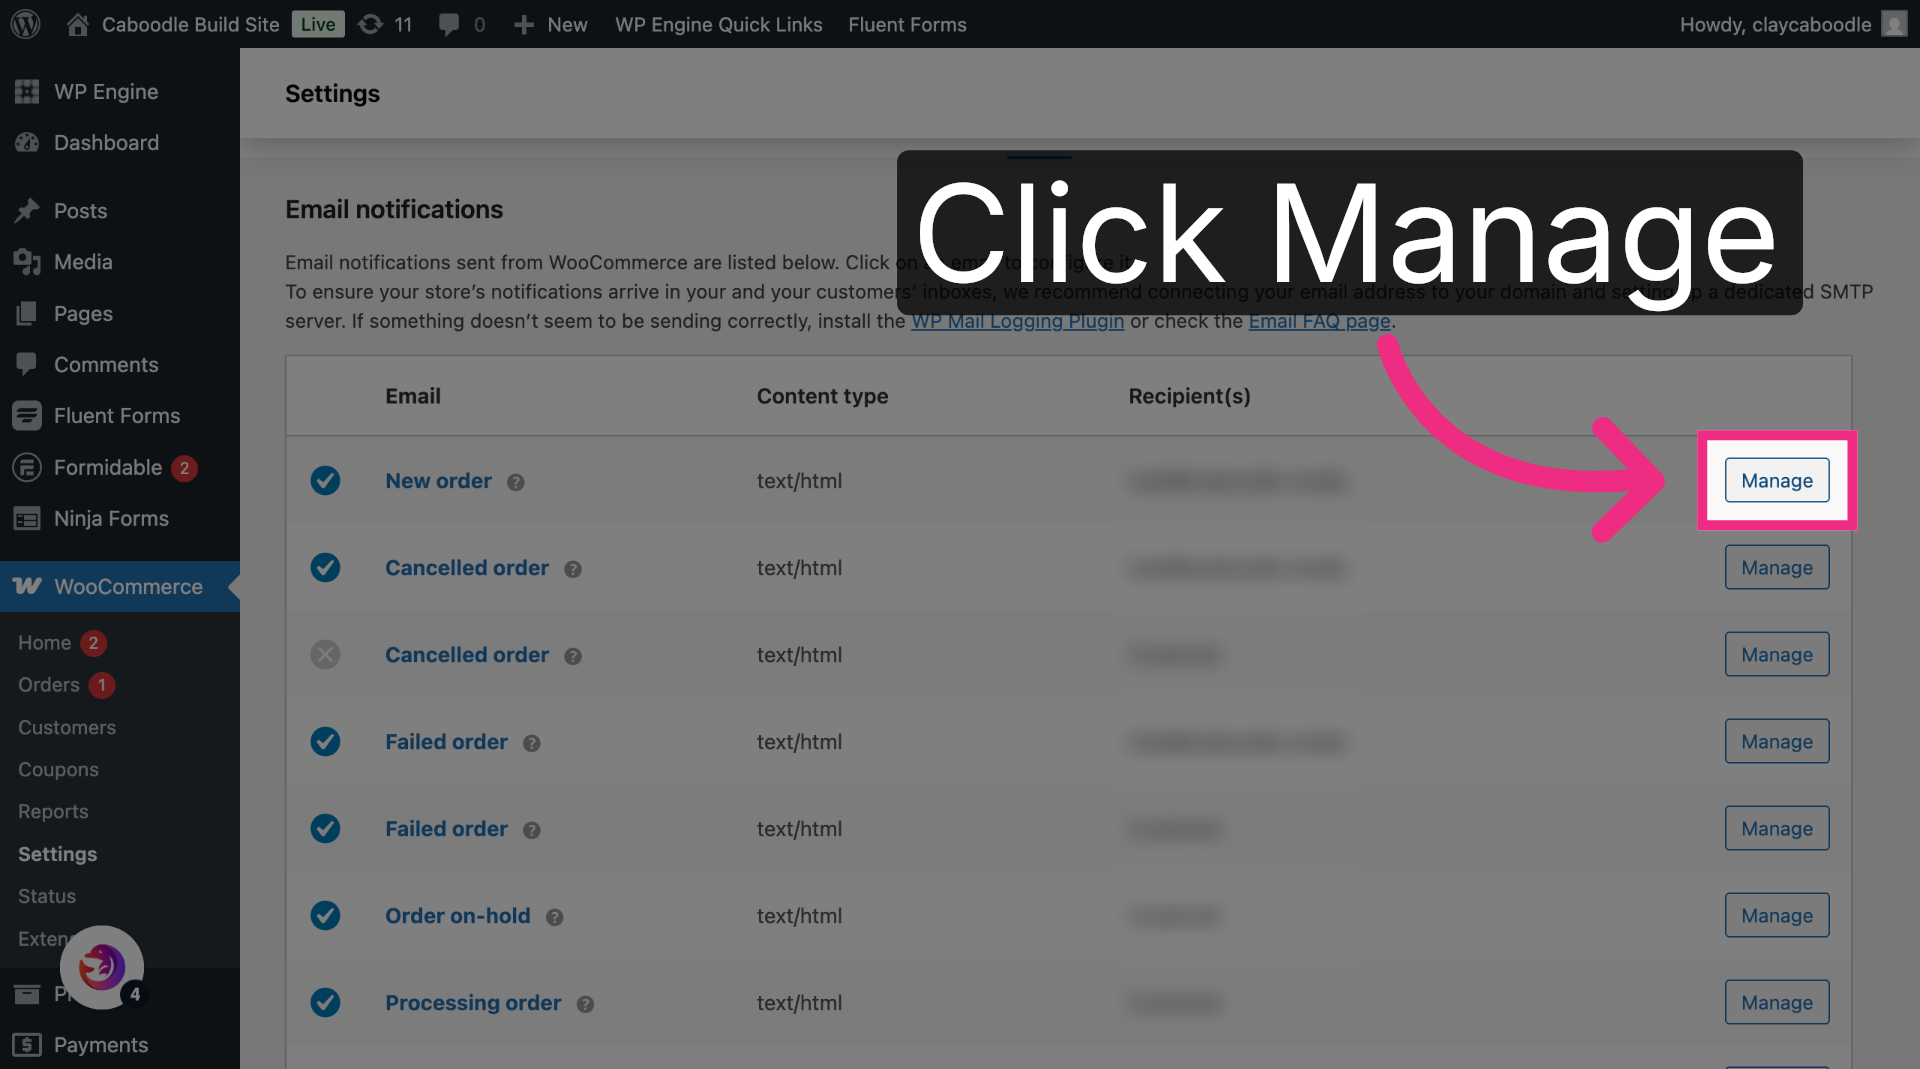
7. Open New Order Settings
Click Manage on the New order email.
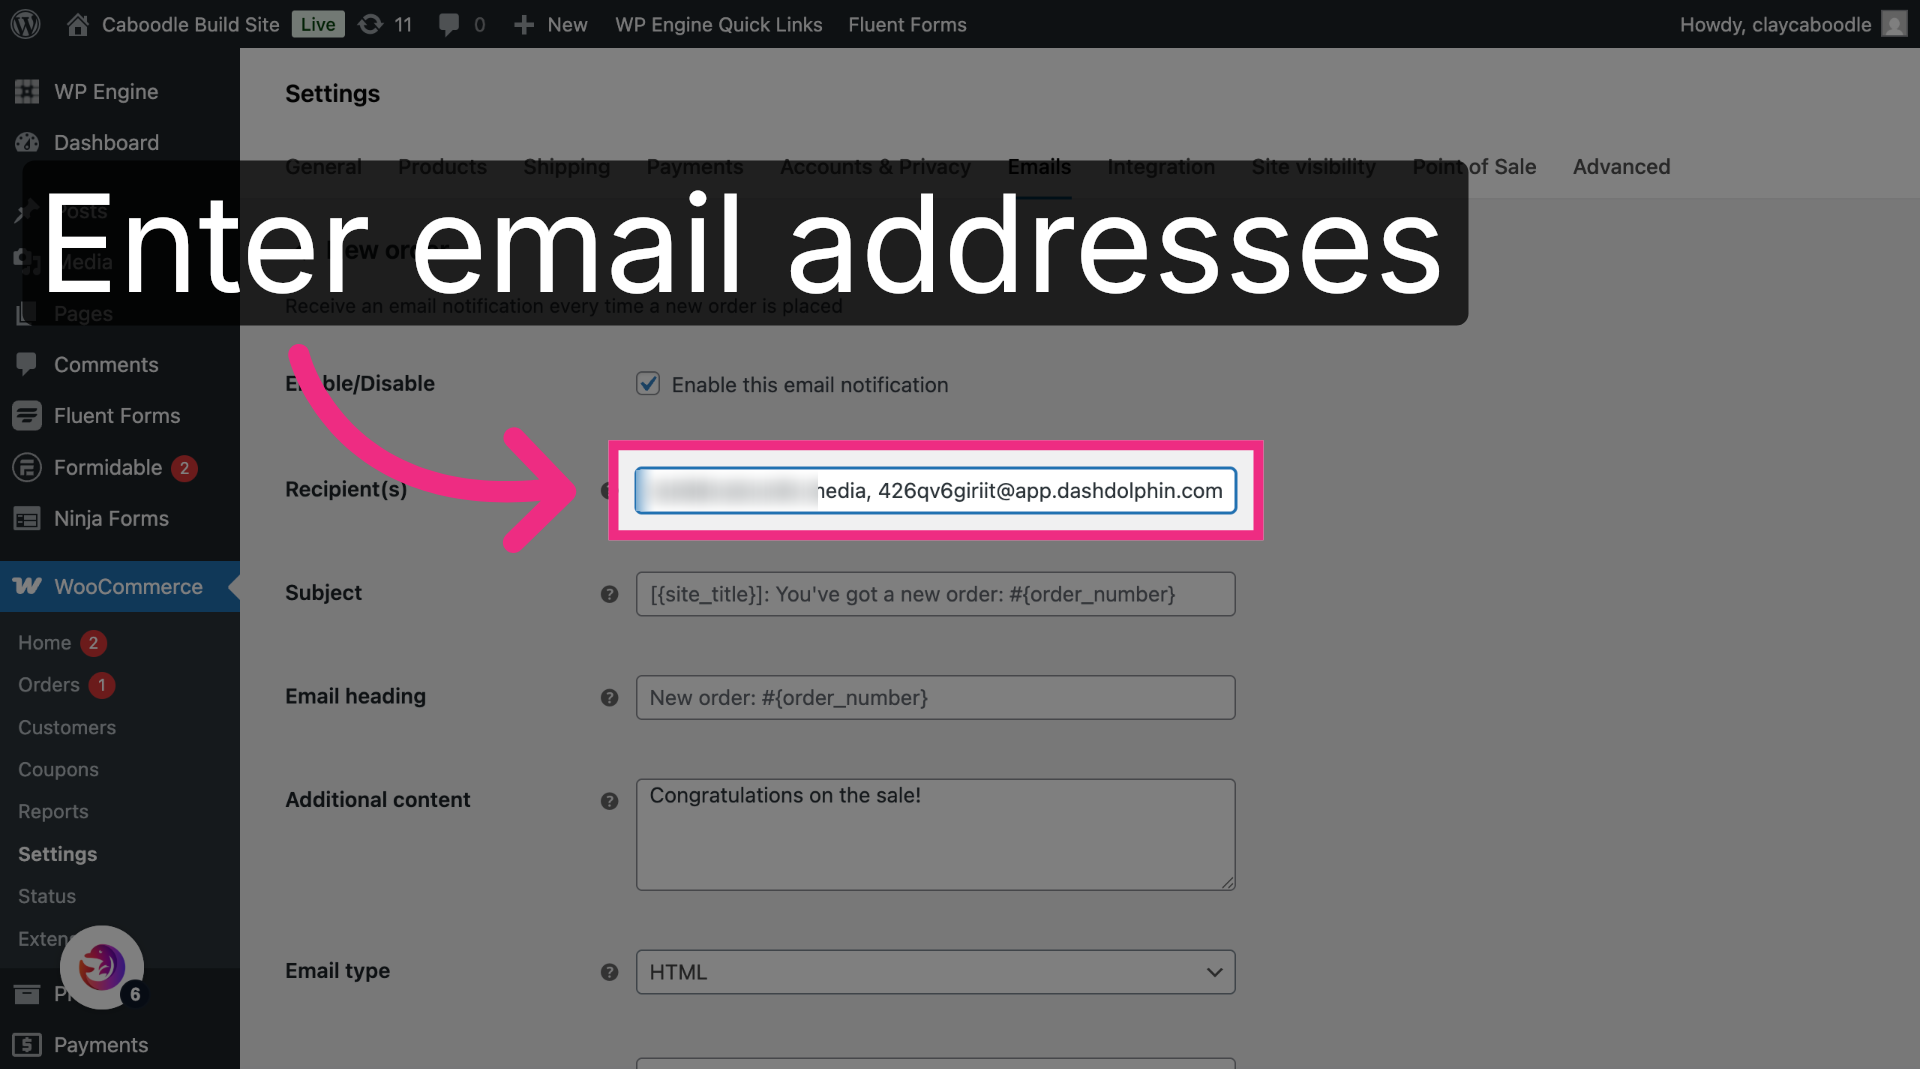
8. Open Recipient Settings
Click into the Recipient(s) field.
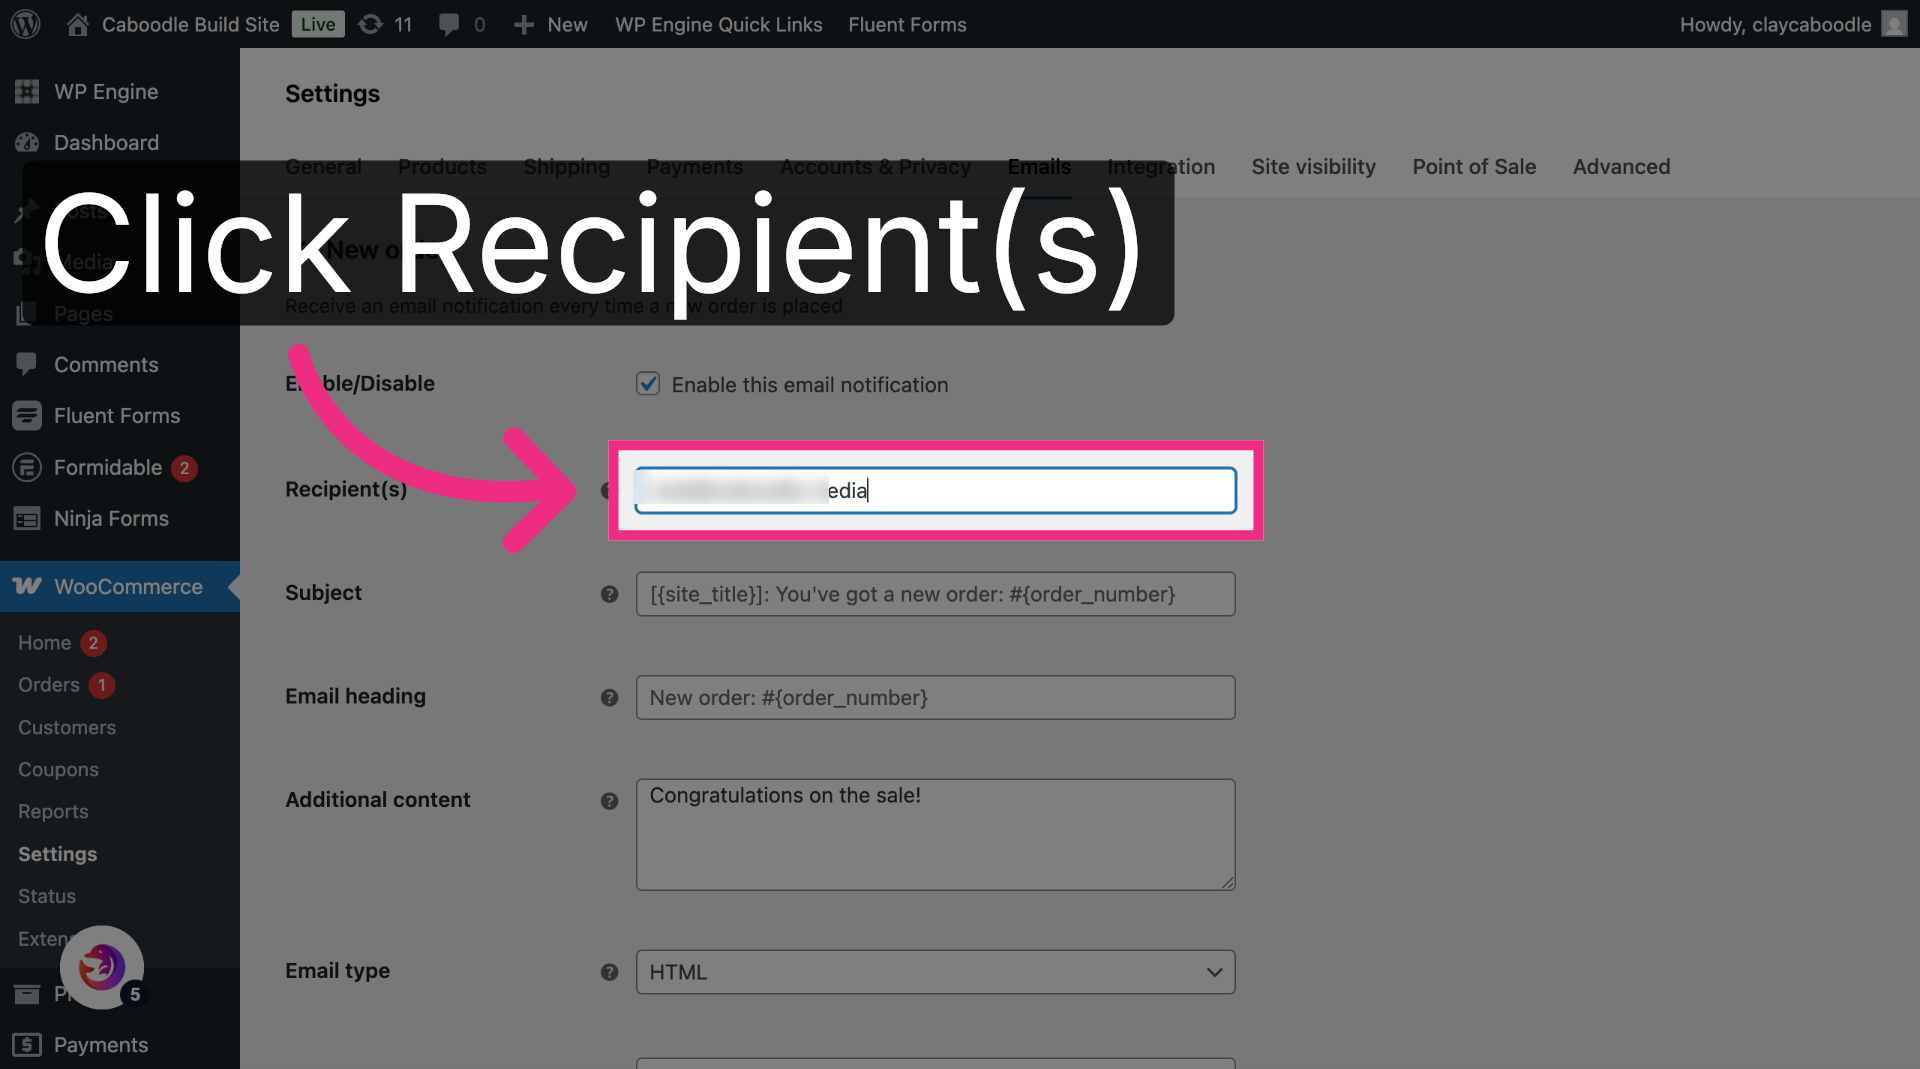
9. Enter Notification Email
Add the Dash Dolphin notification email address after any existing recipients, separated by a comma.
10. Save Changes
Save your changes.

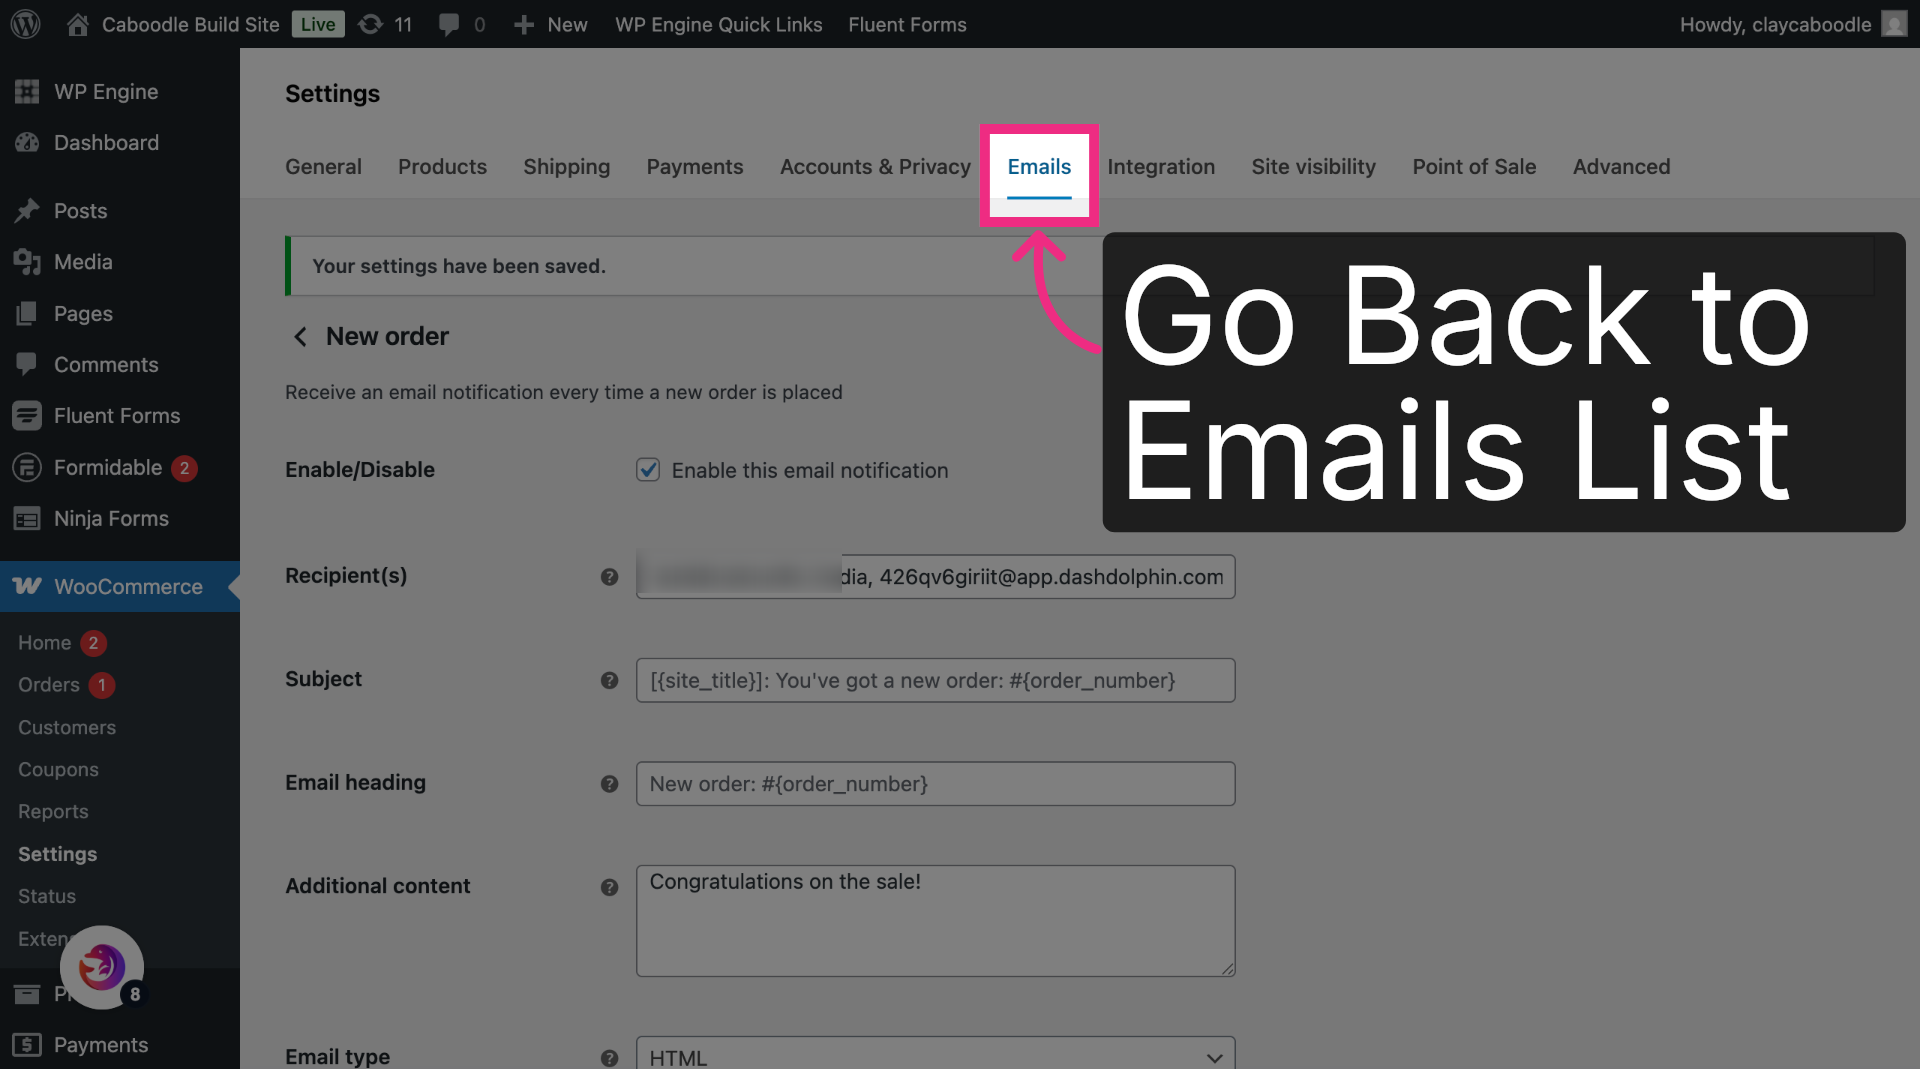
11. Return to Emails Tab
Return to the Emails list.
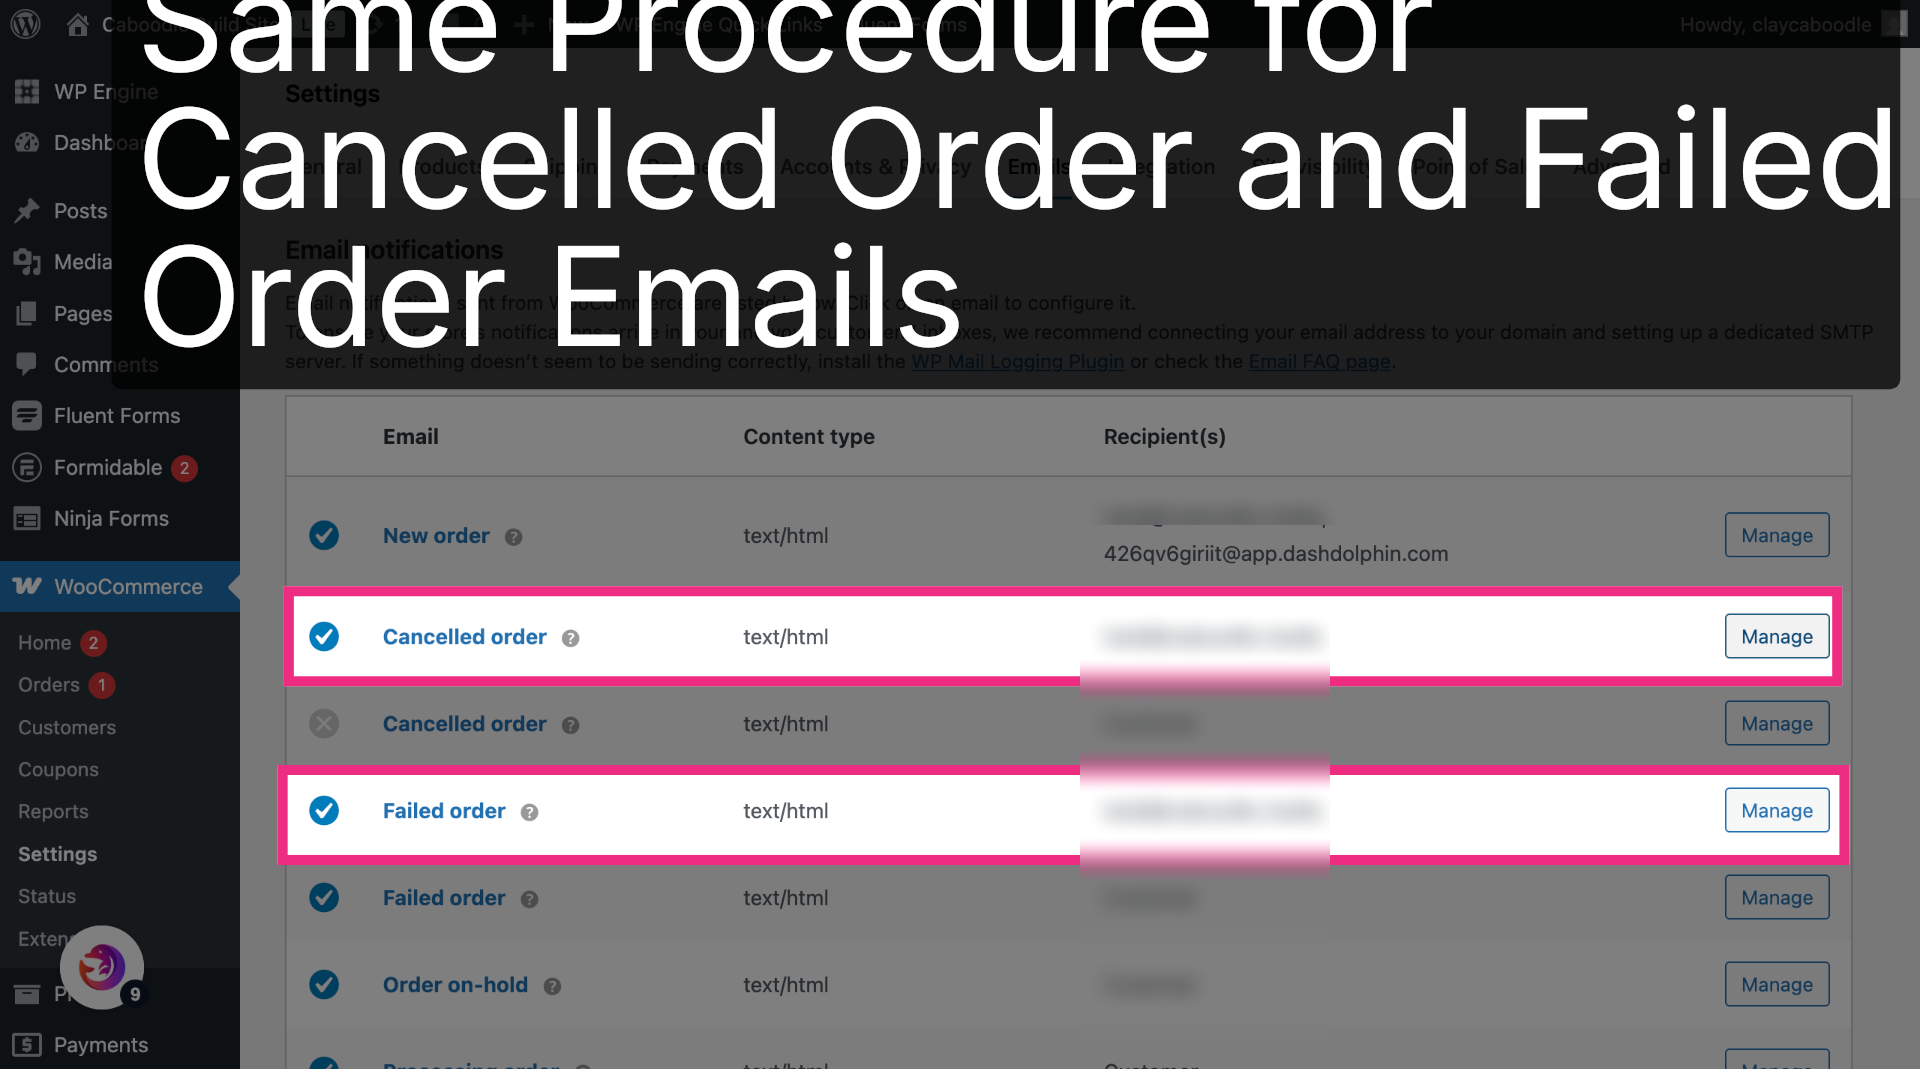
12. Repeat for Other Order Emails
The Cancelled order and Failed order emails have the same Recipient(s) field. Add the Dash Dolphin address to each the same way.
You have successfully configured your WooCommerce store to send order notification emails to Dash Dolphin, enabling instant SMS alerts. Test the setup by placing a test order and verifying the SMS notification delivery.